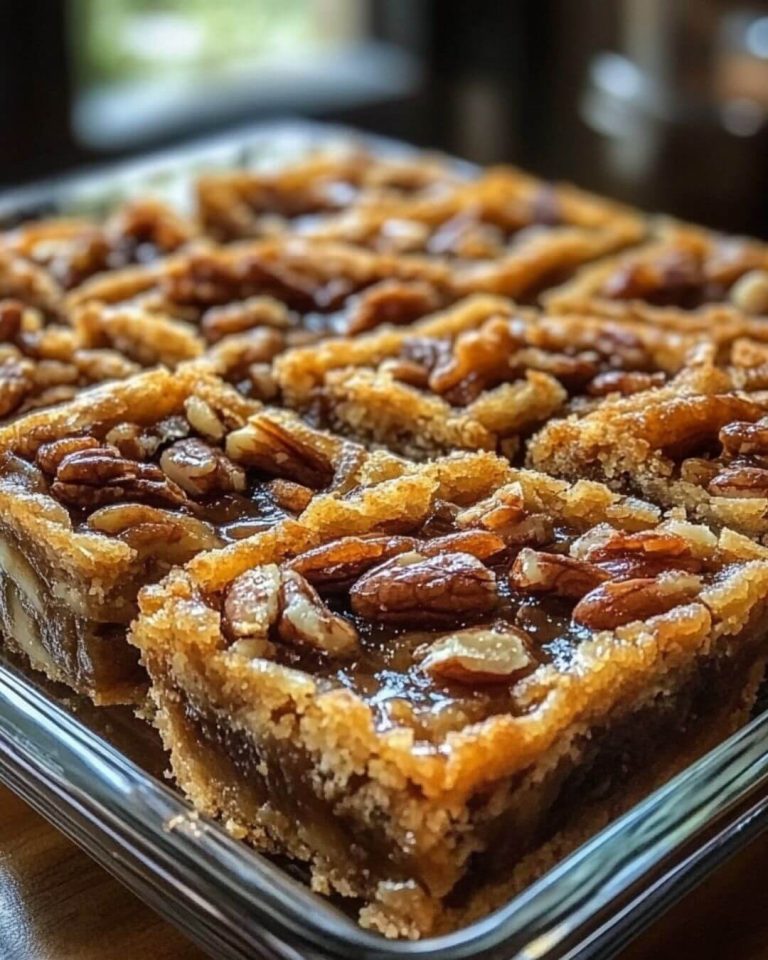
I’m thrilled to share this incredibly simple yet decadent recipe for Pecan Pie Bars that captures all the rich, buttery flavors of traditional pecan pie with half the effort. As someone who loves Southern desserts but values efficiency in the kitchen, I’ve perfected this shortcut version that’ll have everyone thinking you spent hours in the kitchen.
The Story Behind These Bars
The pecan pie has been a cherished Southern tradition since the late 1800s, but sometimes life calls for an easier approach. These bars transform the classic circular pie into convenient, portable squares without sacrificing any of that gooey, nutty goodness. They’re perfect for potlucks, holiday gatherings, or when you simply need a delicious dessert without the fuss.
Preparation Overview
- Prep Time: 15 minutes
- Baking Time: 30-35 minutes
- Cooling Time: 2 hours
- Total Time: 3 hours
- Servings: 24 bars
- Difficulty Level: Easy
Ingredients
For the Crust
- 1 package (16 oz/450g) refrigerated pie crusts (2 crusts)
- 2 tablespoons (30g) unsalted butter, melted (for greasing)
For the Filling
- 1 cup (240ml) light corn syrup
- 1 cup (200g) brown sugar, packed
- 1/2 cup (113g) unsalted butter, melted
- 3 large eggs, room temperature
- 1 teaspoon (5ml) vanilla extract
- 1 1/2 cups (170g) pecan halves
- 1/4 teaspoon salt
Detailed Instructions
Step 1: Preparation
- Position your oven rack in the middle and preheat to 350°F (175°C).
- Thoroughly grease a 9×13-inch (23x33cm) baking pan with melted butter.
- Allow the refrigerated pie crusts to come to room temperature for easier handling.
Step 2: Crust Assembly
- Carefully unroll both pie crusts onto a lightly floured surface.
- Gently press the crusts together at the edges to create one larger rectangle.
- Roll out to fit your 9×13-inch pan with a slight overhang.
- Transfer the crust to the greased pan, pressing firmly against the bottom and sides.
- Trim any excess dough and crimp the edges decoratively.
Step 3: Filling Creation
- In a large mixing bowl, combine corn syrup and brown sugar until well blended.
- Add melted butter and whisk until smooth.
- Beat in eggs one at a time, ensuring each is fully incorporated.
- Stir in vanilla extract and salt until the mixture is completely uniform.
- Fold in the pecan halves, making sure they’re evenly coated with the syrup mixture.
Step 4: Assembly and Baking
- Pour the pecan filling mixture evenly over the prepared crust.
- Gently tap the pan on the counter to remove any air bubbles.
- Arrange any floating pecans evenly across the surface.
- Bake for 30-35 minutes, or until the filling is set but still slightly jiggly in the center.
- The top should be golden brown, and a toothpick inserted near the center should come out clean.
Step 5: Cooling and Cutting
- Place the pan on a wire rack to cool completely (about 2 hours).
- Once cooled, refrigerate for an additional hour for cleaner cuts.
- Cut into 24 even bars using a sharp knife.
Pro Tips for Perfect Pecan Pie Bars
- Bring all refrigerated ingredients to room temperature before starting
- Line your pan with parchment paper for easier removal
- Toast the pecans beforehand for enhanced flavor
- Don’t overbake – the filling will continue to set as it cools
- Use a warm knife for cleaner cuts
Nutrition Information (per bar)
- Calories: 245
- Total Fat: 14g
- Saturated Fat: 5g
- Cholesterol: 35mg
- Sodium: 150mg
- Total Carbohydrates: 29g
- Dietary Fiber: 1g
- Sugar: 18g
- Protein: 2g
Storage Instructions
These bars can be stored in an airtight container at room temperature for up to 3 days, in the refrigerator for up to a week, or frozen for up to 3 months. If freezing, separate layers with parchment paper to prevent sticking.
Make-Ahead Tips
You can prepare the crust up to 24 hours in advance and store it covered in the refrigerator. The filling can also be mixed (without pecans) and refrigerated separately. Bring both to room temperature before assembling and baking.
These Lazy Girl Pecan Pie Bars are the perfect solution when you’re craving the rich, caramel-like flavor of pecan pie but don’t want to spend hours in the kitchen. The simplified approach delivers all the traditional taste with minimal effort, making it an ideal recipe for busy bakers who refuse to compromise on flavor.
