The Vibrant Story Behind Pickled Peppers
Pickling is an age-old culinary tradition that transforms ordinary vegetables into extraordinary flavor bombs. These Pickled Peppers with Garlic are more than just a condiment – they’re a celebration of preservation, taste, and culinary creativity that will elevate everything from sandwiches to charcuterie boards.
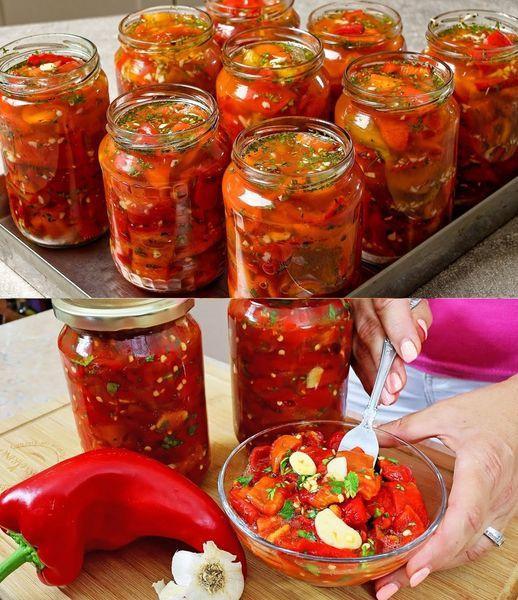
Imagine opening a jar of vibrant, tangy peppers that burst with a perfect balance of sweetness, acidity, and spice. These pickled peppers are not just a side dish; they’re a versatile ingredient that can breathe new life into countless meals, adding a zesty punch of flavor that will have your taste buds dancing.
Ingredients: Your Comprehensive Pickling Inventory
Prepare to gather these ingredients, with measurements in both US and European metrics:
- Bell Peppers: 6-8 (approximately 600-800 grams / 1.3-1.8 lbs)
- White Vinegar: 500 ml (about 16.9 fl oz / 2.1 cups)
- Water: 300 ml (about 10.1 fl oz / 1.26 cups)
- Salt: 1 tablespoon (about 15-20 grams)
- Sugar: 2 tablespoons or 200 grams (about 7 oz)
Spice Blend Options:
- Bay Leaves: 2-3
- Black Peppercorns: 1 tablespoon
- Mustard Seeds: 1 tablespoon
- Whole Cloves: 4-5
- Fresh Dill: A small bunch
- Chili Peppers: 1-2 (optional)
- Garlic Cloves: 4-5 (or 1 small onion)
- Sterilized Jars: 2-3 medium-sized
Step-by-Step Pickling Instructions
Preparing the Peppers
- Cleaning and Preparation Begin by thoroughly washing the bell peppers under cool running water. Use a clean vegetable brush to remove any dirt or debris. Pat the peppers completely dry with clean kitchen towels. This step is crucial to prevent excess moisture in your pickles.
- Cutting Technique Carefully cut the peppers into your preferred style – small cubes, thin strips, or rings. Consistency is key for even pickling and an attractive final product. Remove seeds and membranes if you prefer a milder flavor.
Creating the Pickling Brine
- Brine Preparation In a medium-sized pot, combine the vinegar, water, salt, and sugar. Bring the mixture to a rolling boil, stirring to ensure the salt and sugar completely dissolve. This creates the base of your pickling liquid that will infuse the peppers with flavor.
- Spice Infusion Once the brine is boiling, add your chosen spices. The beauty of this recipe is its flexibility – you can customize the spice blend to your taste. Consider a combination of bay leaves, peppercorns, mustard seeds, and whole cloves for a classic flavor profile.
Jarring and Preserving
- Sterilization Sterilize your jars by washing them in hot, soapy water, or running them through a dishwasher’s hottest cycle. Alternatively, boil the jars for 10 minutes. Ensure they are completely dry before use.
- Filling the Jars Carefully pack the cut peppers into the sterilized jars. If using garlic or onions, distribute them evenly among the peppers. Pour the hot vinegar mixture over the peppers, ensuring they are completely covered. Leave a small amount of headspace at the top of the jar.
- Sealing and Cooling Seal the jars tightly with sterilized lids. Allow them to cool to room temperature. As they cool, you may hear the lids pop – this is a good sign that they are sealing properly.
Pickling Insights and Preservation Details
Yield: 2-3 medium jars Preparation Time: 30 minutes Cooking Time: 10-15 minutes Pickling Time: Minimum 2 weeks Total Time: 2-3 weeks for optimal flavor
Nutritional Estimate (per 1/4 cup serving):
- Calories: 15-20
- Carbohydrates: 4-5g
- Sodium: 200-250mg
- Vitamin C: 20-30% of daily value
Pro Pickling Tips and Culinary Tricks
- Pepper Selection: Choose fresh, firm bell peppers at peak ripeness
- Vinegar Variety: Experiment with apple cider or white wine vinegar
- Spice Creativity: Customize your spice blend
- Temperature Control: Use a thermometer for precise brining
- Storage Wisdom: Keep pickled peppers in a cool, dark place
Recipe Variations and Pickling Adaptations
- Heat Level: Add more or fewer chili peppers
- Flavor Twist: Incorporate different herbs like thyme or rosemary
- Sweet Variation: Increase sugar for a sweeter pickle
- Vinegar Alternatives: Try rice vinegar for a different profile
- Vegetable Swap: Pickle other vegetables like cauliflower or carrots
Frequently Asked Questions
Q1: How long do pickled peppers last? Properly sealed and refrigerated, they’ll keep for 2-3 months.
Q2: Can I can these peppers for long-term storage? For long-term storage, use proper canning techniques with sterilized jars.
Q3: Are homemade pickled peppers safe? Follow sterilization and pickling instructions carefully to ensure safety.
Q4: Can I reduce the sugar? Yes, but it may affect the overall flavor and preservation.
Q5: What are the best ways to use pickled peppers? Great in sandwiches, salads, pizzas, or as a condiment.
Storage and Preservation Strategies
- Refrigeration: Store opened jars in the refrigerator
- Flavor Development: Wait 2 weeks before eating for best taste
- Shelf Life: 2-3 months when properly stored
- Serving Suggestion: Bring to room temperature before serving
- Pairing Ideas: Excellent with charcuterie, sandwiches, and grilled meats
Dive into the world of pickling and transform ordinary peppers into an extraordinary culinary experience!