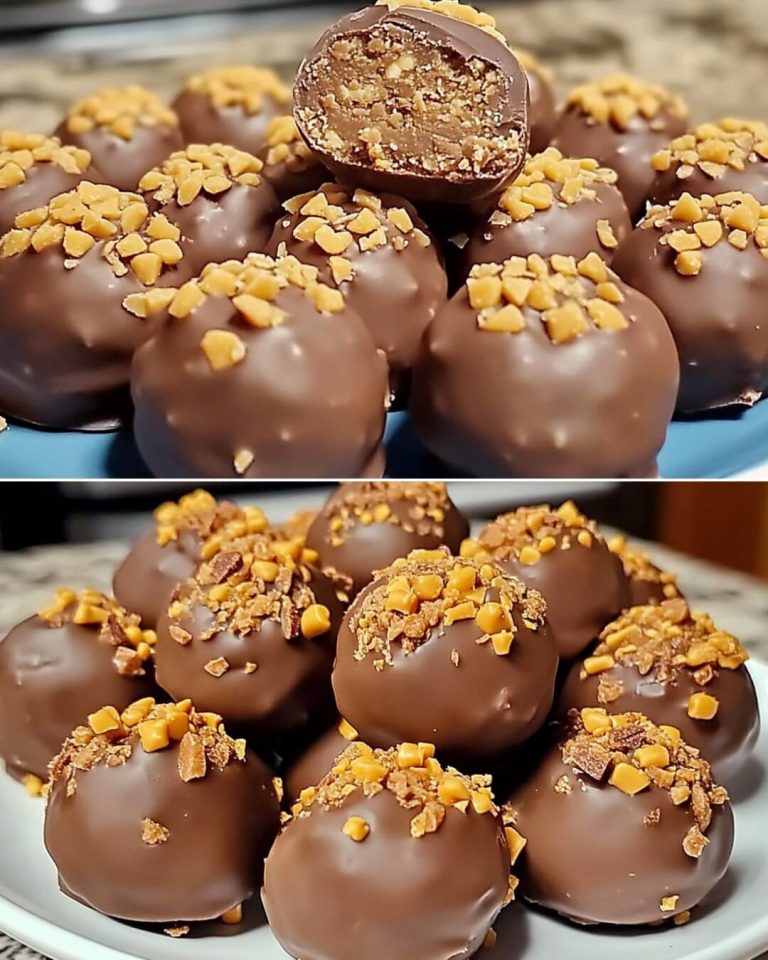
The perfect blend of creamy peanut butter and crispy Butterfinger candy bars, these homemade chocolate-covered treats capture the essence of the beloved candy bar in an elegant, bite-sized form. I’ve perfected this recipe through countless iterations, discovering that the key lies in achieving the perfect balance between the smooth peanut butter base and the signature Butterfinger crunch.
Origins and Inspiration
This recipe pays homage to the iconic Butterfinger bar, first introduced in 1923 by Otto Schnering of the Curtiss Candy Company. The distinctive crispy peanut butter center of the original candy bar inspired this simplified, yet equally delightful homemade version that brings together classic flavors in an approachable format.
Preparation Details
Total Time: 45 minutes
- Preparation: 15 minutes
- Chilling: 20 minutes
- Coating: 10 minutes
Yield: 24 balls
Ingredients
US Measurements:
- 1 cup creamy peanut butter
- 1 cup powdered sugar
- 4 regular-sized Butterfinger bars (or 1 cup crushed pieces)
- 1½ cups chocolate chips (milk or semi-sweet)
- 1 tablespoon coconut oil (optional)
European Measurements:
- 240g creamy peanut butter
- 120g powdered sugar
- 180g Butterfinger bars
- 260g chocolate chips
- 15ml coconut oil (optional)
Essential Equipment
- Medium mixing bowl
- Baking sheet
- Parchment paper
- Microwave-safe bowl
- Cookie scoop or measuring spoon
- Fork or chocolate dipping tool
Detailed Instructions
1. Preparing the Filling
I begin by creating the perfect base mixture. In my medium mixing bowl, I combine the creamy peanut butter and powdered sugar, stirring until they’re well integrated. The texture should be smooth but firm. Next, I incorporate the crushed Butterfinger pieces, mixing until they’re evenly distributed throughout the peanut butter mixture.
2. Creating the Perfect Texture
The consistency of the mixture is crucial for achieving professional results. I check the texture by pinching a small amount between my fingers – it should hold its shape without being too sticky. If needed, I gradually add more powdered sugar, one tablespoon at a time, until reaching the ideal consistency.
3. Forming the Balls
Using a cookie scoop or measuring spoon, I portion out approximately one tablespoon of mixture for each ball. I roll each portion between my palms to create uniform, smooth spheres. I place these on my parchment-lined baking sheet, ensuring they don’t touch each other.
4. Chilling Phase
This step is crucial for achieving a perfect chocolate coating. I place the entire baking sheet in the freezer for 15-20 minutes, allowing the balls to firm up sufficiently. This makes them much easier to coat with chocolate and ensures a smoother finish.
5. Chocolate Coating Preparation
While the balls are chilling, I prepare the chocolate coating. In my microwave-safe bowl, I combine the chocolate chips and coconut oil. I heat this mixture in 30-second intervals, stirring thoroughly between each interval, until achieving a smooth, glossy consistency.
6. Coating Process
Working efficiently with the chilled balls, I dip each one into the melted chocolate using my dipping fork. I gently tap off excess chocolate and carefully place each coated ball back onto the parchment paper. For professional presentation, I can sprinkle additional crushed Butterfinger pieces on top before the chocolate sets.
Storage and Serving
These Butterfinger balls maintain their quality when stored properly:
- Room temperature: 3-4 days in an airtight container
- Refrigerated: Up to 2 weeks
- Frozen: Up to 3 months
Nutritional Information
(Per ball)
- Calories: 165
- Total Fat: 10g
- Saturated Fat: 4g
- Cholesterol: 2mg
- Sodium: 95mg
- Total Carbohydrates: 18g
- Sugar: 15g
- Protein: 3g
- Fiber: 1g
Professional Tips for Excellence
Through extensive testing, I’ve discovered several key factors that elevate these treats from good to exceptional:
- Temperature Control: Maintaining the right temperature throughout the process is crucial. The filling should be thoroughly chilled before dipping, and the chocolate should be warm enough to coat smoothly but not so hot that it melts the filling.
- Texture Balance: The perfect ratio of crushed Butterfinger to peanut butter mixture ensures each bite delivers the signature crunch while maintaining structural integrity.
- Coating Technique: Using a fork or specialized dipping tool, rather than toothpicks or spoons, creates a more professional finish and prevents unsightly holes in the coating.
This recipe transforms the beloved flavors of a classic candy bar into an elevated homemade treat, perfect for gift-giving, special occasions, or an indulgent dessert presentation.