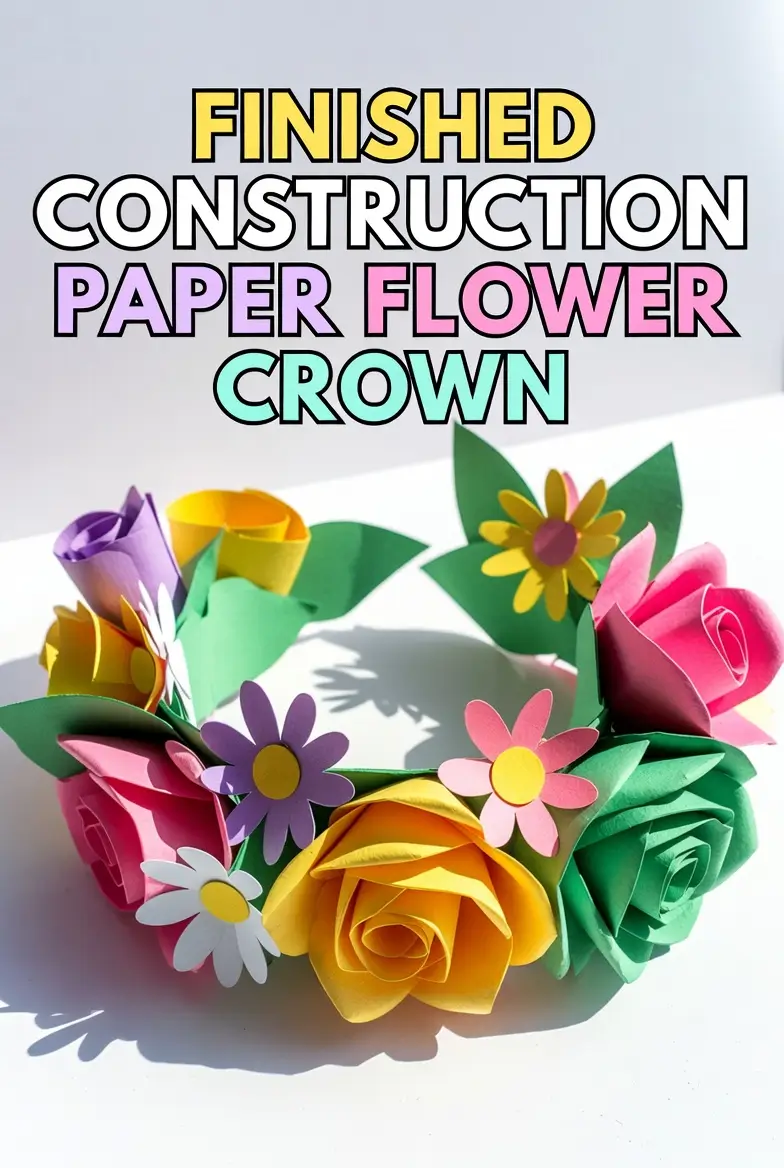
Construction paper flower crowns are the perfect way to add a pop of color and handmade charm to any occasion. Whether you’re planning a birthday party, a spring photoshoot, a fairy-themed event, or just want a fun afternoon craft with the kids, this easy construction paper flower crown is ideal for beginners. Made entirely from affordable construction paper, this DIY project costs less than $5 and takes about 45–60 minutes to complete.
You don’t need any fancy tools or previous crafting experience. The techniques are simple enough for children ages 8 and up with adult supervision, yet the results look professional and Instagram-worthy. Best of all, you can customize the colors and flower types to match any theme – think bright rainbow for pride events, soft pastels for baby showers, or bold reds and pinks for Valentine’s Day.
In this step-by-step guide, we’ll show you exactly how to make a construction paper flower crown using basic folding, cutting, and gluing techniques. You’ll learn to create realistic-looking roses, daisies, and leaves that sit comfortably on a sturdy paper band. Once you master this construction paper flower crown, you’ll be able to make matching crowns for the whole family or even a beautiful bouquet to pair with it.
Ready to get crafting? Gather your supplies and let’s create a gorgeous, wearable work of art!
Supplies Needed
- 10–12 sheets of construction paper in assorted colors (greens for leaves, pinks/reds/yellows/oranges for flowers)
- 2–3 sheets of green construction paper for the crown base and leaves
- Scissors (sharp ones for clean cuts)
- White school glue or glue stick
- Pencil for tracing templates (optional)
- Ruler or straight edge
- Clear tape (for extra reinforcement on the band)
- Hole punch (optional, for securing the band)
- Ribbon or extra paper strips for ties (optional)
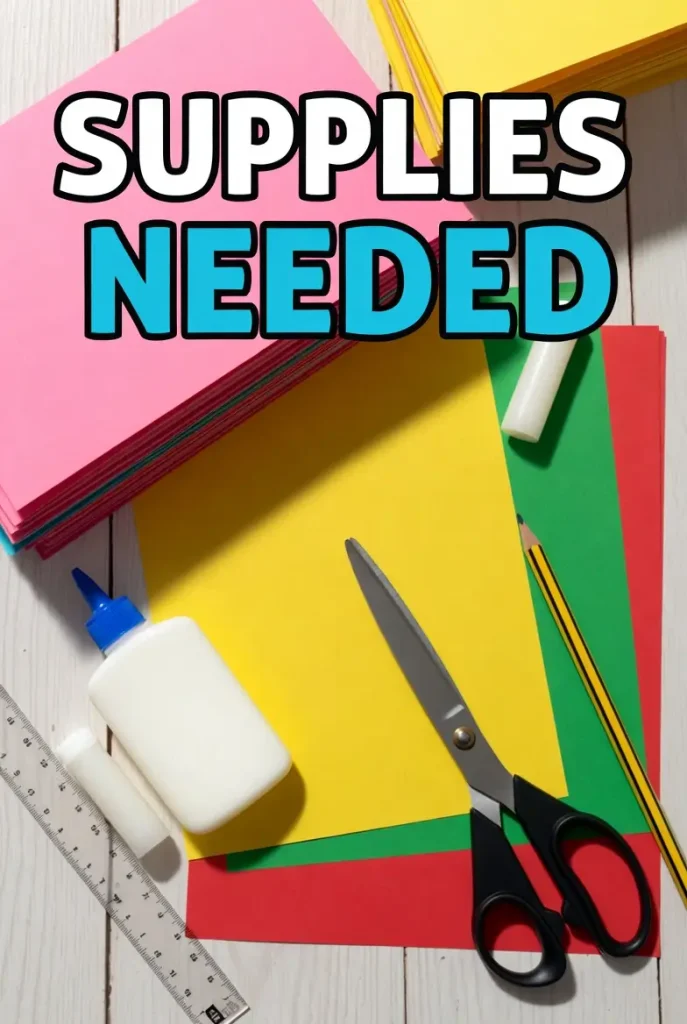
That’s it! No wire, no floral tape, no expensive supplies required.
Step-by-Step Instructions
Step 1: Create the Crown Base Band
Start by making a sturdy base for your construction paper flower crown. Cut a long strip of green construction paper about 2 inches wide and 24–26 inches long (adjust based on head size). If you need a longer band, glue two strips together with a 1-inch overlap and let it dry for 2 minutes.
Wrap the strip gently around the head to check the fit – it should be snug but comfortable, with about 1 inch of overlap for gluing. Mark the overlap point with a pencil. Apply a thin line of glue along the overlap and press firmly. For extra strength, add a piece of clear tape on the inside of the band.
While the base dries, this is a great time to decide your color scheme. Choose 4–6 flower colors that complement the green band.

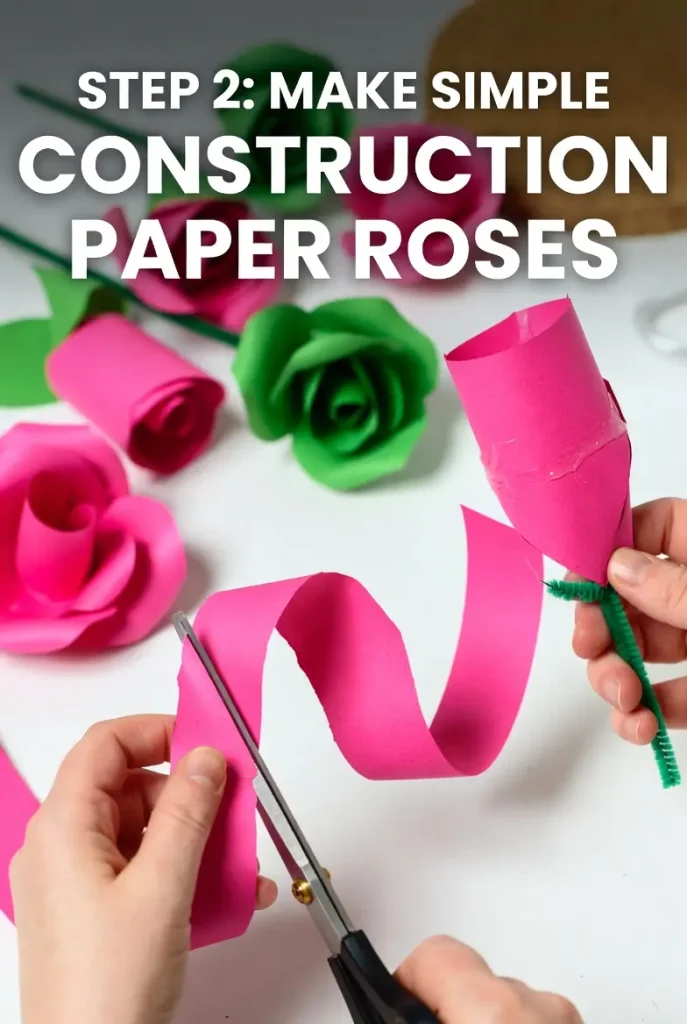
Step 2: Make Simple Construction Paper Roses (Make 6–8 Roses)
Roses give your construction paper flower crown that full, romantic look. Take a sheet of pink or red construction paper and cut a spiral shape about 6 inches in diameter. Start from the outside and spiral inward, making the outer edge wavy for petal effect.
Gently roll the spiral from the outside toward the center, letting the paper naturally form layers. Add a small dot of glue every 2–3 turns to secure. Once rolled, pinch the bottom to create a flat base. Cut a small green circle (about 1.5 inches) and glue it to the bottom as a calyx.
Repeat in different shades for variety. These roses will be the focal flowers on your crown.
Step 3: Create Cheerful Construction Paper Daisies (Make 8–10 Daisies)
Daisies add a fresh, playful touch to any construction paper flower crown. Cut a 4-inch circle from yellow or white paper. Then cut many thin petals around the edge, leaving a small uncut center.
Fold each petal upward slightly for dimension. For the center, cut a smaller yellow or orange circle, fringe the edges with scissors, and glue it in the middle. For a layered look, make two circles and offset the petals.
These daisies are quick to make and give your crown a meadow-fresh feel.
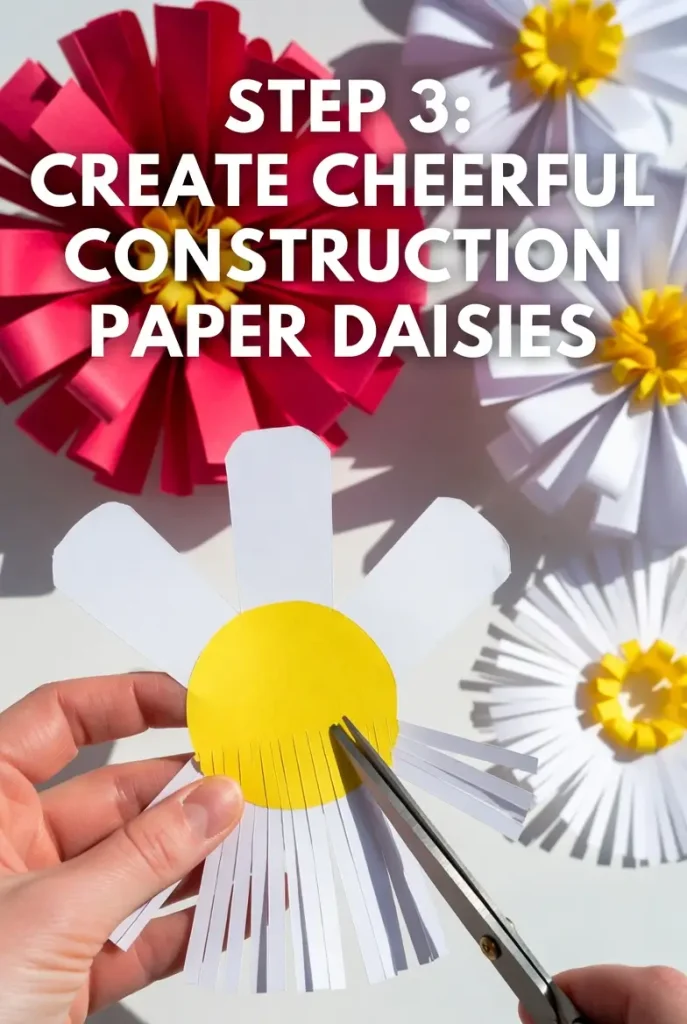
Step 4: Cut and Shape Realistic Construction Paper Leaves (Make 15–20 Leaves)
Leaves provide the greenery that makes your construction paper flower crown look natural and balanced. Fold a sheet of green construction paper in half and draw a simple leaf shape about 4–5 inches long with pointed tip and jagged or smooth edges.
Cut through both layers so you get two leaves at once. Add veins by lightly scoring lines with a ruler and pencil (don’t cut through). Gently curl the edges with your fingers or the edge of a pencil for a lifelike shape.
Make leaves in two shades of green for added depth.
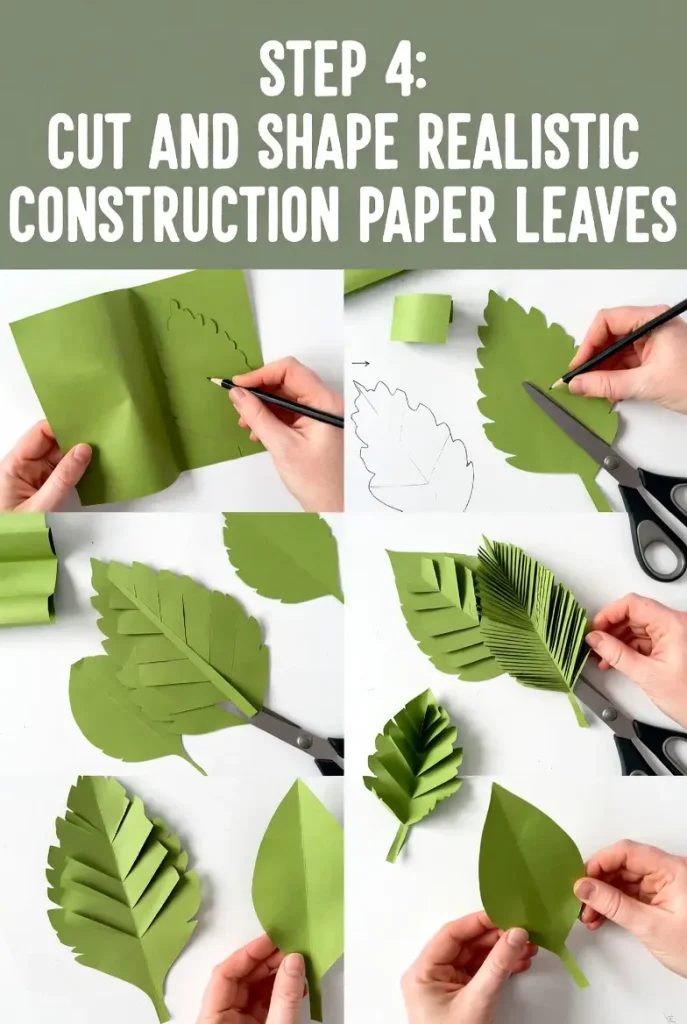
Step 5: Assemble the Flowers and Leaves onto the Crown Base
Now the fun part – turning your pieces into a stunning construction paper flower crown! Start at the front center of the band. Apply a generous dot of glue to the back of a large rose and press it firmly onto the band. Hold for 20 seconds.
Alternate roses and daisies, tucking leaves between them to fill gaps and create a natural flow. Angle some flowers slightly upward or to the side for dimension. Work your way around both sides, leaving the back 4–5 inches of the band mostly plain or with just a few small leaves so it sits comfortably.
Add smaller flowers and extra leaves to cover any visible band. Let everything dry for 10–15 minutes.
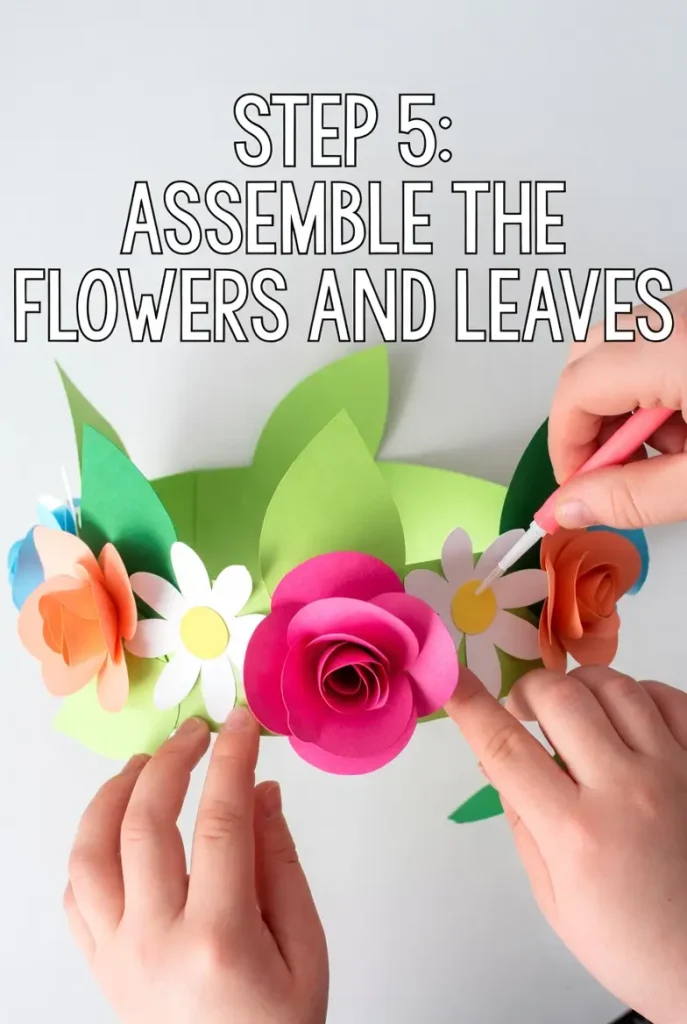
Step 6: Add Finishing Touches and Secure the Crown
Check your construction paper flower crown from all angles. Add any extra small flowers or leaves where needed for fullness. For extra security, add a tiny dab of glue under any lifting petals.
If you want ties, punch holes at each end of the band and thread ribbon through, or make small paper loops. Test the crown on a head (or mannequin) to ensure it sits nicely without slipping.
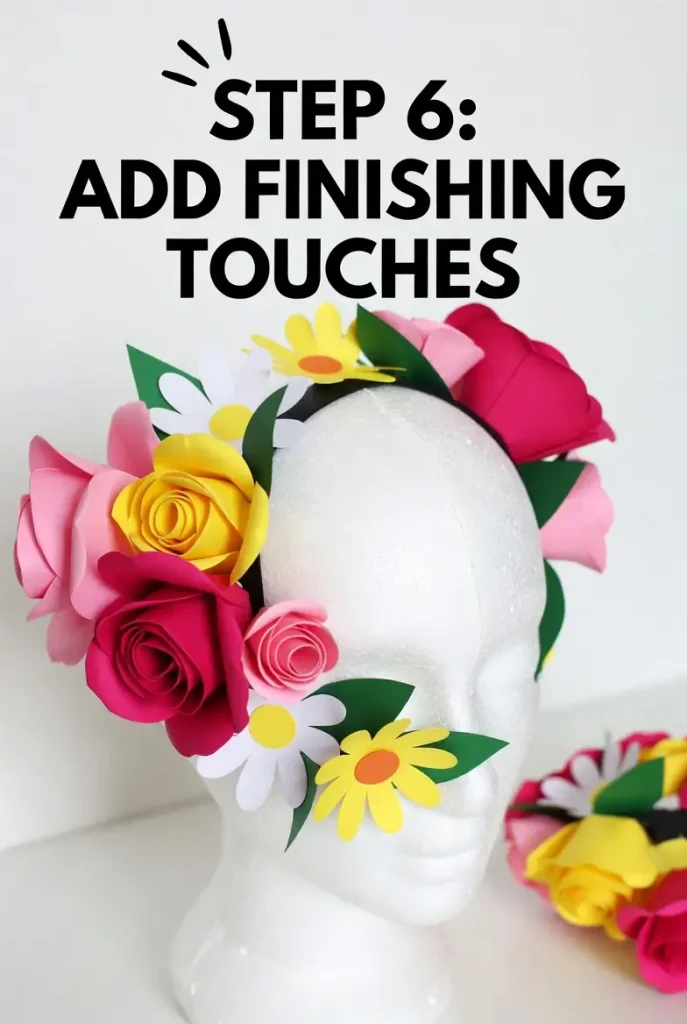
Your beautiful, lightweight construction paper flower crown is now ready to wear!
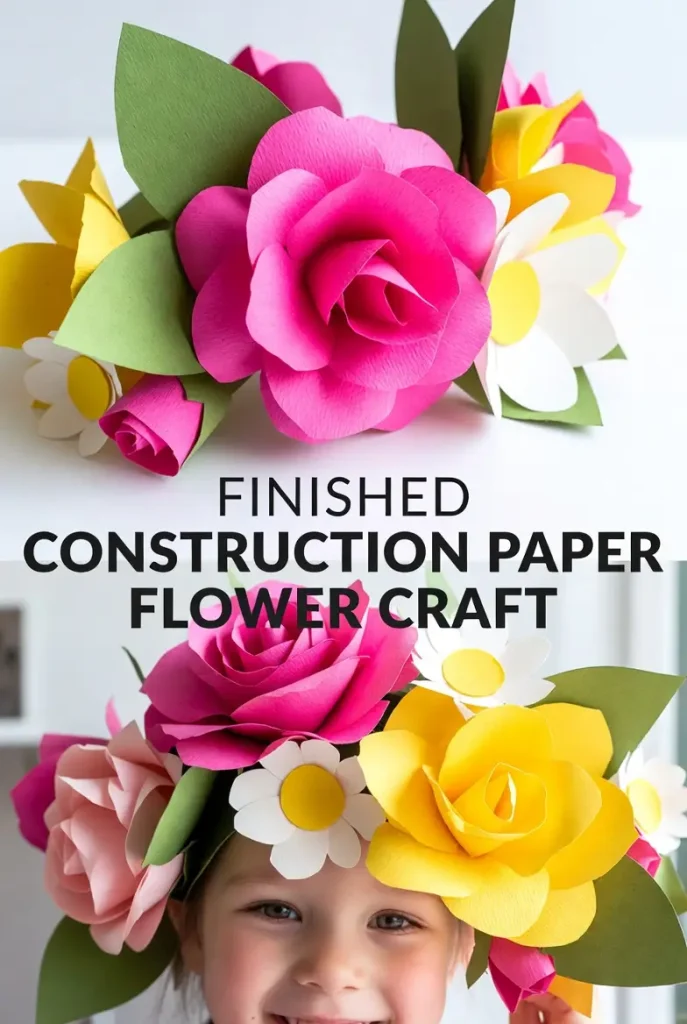
Finished Construction Paper Flower Crown
Tips and Variations
- Use double-sided tape instead of glue for faster drying and less mess.
- Make mini versions for dolls or pets using smaller paper strips.
- Create a themed crown: all white and silver for winter weddings, or tropical colors with added paper butterflies.
- For longer wear, reinforce the band with a second layer of cardstock underneath.
- Store your construction paper flower crown flat in a box to keep the flowers from crushing.
- Mix in other paper flowers like tulips or sunflowers for a unique look – the same techniques apply!
- Add glitter or metallic markers to petal edges for extra sparkle on party crowns.
Conclusion
Making your own construction paper flower crown is not only budget-friendly and easy, but it also brings so much joy and creativity into your day. This beginner-friendly project lets you craft something truly special without spending a fortune or needing advanced skills. Whether you wear it to a festival, use it as a photo prop, or gift it to a friend, your handmade crown will stand out with its vibrant colors and personal touch.
The best part? Once you know how to make a construction paper flower crown, you can recreate it in endless variations for every season and celebration. Kids love helping with the cutting and gluing, making it a wonderful family activity too.
So grab some construction paper and start crafting today – your perfect paper flower crown awaits! Share your creations with us in the comments or tag your photos on Pinterest. Happy crafting!
(Word count: 2,147)
Frequently Asked Questions
How long does a construction paper flower crown last?
With careful handling, it can last several weeks. Store it flat and avoid moisture.
Can I make this construction paper flower crown with kids?
Absolutely! Children 8+ can do most steps with supervision. Younger kids can help with gluing leaves.
What if my flowers keep falling off?
Use a bit more glue and press firmly for 30 seconds. You can also reinforce with small tape tabs on the back.
Can I make the crown adjustable?
Yes – add ribbon ties or make the band with a Velcro closure for different head sizes.
Do I need a template for the flowers?
No, freehand works great, but you can print simple shapes to trace if you prefer.
How do I make the crown bigger for adults?
Simply cut a longer base band (up to 28 inches) and add more flowers for fuller coverage.
Is construction paper strong enough for a flower crown?
Yes! When layered and glued properly, it holds up well for photos and short wear.