Discover the magic of homemade lentil bread, a revolutionary gluten-free recipe passed down through generations. This protein-packed, nutrient-dense bread combines the goodness of lentils and quinoa to create a delicious alternative to traditional wheat bread. Perfect for vegans, health enthusiasts, and anyone looking to diversify their bread options, this recipe transforms simple ingredients into wonderfully textured rolls that will make you rethink store-bought bread forever.
Why You’ll Love This Recipe
This family-treasured recipe offers a unique take on bread-making, utilizing protein-rich lentils and quinoa to create soft, nutritious rolls that are both gluten-free and vegan. The recipe requires minimal ingredients and basic kitchen equipment, making it accessible to bakers of all skill levels. Whether you’re following a specific dietary regime or simply wanting to experiment with healthy alternatives, these lentil bread rolls will exceed your expectations.
Ingredients
For the Bread:
- Split lentils: 1½ cups (11 oz | 300g)
- Raw quinoa: ½ cup (3.5 oz | 100g)
- Plant-based milk: 1¼ cups (11 fl oz | 300ml)
- Apple cider vinegar: 1 tablespoon
- Oil: 2 tablespoons (plus extra for spraying/drizzling)
- Psyllium husk: 3 tablespoons
- Baking powder: 2 teaspoons
- Salt: to taste
- Water: for soaking
Optional Toppings:
- Avocado spread
- Pickled sweet potato slices
- Seeds (sesame, pumpkin, or sunflower)
Instructions
Preparation Phase (4 hours + 15 minutes)
- Combine split lentils and raw quinoa in a large bowl
- Cover with plenty of water and let soak for 4 hours
- After soaking, thoroughly rinse and drain the lentils and quinoa
- Transfer the soaked mixture to a large bowl
Making the Dough
- In a high-powered blender, combine:
- Soaked lentils and quinoa
- Plant-based milk
- Apple cider vinegar
- Oil
- Blend until completely smooth (a stationary blender is recommended for optimal texture)
- Transfer the blended mixture to a large mixing bowl
- Add psyllium husk, baking powder, and salt
- Mix thoroughly until well combined
- Let the dough rest for 15 minutes to allow the psyllium husk to absorb moisture
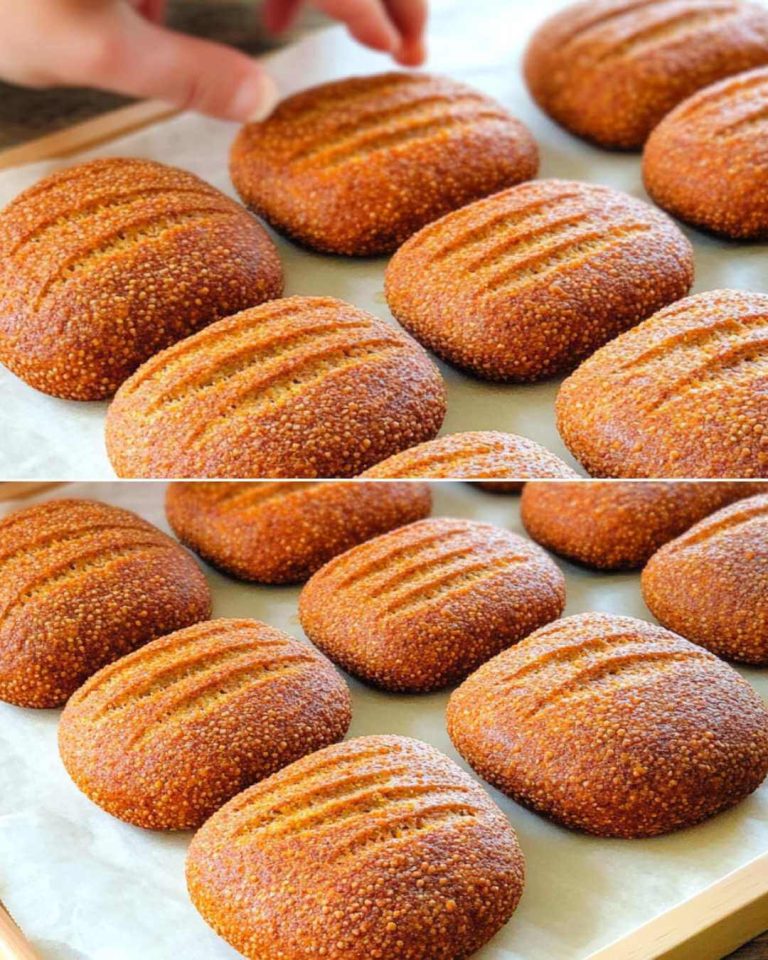
Shaping and Baking
- Preheat your oven to 350°F (180°C)
- Line a baking tray with parchment paper
- With wet hands, shape the dough into equal-sized rolls
- Place the rolls on the prepared baking tray, leaving space between each
- Spray or drizzle the tops with oil
- Bake for 30 minutes until golden brown and cooked through
Nutritional Information (per roll, approximate)
- Calories: 180
- Protein: 8g
- Carbohydrates: 25g
- Fiber: 6g
- Fat: 5g
- Iron: 3mg
- Calcium: 60mg
Time Requirements:
- Prep Time: 4 hours 20 minutes (including soaking)
- Active Time: 20 minutes
- Baking Time: 30 minutes
- Total Time: 4 hours 50 minutes
Pro Tips and Tricks
- Perfect Texture: For the smoothest texture, use a high-powered stationary blender and blend the mixture for at least 2-3 minutes.
- Moisture Balance: If the dough seems too wet after resting, add an extra teaspoon of psyllium husk. If too dry, add plant milk one tablespoon at a time.
- Shaping Success: Keep a small bowl of water nearby when shaping the rolls. Wet hands prevent the dough from sticking and create a smoother surface.
- Even Baking: Make rolls of similar size to ensure even baking. Using an ice cream scoop can help maintain consistency.
- Crust Development: For a crispier crust, spray with water instead of oil before baking.
Variations and Substitutions
- Seed Variations:
- Add 2 tablespoons of sunflower or pumpkin seeds to the dough
- Top with sesame or poppy seeds before baking
- Flour Alternatives:
- Replace psyllium husk with equal amounts of ground chia seeds or ground flax seeds
- Use different lentil varieties (red, green, or brown) for varying flavors
- Milk Options:
- Any plant-based milk works (almond, soy, oat, or coconut)
- Adjust liquid amount slightly based on milk consistency
- Flavor Additions:
- Add 1 teaspoon of herbs (rosemary, thyme, or oregano)
- Include 1 clove of minced garlic
- Sprinkle with nutritional yeast for a cheesy flavor
Common FAQs
Q: Can I make this recipe without a high-powered blender?
A: While a high-powered blender yields the best results, you can use a food processor, but you’ll need to blend for longer to achieve a smooth consistency.
Q: Why did my bread turn out dense?
A: Dense bread usually results from insufficient blending or not allowing proper rest time. Ensure thorough blending and don’t skip the 15-minute rest period.
Q: Can I freeze these bread rolls?
A: Yes! These rolls freeze well for up to 3 months. Thaw at room temperature and reheat in the oven for best results.
Q: How can I tell when the bread is fully baked?
A: The rolls should be golden brown on the outside and feel firm to the touch. A toothpick inserted into the center should come out clean.
Storage and Make-Ahead Tips
- Counter Storage: Store in an airtight container at room temperature for up to 2 days
- Refrigerator: Keep fresh for up to 5 days in an airtight container
- Freezer: Freeze for up to 3 months in a freezer-safe bag or container
- Make-Ahead: Prepare the dough up to the resting stage and refrigerate for up to 24 hours
- Reheating: Warm in a 350°F (180°C) oven for 5-7 minutes or toast individual slices
For optimal freshness, cool completely before storing. If freezing, slice before freezing for easier portioning. When reheating, sprinkle with a few drops of water to restore moisture.