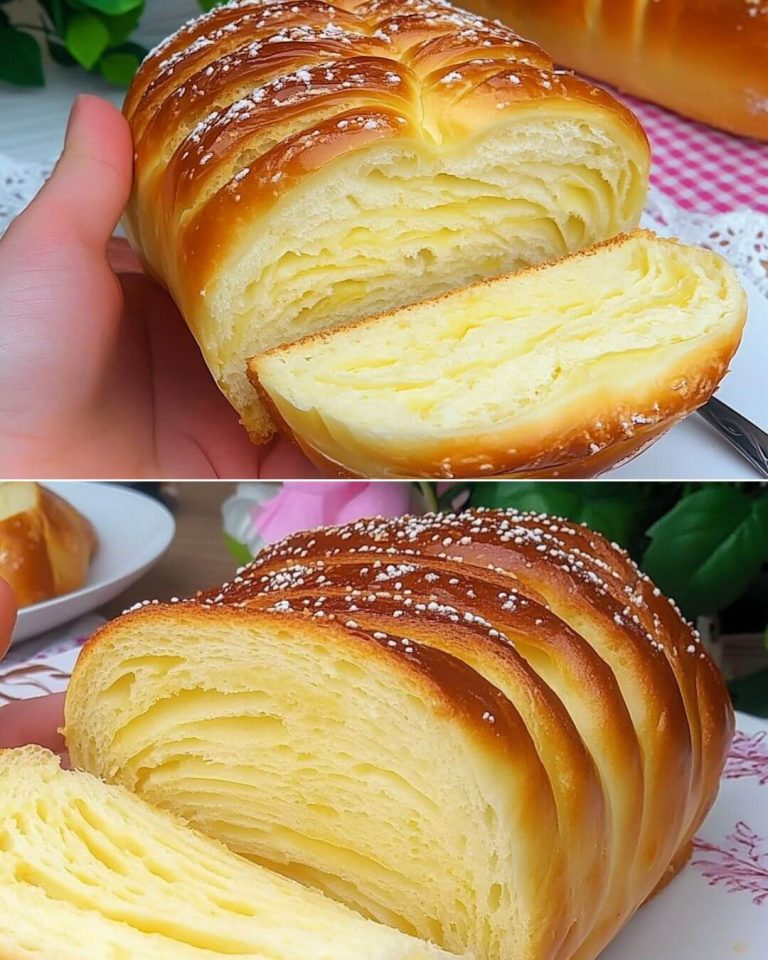
Creating memorable breakfast moments becomes effortless with this sublime Layered Pull-Apart Milk Bread. This Japanese-inspired milk bread combines the perfect balance of sweetness with an irresistibly fluffy texture, making it an ideal choice for both special occasions and everyday breakfast treats.
Ingredients
For the Dough:
- 150ml (⅔ cup) warm milk
- 4g (1¼ teaspoons) dry yeast or 12g (2½ teaspoons) fresh yeast
- 30g (2 tablespoons) butter, softened
- 1 large egg, room temperature
- ⅓ teaspoon salt
- 40g (3 tablespoons) sugar
- 320-350g (2½-2¾ cups) all-purpose wheat flour
For Layering and Finishing:
- 30g (2 tablespoons) butter, softened
- 2 tablespoons sweetened milk for glazing
- 1 tablespoon sesame seeds (optional)
- 1 teaspoon vanilla sugar or ½ teaspoon vanilla extract (optional)
Step-by-Step Instructions
1. Preparing the Dough
- Combine warm milk with yeast and a small portion of sugar in a bowl
- Let the mixture rest for 5-10 minutes until foamy
- In a separate large bowl, mix remaining sugar, softened butter, egg, and salt
- Add the activated yeast mixture to the bowl
- Gradually incorporate flour while kneading
- Continue kneading for 8-10 minutes until the dough becomes soft and elastic
2. First Rise
- Transfer dough to a lightly oiled bowl
- Cover with a clean kitchen towel
- Place in a warm area for 1 hour or until doubled in size
3. Shaping the Bread
- Roll dough into a rectangle on a floured surface
- Spread 30g softened butter evenly across the surface
- Make parallel cuts 1 inch apart, leaving the bottom connected
- Carefully arrange strips in a loaf pan, creating layers
4. Second Rise and Baking
- Let the shaped loaf rise for 30 minutes
- Preheat oven to 180°C (350°F)
- Brush top with sweetened milk
- Sprinkle with sesame seeds if desired
- Bake for 25-30 minutes until golden brown
Nutritional Information (per serving, based on 12 slices)
- Calories: 185
- Total Fat: 6.5g
- Saturated Fat: 3.8g
- Carbohydrates: 27g
- Protein: 4.5g
- Fiber: 1g
- Sugar: 4g
Time Requirements:
- Preparation: 30 minutes
- Rising Time: 90 minutes
- Baking Time: 25-30 minutes
- Total Time: 2 hours 30 minutes
Professional Baking Tips
Creating the perfect milk bread requires attention to detail. The dough’s temperature and consistency are crucial factors in achieving the desired texture. Maintain all ingredients at room temperature for optimal results. When kneading, the dough should feel soft and slightly tacky but not stick to your hands. The butter should be softened but not melted to ensure proper incorporation.
Variations and Substitutions
- Replace regular milk with coconut milk for a tropical twist
- Substitute butter with coconut oil for a dairy-free version
- Add matcha powder (1-2 teaspoons) for a Japanese-inspired variation
- Incorporate chocolate chips between layers for a sweet variation
- Use whole wheat flour for up to 30% of the total flour for added nutrition
Common FAQs
Q: Can I make this bread without a stand mixer?
A: Yes, you can knead the dough by hand for 10-12 minutes until it becomes smooth and elastic.
Q: Why didn’t my dough rise properly?
A: The most common causes are inactive yeast or incorrect milk temperature. Ensure your milk is warm (not hot) and your yeast is fresh.
Q: Can I prepare the dough the night before?
A: Yes, you can refrigerate the dough after the first rise. Allow it to come to room temperature before shaping.
Q: How can I tell when the bread is fully baked?
A: The bread should be golden brown and sound hollow when tapped on the bottom. Internal temperature should reach 190°F (88°C).
Storage and Make-Ahead Tips
Store the cooled bread in an airtight container at room temperature for up to 3 days. For longer storage, slice and freeze for up to one month in a freezer-safe container. To reheat, warm individual slices in a toaster or the entire loaf in a 350°F (180°C) oven for 5-7 minutes.
For make-ahead preparation, you can refrigerate the dough after the first rise for up to 24 hours. Shape and bake as directed, adding 10-15 minutes to the second rise time.
This versatile bread can be prepared in advance for special occasions or weekly meal prep, making it a practical addition to your baking repertoire.