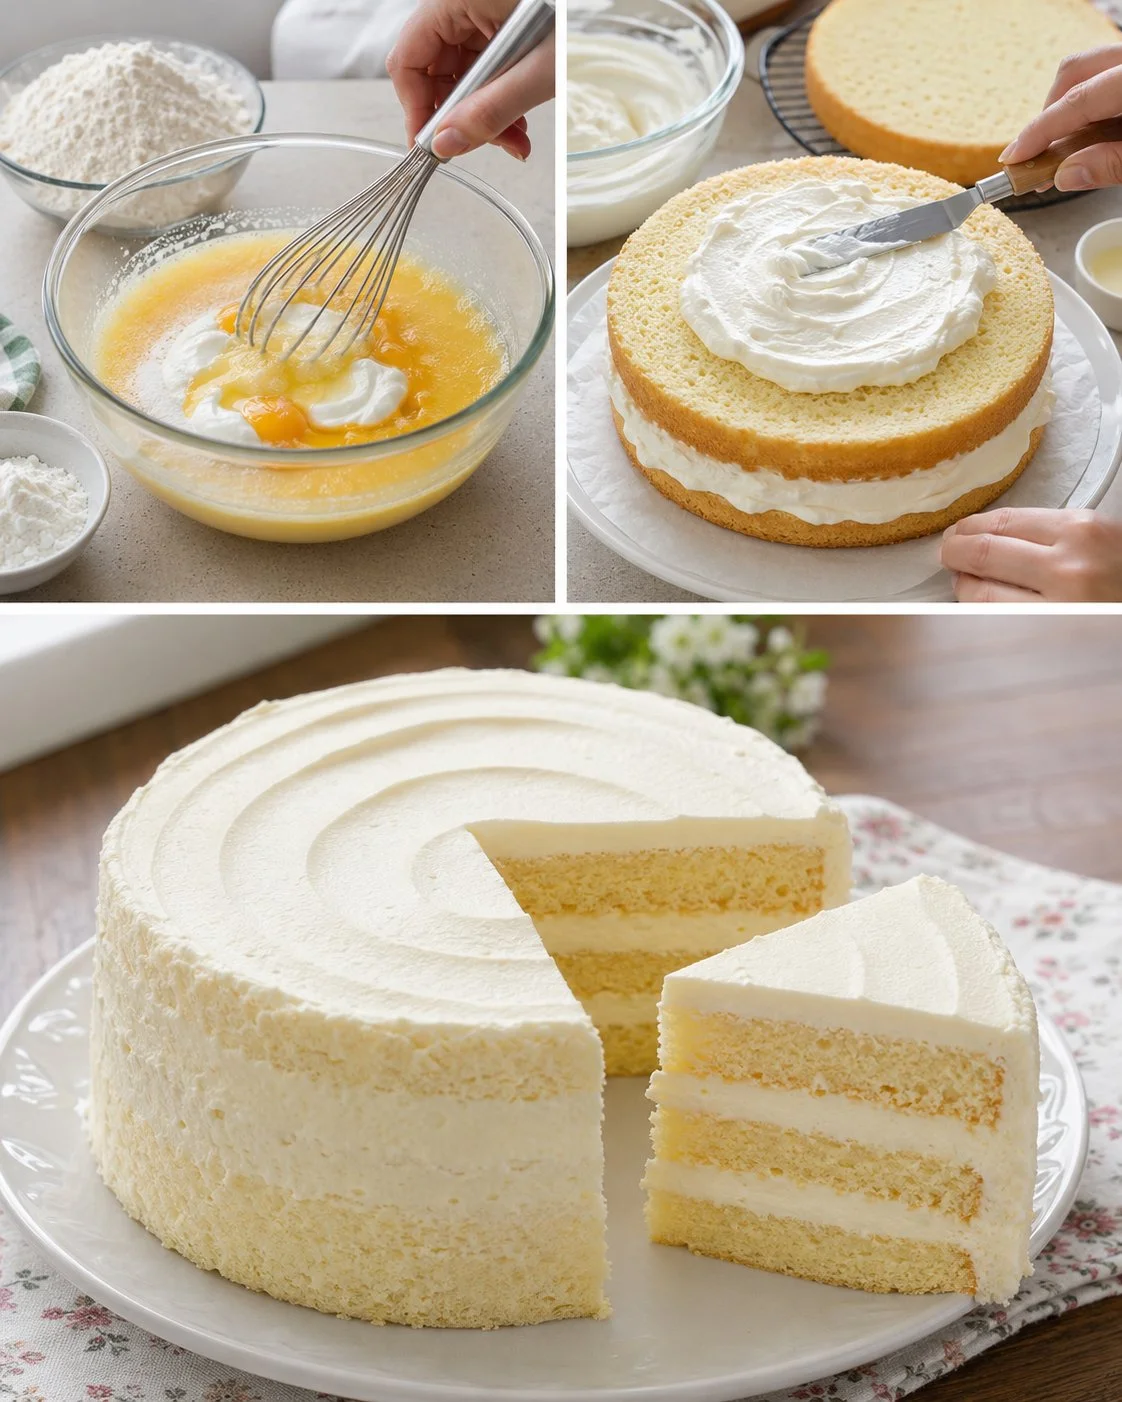
This fluffy layered cake is for the days you want something bakery-pretty but still doable at home: a tangy yogurt sponge, a classic vanilla sponge, and a creamy (very forgiving) cream-cheese filling that slices clean once chilled. It’s lighter in feel than a butter cake thanks to the yogurt base, but it’s still a real dessert—between the sugar and sweetened condensed milk, it’s best enjoyed as an occasional treat, especially if you’re watching blood sugar. If you enjoy creamy layered desserts, you might also like this chocolate tiramisu-style cake with cream cheese filling for a richer, coffee-chocolate direction.
This recipe is best for home bakers who like a soft, airy crumb and don’t mind whipping egg whites. The yogurt sponge comes out almost cloud-like if you fold gently and don’t rush it; the second sponge adds structure so the cake stacks without sliding around. Plan on chilling before slicing—warm cream filling is delicious, but it won’t give you those neat layers.
Why This Recipe Is Helpful
- Makes a celebration-style layer cake without fancy decorating skills (the layers do most of the work).
- Yogurt sponge bakes up soft and springy, so the cake feels lighter than many frosted cakes.
- Cream filling is stable and easy to spread—no gelatin required.
- Two different sponges give you great texture contrast: airy + classic tender crumb.
- Works well made ahead, which is a lifesaver for parties and birthdays.
- Uses everyday supermarket ingredients (Greek yogurt, cream cheese, condensed milk).
Who This Recipe Is Best For
If you like desserts that aren’t overly buttery and you enjoy a little tang (from Greek yogurt and cream cheese), this cake is right up your alley. It’s also a good choice when you want a crowd-pleaser for kids and adults—soft cake layers, sweet cream, and no strong flavors that “divide the room.”
It’s especially satisfying for anyone who loves the look of layered cakes but prefers straightforward techniques: whip, fold, bake, chill, slice.
Who Should Be Careful
This is a high-sugar dessert (granulated sugar plus sweetened condensed milk) and it’s made with refined flour, so it may not be ideal for people actively managing blood sugar. It’s also rich from dairy (cream cheese + heavy cream), which can feel heavy for some—smaller slices help.
If you have an egg allergy, this one won’t be a fit (it uses a lot of eggs). And because the filling is dairy-based, it’s not suitable for those avoiding dairy.
Ingredients
Yogurt Sponge Layer
- 8 large egg yolks
- 8 large egg whites
- 3 cups (700 g) Greek yogurt (plain)
- 6 tablespoons (about 45 g) all-purpose flour
- 1/4 cup (30 g) cornstarch
- Pinch of salt
- 8 tablespoons sugar (about 100 g)
Classic Sponge Layer
- 4 large eggs
- 1 cup (200 g) sugar
- 3/4 cup (200 ml) milk
- 2/3 cup (150 ml) vegetable oil
- 3 cups (350 g) all-purpose flour
- 1 teaspoon baking powder
Cream Filling
- 7 oz (200 g) cream cheese, softened
- 2/3 cup (200 g) sweetened condensed milk
- 1 cup (250 ml) heavy cream (35%), cold
Ingredient Notes
- Greek yogurt: Full-fat gives the most tender, moist sponge and a gentle tang. Low-fat works, but the sponge can bake up a bit drier.
- Cornstarch in the yogurt sponge: Helps keep the crumb fine and “cottony,” and gives that airy, bouncy bite.
- Cream cheese: Use block-style cream cheese if possible for the thickest filling. If yours is very soft (tub style), chill the assembled cake longer for clean slices.
- Sweetened condensed milk: Adds sweetness and body; it also makes the filling very smooth. Because it’s already sweet, you generally don’t need extra sugar in the cream.
- Vegetable oil: Keeps the classic sponge tender even after chilling (butter cakes can feel firm straight from the fridge).
Kitchen Tools Needed
- Two 8–9 inch (20–23 cm) cake pans (or one pan baked twice), plus parchment paper
- Electric mixer (hand or stand)
- Two mixing bowls (one very clean for egg whites)
- Rubber spatula
- Whisk
- Cooling rack
- Serrated knife (helpful for leveling/slicing layers)
- Offset spatula (optional, for spreading filling)
Step-by-Step Instructions
-
Prep your pans and oven.
Heat oven to 350°F (180°C). Line the bottoms of your cake pans with parchment and lightly grease the sides. -
Make the yogurt sponge base.
In a large bowl, whisk together the 8 egg yolks, Greek yogurt, 6 tbsp flour, cornstarch, salt, and 8 tbsp sugar until smooth and thick. -
Whip the egg whites.
In a very clean bowl, beat the 8 egg whites to stiff peaks. You want glossy peaks that stand tall—stop once they’re stiff so they don’t turn dry and clumpy. -
Fold carefully (this is where fluff happens).
Fold one-third of the egg whites into the yogurt mixture to loosen it, then gently fold in the remaining whites in two additions. Use a spatula and lift from the bottom to keep the air. -
Bake the yogurt sponge.
Pour into the prepared pan and bake for about 40 minutes, until the top is set and springs back when lightly pressed. A toothpick should come out clean or with a few soft crumbs. Cool 10–15 minutes, then turn out onto a rack to cool completely. -
Make the classic sponge batter.
In a bowl, beat the 4 eggs while gradually adding 1 cup (200 g) sugar. Beat until pale and slightly thicker. Mix in milk and vegetable oil. -
Add dry ingredients and bake.
Whisk flour with baking powder, then add to the wet mixture gradually, mixing just until smooth (don’t overbeat once flour is in). Pour into the second prepared pan and bake 30–35 minutes, until golden and springy. Cool completely. -
Make the cream filling.
Beat cream cheese until smooth. Mix in sweetened condensed milk until silky. In a separate bowl, whip cold heavy cream to medium peaks (it should hold shape but still look creamy). Gently fold whipped cream into the cream-cheese mixture. -
Assemble.
Level cakes if needed. Place one sponge layer on a plate/cake stand, spread an even layer of cream, add the second sponge, and repeat. If you have extra sponge scraps, you can crumble them over the top or sides for a simple finish. -
Chill before slicing.
Refrigerate at least 2–4 hours (overnight is even better) for the cleanest layers. Slice with a long serrated knife, wiping the blade between cuts.
Pro Tips
- Room-temp yolk mixture + clean, grease-free bowl for whites makes a big difference in volume and stability.
- Fold slowly and stop as soon as you don’t see white streaks. Over-folding deflates the batter and makes the sponge shorter.
- Cool both cakes completely before filling—warm cake melts the cream and causes sliding.
- Whip the heavy cream to medium peaks, not stiff. Too stiff can make the filling grainy after folding.
- Chill the assembled cake before you try to “pretty it up.” Cold filling is easier to smooth.
- If your kitchen is hot, pop the filling in the fridge for 10 minutes before assembling.
Healthier or Lighter Swaps
- Reduce the sugar slightly: In the classic sponge, you can often reduce sugar by about 10–15% without wrecking the texture (the cake will be a touch less tender).
- Use all Greek yogurt (full-fat) and skip extra frosting: The yogurt sponge already feels light and satisfying—serve smaller slices with fruit.
- Serve with fresh berries to add brightness and help balance sweetness.
- Make thinner filling layers: You still get the creamy bite, but overall richness comes down.
Common Mistakes
- Overwhipping egg whites until they look dry and chunky—this makes folding harder and can lead to a dense sponge.
- Overmixing after adding flour in the classic sponge, which can make it tougher.
- Assembling before cooling, causing the filling to melt and layers to slide.
- Not chilling long enough—the cake can taste great, but slices won’t look neat.
- Using cold cream cheese straight from the fridge, which can leave lumps.
Variations
- Lemon version: Add lemon zest to the cream filling and a little to the yogurt sponge for a brighter, less “sweet-only” flavor.
- Berry layer: Spread a thin layer of jam (or lightly cooked berries) between cream layers for a fruity contrast.
- Vanilla-forward: Add 1–2 teaspoons vanilla extract to the classic sponge batter and to the cream filling.
- Simple crumb coat finish: Cover the outside with a