The Art of Pita: A Bread with History
Pita bread is more than just a simple flatbread – it’s a culinary tradition that spans centuries and continents. Originating in the Middle East, this versatile bread has traveled the world, becoming a staple in countless cuisines. Our homemade pita bread recipe brings the warmth of traditional baking right into your kitchen, promising a taste that store-bought breads can never match.
Ingredients List (US and Metric Measurements)
Dry Ingredients
- Plain Flour: 10.58 oz (300 g or 2 1/4 cups)
- Granulated Sugar: 1 teaspoon (4 g)
- Table Salt: 1 teaspoon (6 g)
- Dry Yeast: 1 tablespoon (9 g or 1 standard packet)
Wet Ingredients
- Milk: 6.76 fl oz (200 ml or 3/4 cup)
- Vegetable Oil: 1 tablespoon (15 ml)
- Yogurt: 1 tablespoon (15 g)
Step-by-Step Preparation Instructions
Preparing the Dough
- In a large mixing bowl, combine the dry ingredients:
- Sift the flour
- Add salt and sugar
- Sprinkle the dry yeast evenly
- Create a well in the center of the dry ingredients.
- Warm the milk to lukewarm (around 110°F or 43°C) – too hot will kill the yeast, too cold won’t activate it.
- Pour the warm milk, vegetable oil, and yogurt into the well.
- Mix gradually, bringing the flour from the sides into the liquid.
- Knead the dough for 8-10 minutes until:
- Smooth and elastic
- Slightly tacky but not sticky
- Springs back when gently pressed
Proofing the Dough
- Place the dough in a lightly oiled bowl.
- Cover with a damp cloth or plastic wrap.
- Let rise in a warm, draft-free area for 1-1.5 hours or until doubled in size.
Shaping and Cooking
- Punch down the risen dough and divide into 6-8 equal portions.
- Roll each portion into a ball.
- On a floured surface, roll each ball into a thin circle (about 1/4 inch thick).
- Heat a heavy skillet or griddle over medium-high heat.
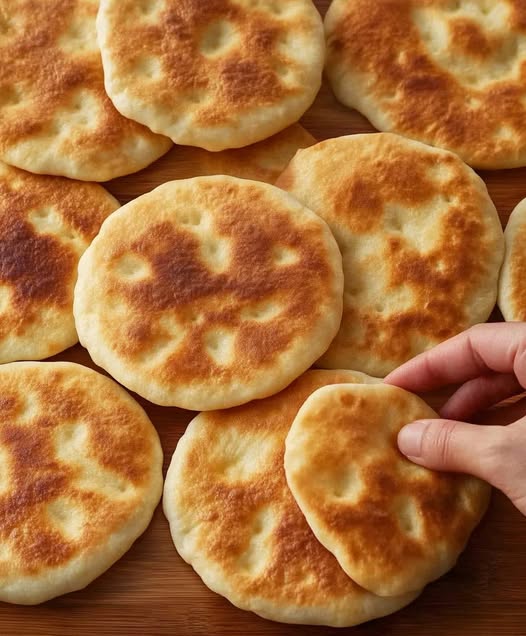
- Cook each pita for 2-3 minutes per side:
- Look for golden-brown spots
- Slight puffing indicates perfect cooking
- Keep cooked pitas covered with a clean kitchen towel to stay soft.
Nutritional Information
Per Pita (Approximate):
- Calories: 150-180
- Protein: 4-5g
- Carbohydrates: 25-30g
- Fat: 3-4g
- Fiber: 1g
Preparation Time: 15 minutes Proofing Time: 1-1.5 hours Cooking Time: 15-20 minutes Total Time: 1.5-2 hours Servings: 6-8 pitas
Pro Cooking Tips and Tricks
- Use warm (not hot) milk to activate yeast perfectly
- Let dough rise in a warm, draft-free area
- Don’t overwork the dough when rolling
- Use a cast-iron skillet for best heat distribution
- Keep cooked pitas covered to maintain softness
Delicious Variations and Substitutions
- Whole Wheat Version: Replace half the flour with whole wheat flour
- Herb-Infused Pitas: Add dried herbs to the dough
- Gluten-Free Option: Use a gluten-free flour blend
- Dairy-Free Adaptation: Replace milk with water or plant-based milk
- Seed Lovers: Sprinkle sesame or nigella seeds on top before cooking
Frequently Asked Questions
Q1: Why don’t my pitas puff up? A: Ensure your skillet is hot enough and the dough is rolled thin and evenly.
Q2: How long can I store homemade pitas? A: 2-3 days at room temperature, up to a week in the refrigerator, or 3 months frozen.
Q3: Can I make the dough ahead of time? A: Yes! Refrigerate overnight for slow fermentation and enhanced flavor.
Q4: What if I don’t have a skillet? A: A griddle or heavy-bottomed pan works well. Avoid non-stick surfaces.
Q5: Are pitas healthy? A: Moderate in calories, provides carbohydrates, and can be part of a balanced diet.
Storage and Make-Ahead Tips
- Room Temperature: Store in an airtight container for 2-3 days
- Refrigeration: Up to 1 week in a sealed bag
- Freezing: Separate with parchment, freeze up to 3 months
- Reheating: Warm briefly in a skillet or microwave
Enjoy your homemade pita bread – a testament to the joy of baking from scratch!