These baked rice pudding breakfast squares are my favorite way to turn leftover cooked rice into a sliceable, lightly sweet breakfast that feels like comfort food but still works on a weekday. They bake up custardy in the middle with a gentle cinnamon-vanilla vibe, and they’re easy to portion for grab-and-go mornings. Nutrition-wise, you’re getting protein from eggs and yogurt plus some staying power from the rice, but it is sweetened—so if you’re watching added sugar or managing blood sugar, you’ll want smaller squares and a balanced pairing (like fruit and extra protein).
If you love classic rice pudding but want something less spoon-y and more meal-prep friendly, this is a great middle ground. It’s especially good for families and anyone who likes a soft-baked texture—think “baked oatmeal bar,” but creamier. If you’re craving the traditional dessert version for comparison, this New York deli-style rice pudding is a good reference point for that extra-creamy, scoopable style.
Why This Recipe Is Helpful
- Uses up leftover cooked rice you already have in the fridge (less waste, less planning).
- Simple batter: one bowl, whisk, stir, bake.
- Sliceable and portable for breakfast, snacks, or lunchboxes.
- Custardy texture feels satisfying without needing butter or heavy cream.
- Easy to adjust sweetness (and you can skip raisins if that’s not your thing).
- Freezer-friendly for longer meal prep.
Who This Recipe Is Best For
This works well for home cooks who want a warm, comforting breakfast that can be made ahead and eaten all week. It’s also great for kids who like mildly sweet breakfasts, and for anyone who prefers a softer, pudding-like bar over a dry muffin or granola bar. If you enjoy creamy baked custards or baked oatmeal, you’ll probably love the texture here.
Who Should Be Careful
- People managing blood sugar: these squares include rice plus added sweetener, which can be a lot of carbs in one serving. Consider smaller portions and pair with protein (Greek yogurt, eggs) to make it feel steadier.
- Anyone avoiding dairy: the recipe uses milk and yogurt, though you can swap (see notes below) with mixed results depending on the products used.
- Egg allergies: eggs are key for setting the custard; an egg-free version won’t slice the same way.
- Sensitive to dried fruit: raisins can be a trigger for some people; they’re optional for a reason.
Ingredients
- 2 cups cooked rice (about 320–360 g, depending on the rice)
- 2 cups milk (480 ml)
- 2 large eggs
- 1/3 cup plain yogurt (80 g)
- 1/4 cup sugar, or sweetener of choice (50 g)
- 1 teaspoon vanilla extract (5 ml)
- 1/2 teaspoon ground cinnamon (1 g)
- 2 tablespoons cornstarch (16 g)
- Pinch of salt
- 1/3 cup raisins (optional) (about 50 g)
Ingredient Notes
- Cooked rice: Any cooked rice works (white, brown, jasmine, basmati). Day-old rice is perfect because it’s a little drier and doesn’t water down the custard. If your rice is very dry, the squares may bake up a touch firmer—in a good way.
- Milk: Whole milk gives the creamiest result, but 2% also works. If using a plant milk, choose an unsweetened, higher-protein option (like soy) for better structure.
- Yogurt: Plain yogurt adds a gentle tang and helps with a tender set. Greek yogurt works too, but the batter will be thicker and may bake slightly firmer.
- Cornstarch: This is the “insurance policy” that helps the squares slice cleanly once cooled. Don’t skip it unless you’re okay with a looser, more spoonable texture.
- Sugar/sweetener: Regular sugar gives the most predictable bake. If using a non-sugar sweetener, choose one meant for baking and expect slight texture changes.
- Raisins: They add pops of sweetness. If your household is divided on raisins, sprinkle them over only half the pan.
Kitchen Tools Needed
- 8-inch (20 cm) square baking pan
- Parchment paper
- Large mixing bowl
- Whisk
- Spatula or large spoon
- Measuring cups and spoons
Step-by-Step Instructions
- Preheat and prep. Heat the oven to 350°F (180°C). Line an 8-inch (20 cm) square pan with parchment, leaving a little overhang so you can lift the slab out later.
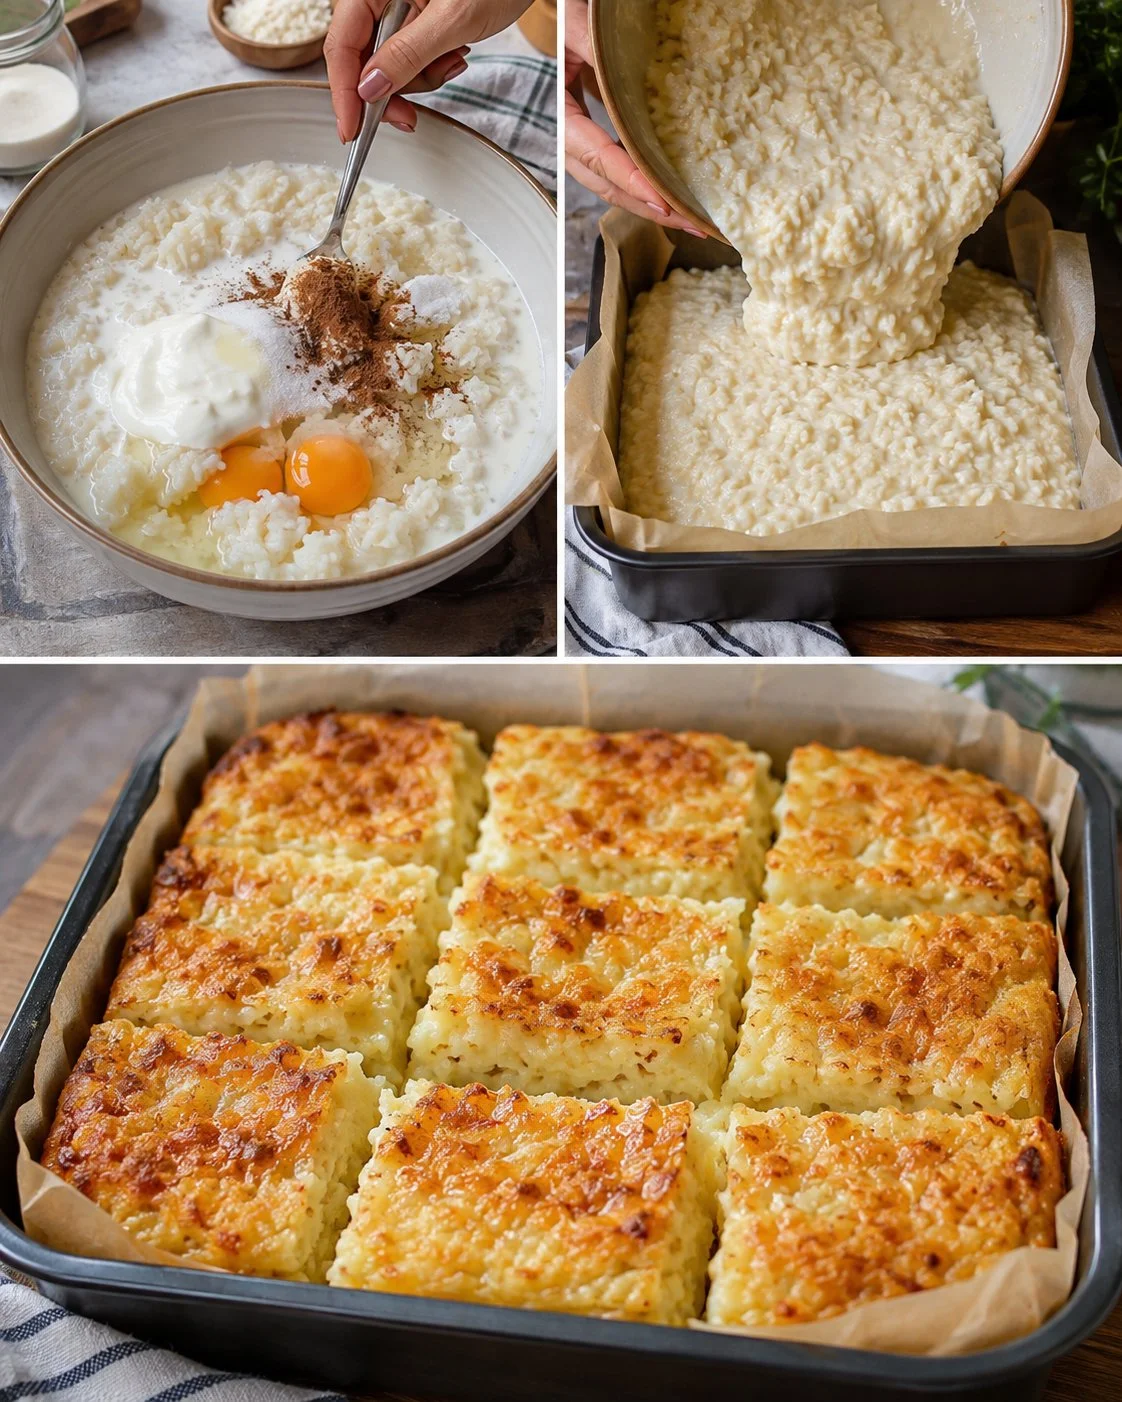
- Whisk the custard base. In a large bowl, whisk the eggs until smooth. Whisk in the yogurt, sugar, vanilla, cinnamon, cornstarch, and salt until you don’t see lumps of cornstarch.
- Add rice and milk. Stir in the cooked rice, then pour in the milk and mix until everything is evenly combined. Fold in raisins if using.
- Fill the pan. Pour the mixture into the lined pan and smooth the top. Tap the pan once or twice on the counter to pop any big air bubbles.
- Bake. Bake for 35–40 minutes, until the edges look lightly golden and the center is set (it shouldn’t slosh when you gently jiggle the pan). A little softness in the center is fine—it firms up as it cools.
- Cool for clean slices. Let cool until just warm for a soft, pudding-like bite, or chill fully for the neatest squares. Lift out using the parchment and cut into squares.
Pro Tips
- For clean, sharp edges, chill the pan for at least 2 hours before slicing, and wipe your knife between cuts.
- If your rice is very clumpy, break it up with your fingers or a fork before mixing so the custard coats it evenly.
- Prefer a creamier center? Bake on the lower end of the time range and cool completely before cutting.
- For more flavor without extra sugar, add a tiny pinch of nutmeg or a little orange zest to the batter.
- If using raisins, soak them in warm water for 5–10 minutes and drain well to keep them plump (especially if they’re older/drier).
Healthier or Lighter Swaps
- Reduce the sugar to 2–3 tablespoons (25–38 g) if you like a gently sweet breakfast.
- Use Greek yogurt for a bit more protein and a firmer set (handy if you want very tidy squares).
- Add berries on the side instead of increasing sweetness in the batter.
- For a more filling plate, serve smaller squares with plain yogurt or a nut butter topping (portion mindful, since nut butters add calories quickly).
Common Mistakes
- Not dissolving the cornstarch: whisk it in thoroughly or you’ll get little starchy pockets.
- Cutting too soon: warm squares taste great but won’t look as neat—cooling is what makes them slice cleanly.
- Overbaking: the center can turn rubbery if baked until completely firm in the oven; aim for “set with a gentle jiggle.”
- Using sweetened yogurt or sweetened milk: it’s easy to accidentally make these overly sweet—stick to plain/unsweetened if possible.
Variations
- Apple-cinnamon: fold in 1/2 cup (75 g) finely diced apple; expect slightly longer bake time.
- Chocolate chip: replace raisins with 1/3 cup (60 g) mini chocolate chips (best for dessert-style squares).
- Coconut-vanilla: use coconut milk beverage and add 2 tablespoons (12 g) unsweetened shredded coconut.
- Cardamom version: swap cinnamon for 1/4 teaspoon ground cardamom for a more fragrant, bakery-style flavor.
Serving Suggestions
- Breakfast: serve 1–2 squares with fresh fruit and a spoon of plain yogurt.
- Snack: warm a square and dust lightly with cinnamon.
- Dessert-ish: top with a little extra milk (or warmed milk) and eat it like a soft baked pudding.
- For a more balanced meal, pair with a protein (eggs, yogurt) rather than adding extra sweet toppings.
Storage Instructions
- Refrigerate in an airtight container for up to 4 days.
- Freeze (best sliced first): wrap squares individually and freeze for up to 2 months. Thaw overnight in the fridge for best texture.
Reheating Tips
- Microwave: heat one square for 15–30 seconds until just warm.
- Oven/toaster oven: warm at 300°F (150°C) for about 8–10 minutes for a slightly drier, more set texture.
- If you like them firm and tidy, they’re also very good cold straight from the fridge.
Nutrition Estimate
Per serving (based on 9 squares, made with milk, yogurt, sugar, and optional raisins): ~150–180 calories, 6–8 g protein, 24–30 g carbs, 3–5 g fat.
Values are estimates and will vary with your milk choice, sweetener, rice type, and portion size.
Recipe Summary
- Prep Time: 10 minutes
- Cook Time: 35–40 minutes
- Total Time: 45