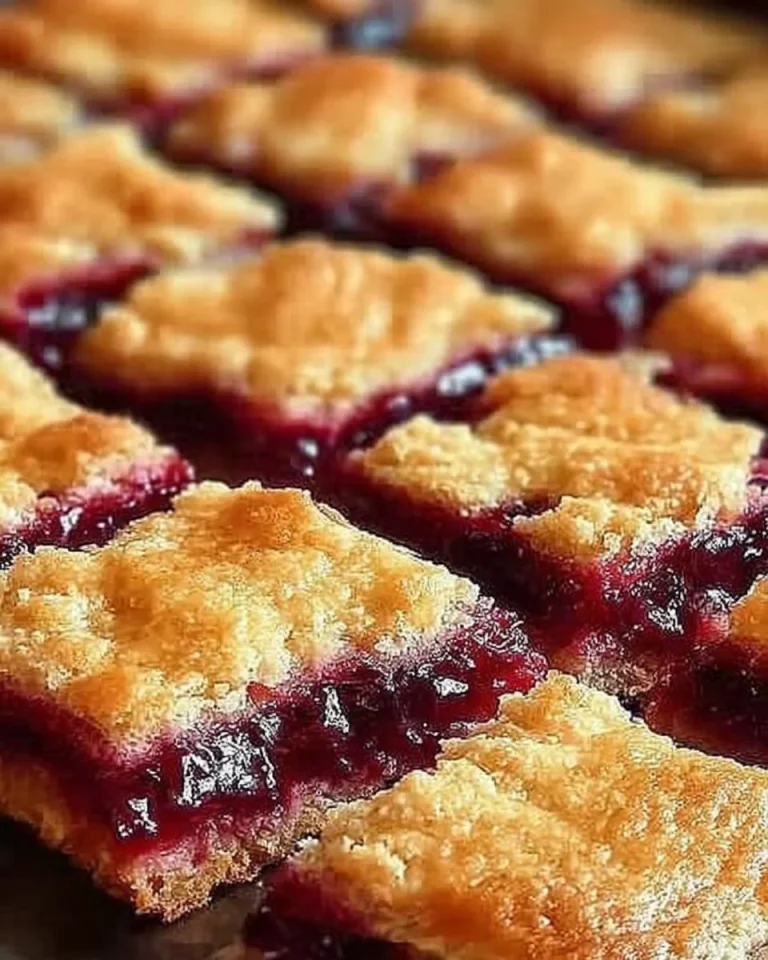
Cherry Pie Bars are a delightful treat that combines the classic flavors of cherry pie into a convenient bar form. Perfect for parties, family gatherings, or just a sweet snack at home, these bars are sure to bring a smile to anyone’s face. With a buttery crust, luscious cherry filling, and a sweet glaze on top, they are an easy-to-make dessert that’s oh-so-satisfying.
What Goes into This Cherry Pie Bars
To whip up these delicious Cherry Pie Bars, you’ll need the following ingredients:
- 1 cup (225 g) butter, softened
- 2 cups (400 g) sugar
- 4 large eggs
- 1 tsp (5 ml) vanilla extract
- 1/4 tsp (1 ml) almond extract
- 3 cups (360 g) all-purpose flour
- 1 tsp (6 g) salt
- 2 cans (21 oz/595 g each) cherry pie filling
- 1 cup (120 g) powdered sugar
- 1/2 tsp (2.5 ml) vanilla extract
- 1/2 tsp (2.5 ml) almond extract
- 2 tbsp (30 ml) milk
Step-by-Step Cherry Pie Bars Recipe
Follow these simple steps to create your own delicious Cherry Pie Bars:
-
Preheat Your Oven: Preheat your oven to 350 degrees F (175 degrees C). This ensures even baking.
-
Prepare the Pan: Grease and flour a 15x10x1-inch baking pan. This helps prevent sticking and makes for easier cleanup.
-
Cream Butter and Sugar: In a large bowl, cream together the softened butter and sugar until the mixture is light and fluffy.
-
Add Eggs: Beat in the eggs one at a time, mixing well after each addition. This is key for a smooth batter.
-
Mix in Extracts: Stir in the vanilla and almond extracts to enhance the flavor of your bars.
-
Combine Dry Ingredients: In a separate bowl, whisk together the flour and salt. This ensures an even distribution of the dry ingredients.
-
Mix Dry into Wet: Gradually add the dry ingredients to the creamed butter mixture, mixing until just combined. Be careful not to overmix.
-
Spread the Batter: Spread 3 cups of the batter evenly in the prepared pan. This forms the bottom layer of your bars.
-
Add Cherry Filling: Spread the cherry pie filling evenly over the batter for that juicy, fruity layer.
-
Drop Spoonfuls of Batter: Drop spoonfuls of the remaining batter over the cherry filling. This creates a beautiful, rustic look.
-
Bake: Bake for 30-35 minutes or until a toothpick inserted into the center comes out clean. Be sure to check it at the 30-minute mark to avoid overbaking.
-
Cool: Let the bars cool completely on a wire rack. Patience is key here!
-
Make the Glaze: In a small bowl, whisk together the powdered sugar, vanilla extract, almond extract, and milk until smooth.
-
Drizzle the Glaze: Once the bars are completely cooled, drizzle the glaze evenly over the top. Let it set before cutting.
-
Serve: Cut the bars into squares and serve. Enjoy every bite!
How to Serve Cherry Pie Bars
These gorgeous Cherry Pie Bars can be served in various ways to impress your guests:
- On a Platter: Plate the bars neatly on a decorative platter for a beautiful presentation.
- With Ice Cream: Serve a warm bar alongside a scoop of vanilla ice cream for a delightful contrast of temperatures.
- Garnished: Sprinkle a few fresh cherries or a dusting of powdered sugar on top for added flair.
Recipe Tips & Variations
-
Make It Berrylicious: Experiment with other pie fillings. Blueberry or mixed berry filling adds a unique twist!
-
Add Nuts: Consider adding chopped nuts to the batter for a crunchy surprise.
-
Enhance the Glaze: For an extra touch, add a teaspoon of lemon juice to the glaze for a little zing.
Cherry Pie Bars: Frequently Asked Questions
Can I make these bars ahead of time?
Absolutely! You can bake them a day in advance and store them covered at room temperature.
What should I do if my cherry filling is too thick?
If your cherry filling is too thick, mix in a splash of water or cherry juice to loosen it up before spreading it on the batter.
Can I freeze Cherry Pie Bars?
Yes, these bars freeze well! Just wrap them tightly in plastic wrap or foil, and store them in an airtight container.
Give this Cherry Pie Bars recipe a try, and you’ll find it to be a hit with family and friends alike. Happy baking!
Cherry Pie Bars
Ingredients
Method
- Preheat your oven to 350 degrees F (175 degrees C).
- Grease and flour a 15x10x1-inch baking pan.
- In a large bowl, cream together the softened butter and sugar until light and fluffy.
- Beat in the eggs one at a time, mixing well after each addition.
- Stir in the vanilla and almond extracts.
- In a separate bowl, whisk together the flour and salt.
- Gradually add the dry ingredients to the creamed butter mixture, mixing until just combined.
- Spread 3 cups of the batter evenly in the prepared pan.
- Spread the cherry pie filling evenly over the batter.
- Drop spoonfuls of the remaining batter over the cherry filling.
- Bake for 30-35 minutes or until a toothpick inserted into the center comes out clean.
- Let the bars cool completely on a wire rack.
- In a small bowl, whisk together the powdered sugar, vanilla extract, almond extract, and milk until smooth.
- Drizzle the glaze evenly over the cooled bars and let it set before cutting.
- Cut the bars into squares and serve.