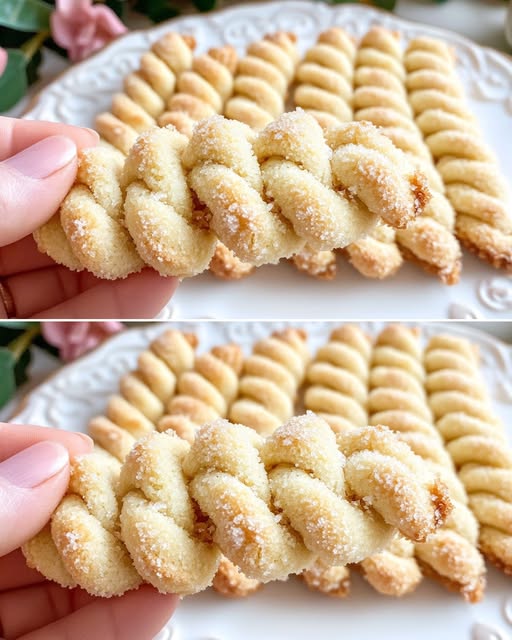
These elegant twisted cookies are a true delight for the senses – delicately flavored with vanilla and lemon zest, their tender, crumbly texture quite literally melts in your mouth. The cornstarch gives these cookies their signature dissolve-on-the-tongue quality, while the white chocolate dipped ends and crushed nut coating add a delicious contrast in both flavor and texture. Perfect for special occasions, holiday gatherings, or whenever you crave a truly special sweet treat!
Ingredients
For the cookie dough:
- 1 large egg
- Zest of 1 lemon
- 8g (1 packet) vanilla sugar
- 100g (1/2 cup) granulated sugar
- 100g (1/2 cup) vegetable oil
- 5g (1 teaspoon) baking powder
- 60g (1/2 cup) cornstarch
- 350g (2 3/4 cups) all-purpose flour
For decoration:
- 200g (7oz or 1 1/4 cups) white chocolate chips
- 100g (3/4 cup) finely chopped nuts (walnuts, pecans, or almonds)
- 1 tablespoon granulated sugar (for sprinkling)
Instructions
- Prepare the oven: Preheat your oven to 180°C (350°F). Line two baking sheets with parchment paper.
- Mix wet ingredients: In a large bowl, whisk together the egg, lemon zest, vanilla sugar, and granulated sugar until well combined and slightly lighter in color.
- Add oil: Gradually pour in the oil while continuing to whisk until the mixture is smooth and well integrated.
- Combine dry ingredients: In a separate bowl, whisk together the flour, cornstarch, and baking powder.
- Form the dough: Gradually add the dry ingredients to the wet mixture, stirring with a spatula or wooden spoon until a soft, pliable dough forms. The dough should be smooth and not sticky. If it feels too sticky, add a tablespoon of flour at a time.
- Shape the cookies: Take about 1 tablespoon of dough and roll it into a rope about 4-5 inches (10-12 cm) long. Fold the rope in half, then twist the two strands together. Pinch the ends lightly to secure them.
- Arrange for baking: Place the twisted cookies on the prepared baking sheets, leaving about 1 inch (2.5 cm) between each cookie as they will expand slightly during baking.
- Bake to perfection: Bake in the preheated oven for 14-16 minutes, or until the cookies are just barely starting to turn golden at the edges. Be careful not to overbake, as they should remain pale for the best melt-in-your-mouth texture.
- Cool completely: Allow the cookies to cool on the baking sheets for 5 minutes, then transfer to a wire rack to cool completely.
- Melt the chocolate: Once the cookies are completely cool, melt the white chocolate in a microwave-safe bowl in 30-second intervals, stirring between each until smooth and fully melted.
- Prepare nuts: Place the finely chopped nuts in a shallow dish or plate.
- Decorate: Dip one end of each twisted cookie into the melted white chocolate, then immediately into the chopped nuts. Place back on parchment paper to set.
- Final touch: While the chocolate is still soft, sprinkle a light dusting of granulated sugar over the cookies for a sparkling finish.
- Set the chocolate: Allow the chocolate to set completely before serving, about 30 minutes at room temperature or 15 minutes in the refrigerator.
Nutritional Information & Timing
Prep Time: 25 minutes
Bake Time: 14-16 minutes per batch
Total Time: Approximately 1 hour 15 minutes
Yield: About 24-28 cookies
Per Cookie (approximate):
- Calories: 170
- Fat: 9g
- Carbohydrates: 20g
- Protein: 2g
- Fiber: 1g
- Sugar: 10g
Cooking Tips and Tricks
- Room temperature egg: Using a room temperature egg helps it incorporate more easily into the dough.
- Lemon zest technique: Use only the yellow part of the lemon skin, avoiding the bitter white pith. A microplane grater works best for this.
- Oil selection: A neutral-flavored oil like canola or sunflower works best, but you can experiment with light olive oil for a subtle flavor variation.
- Cornstarch is key: Don’t skip or reduce the cornstarch – it’s what gives these cookies their signature melt-in-your-mouth texture.
- Proper twisting: When twisting the dough ropes, do so gently to maintain the definition of the twist pattern. If the dough becomes too soft while working, refrigerate it for 10-15 minutes to firm up.
Variations and Substitutions
Flavor Variations
- Citrus twist: Replace lemon zest with orange or lime zest for a different citrus note.
- Spiced version: Add 1/2 teaspoon of ground cinnamon or cardamom to the dry ingredients.
- Almond joy: Add 1/2 teaspoon of almond extract alongside the vanilla sugar.
- Chocolate dough: Replace 2 tablespoons of flour with cocoa powder for a chocolate version.
Coating Options
- Dark chocolate: Substitute white chocolate with semi-sweet or dark chocolate for a less sweet option.
- Colorful treats: Add a few drops of food coloring to the white chocolate for special occasions.
- Sprinkle delight: Roll chocolate-dipped ends in colorful sprinkles instead of nuts for a kid-friendly version.
- Coconut coating: Use shredded coconut instead of nuts for the coating.
Dietary Adaptations
- Gluten-free option: Replace the all-purpose flour with a gluten-free flour blend with xanthan gum.
- Vegan variation: Substitute the egg with a flax egg (1 tablespoon ground flaxseed mixed with 3 tablespoons water, allowed to gel for 15 minutes).
- Less sweet version: Reduce sugar to 75g and use dark chocolate for dipping.
Common FAQs
Q: Why did my cookies spread too much during baking? A: This could happen if the oil proportion is too high or if the dough was too warm. Try chilling the shaped cookies for 15-20 minutes before baking.
Q: Can I make the dough ahead of time? A: Yes! The dough can be refrigerated for up to 2 days. Let it come to room temperature for about 30 minutes before shaping.
Q: My dough is crumbly and won’t hold together. What went wrong? A: The dough may be too dry. Add 1-2 teaspoons of oil or milk, mixing after each addition until the dough holds together when pressed.
Q: How do I know when these cookies are done baking? A: These cookies should remain pale with just the slightest golden color at the edges. They may seem slightly underdone when you remove them from the oven, but they will firm up as they cool.
Q: Can I freeze these cookies? A: Yes! Both the baked cookies and the unbaked dough freeze well. For best results, freeze before adding the chocolate and nut coating.
Storage and Make-Ahead Tips
- Countertop storage: Store fully cooled cookies in an airtight container at room temperature for up to 1 week.
- Refrigerator option: In warm climates, store cookies in the refrigerator to prevent the chocolate coating from melting.
- Freezer storage: Baked cookies can be frozen for up to 3 months. Layer with parchment paper in an airtight container.
- Dough freezing: Shape the twisted cookies, place on a baking sheet, and freeze until solid. Transfer to a freezer bag and store for up to 2 months. Bake directly from frozen, adding 2-3 minutes to the baking time.
- Gift packaging: These elegant cookies make wonderful gifts. Layer them in a decorative tin with parchment paper between layers to prevent sticking.
These meltaway twisted cookies are truly special treats that combine simplicity of ingredients with an elegant presentation. The delicate balance of vanilla, lemon, and the rich coating makes them perfect for special occasions or whenever you want to elevate your cookie game. Their unique texture – firm enough to hold their shape but dissolving as soon as they hit your tongue – is what makes them truly unforgettable!