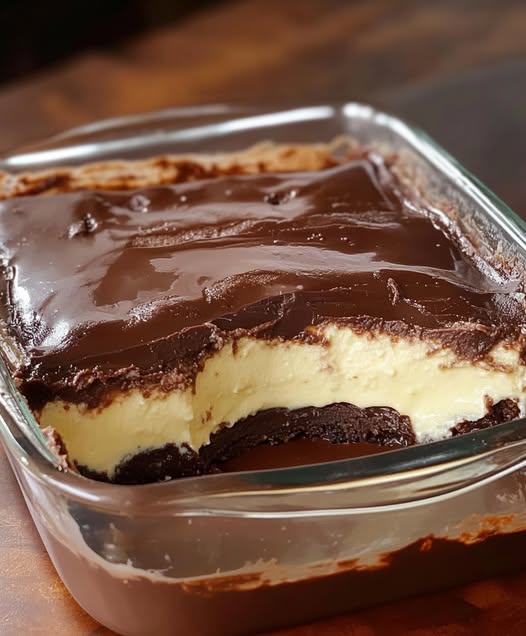
This indulgent layered chocolate delight creates a stunning dessert that showcases three distinct chocolate flavors in perfect harmony. From the rich cocoa base layer to the creamy white chocolate middle and the luxurious dark chocolate top, each spoonful delivers a symphony of textures and tastes that will satisfy even the most discerning chocolate lover.
Perfect for special occasions or when you want to impress guests, this elegant dessert requires patience but rewards you with restaurant-quality results. The contrast between the three chocolate layers creates both visual appeal and complex flavor profiles that make this dessert truly memorable.
Ingredients
For the First Layer (Cocoa Base):
- 500ml (2 cups) fresh whole milk
- 3 tablespoons (45g) granulated sugar
- 2 tablespoons (30g) all-purpose flour
- 1 tablespoon (15g) cornstarch
- 2 tablespoons (20g) unsweetened cocoa powder
- 50g (2 oz) white chocolate, chopped
- 1 teaspoon (5g) unsalted butter
For the Second Layer (White Chocolate):
- 400ml (1⅔ cups) fresh whole milk
- 3 tablespoons (45g) granulated sugar
- 1 tablespoon (15g) cornstarch
- 2 tablespoons (30g) all-purpose flour
- 1 teaspoon vanilla powder (or 1 teaspoon vanilla extract)
- 50g (2 oz) white chocolate, chopped
- 1 teaspoon (5g) unsalted butter
For the Third Layer (Dark Chocolate):
- 100ml (⅓ cup) fresh whole milk
- 150g (5 oz) dark chocolate (70% cocoa), chopped
- 1 tablespoon (15g) unsalted butter
Instructions
Preparing the First Layer (Cocoa Base)
Begin by preparing your serving vessel, whether individual glasses or one large dish that can be portioned later. Have your ingredients measured and ready, as this process requires attention to prevent lumps from forming.
In a medium-sized heavy-bottomed saucepan, pour the fresh milk and set aside 3 tablespoons of milk in a small bowl. To the reserved milk, add the flour, cornstarch, and cocoa powder, whisking vigorously until completely smooth with no lumps remaining. This slurry technique prevents the dry ingredients from clumping when added to hot milk.
Place the saucepan with the remaining milk over medium heat and add the sugar, stirring until dissolved. Slowly pour the cocoa slurry into the warming milk while whisking continuously to prevent lumps from forming. Continue cooking while stirring constantly with a wooden spoon or whisk.
Cook the mixture for 5-8 minutes, stirring continuously, until it begins to thicken and coats the back of your spoon. The consistency should be similar to thick custard. Remove from heat and immediately add the chopped white chocolate, stirring until completely melted and incorporated.
Add the butter and stir until it’s completely dissolved and the mixture is glossy and smooth. The butter adds richness and helps create a silky texture. Pour this first layer into your prepared dish or individual serving glasses, smoothing the top with a spatula. Cover with plastic wrap, pressing it directly onto the surface to prevent a skin from forming, and refrigerate for at least 1 hour until set.
Creating the Second Layer (White Chocolate)
While the first layer is setting, prepare the second layer. In another medium saucepan, pour the milk and set aside 3 tablespoons in a small bowl. To the reserved milk, add the cornstarch, flour, and vanilla powder, whisking until completely smooth.
Heat the remaining milk in the saucepan over medium heat, adding the sugar and stirring until dissolved. Gradually add the flour mixture while whisking continuously to prevent lumps. Cook for 5-7 minutes, stirring constantly, until the mixture thickens to a custard-like consistency.
Remove from heat and add the chopped white chocolate, stirring until completely melted and smooth. The white chocolate will create a creamy, vanilla-scented layer that provides beautiful contrast to the cocoa layer below.
Add the butter and stir until completely incorporated and the mixture is glossy. Allow this layer to cool for 10-15 minutes, stirring occasionally to prevent a skin from forming. This slight cooling prevents the warm mixture from melting the set first layer.
Carefully pour the white chocolate layer over the set cocoa layer, using the back of a spoon to spread it evenly without disturbing the bottom layer. Cover with plastic wrap and refrigerate for another hour until this layer is completely set.
Finishing with the Third Layer (Dark Chocolate)
The final layer is the simplest but requires the highest quality chocolate for the best results. In a small saucepan, heat the milk over medium-low heat until it begins to steam but not boil.
Remove from heat and add the chopped dark chocolate all at once. Let it sit for 2-3 minutes to allow the hot milk to begin melting the chocolate, then stir gently from the center outward until the chocolate is completely melted and the mixture is smooth and glossy.
Add the butter and stir until completely incorporated. The mixture should be smooth and pourable but not too thin. If it seems too thick, add a tablespoon of warm milk; if too thin, let it cool for a few minutes.
Allow this chocolate mixture to cool for 15-20 minutes, stirring occasionally, until it’s warm but not hot. This prevents it from melting the white chocolate layer underneath.
Final Assembly and Setting
Carefully pour the dark chocolate layer over the set white chocolate layer, using a spoon to distribute it evenly across the surface. The weight of the chocolate should naturally create a smooth top, but you can gently shake the dish to level it if needed.
Cover the entire dessert with plastic wrap and refrigerate for 2-3 hours, or preferably overnight, until all layers are completely set and firm. The longer setting time allows the flavors to meld and creates the perfect slicing consistency.
Serving and Presentation
When ready to serve, remove from the refrigerator and let sit at room temperature for 5-10 minutes for easier cutting and optimal flavor. If made in individual glasses, serve directly. If made in a large dish, use a sharp knife dipped in warm water between cuts to create clean slices that showcase all three layers.
Nutritional Information
Serving Size: 1/8 of recipe (approximately 120g) Prep Time: 45 minutes Chill Time: 4-8 hours Total Time: 4 hours 45 minutes – 8 hours 45 minutes Serves: 8
Per Serving:
- Calories: 245
- Protein: 6.2g
- Carbohydrates: 28g
- Dietary Fiber: 2.8g
- Sugars: 24g
- Fat: 12.5g
- Saturated Fat: 7.8g
- Cholesterol: 18mg
- Sodium: 65mg
- Calcium: 155mg
- Iron: 1.8mg
- Magnesium: 35mg
This dessert provides calcium from milk, antioxidants from cocoa and dark chocolate, and moderate protein. While indulgent, it offers some nutritional benefits when enjoyed as part of a balanced diet.
Recipe Variations and Substitutions
Dairy-Free Version
Replace regular milk with full-fat coconut milk or cashew milk for richness. Use dairy-free chocolate varieties and vegan butter substitutes to create a completely dairy-free version.
Sugar-Free Alternative
Substitute granulated sugar with erythritol or stevia-based sweeteners, adjusting quantities according to package directions. Sugar-free chocolate varieties work well for the chocolate components.
Flavor Variations
Add different extracts to each layer such as peppermint extract to the white chocolate layer, orange zest to the cocoa layer, or espresso powder to the dark chocolate layer for sophisticated flavor combinations.
Texture Enhancements
Fold in chopped nuts, crushed cookies, or fresh berries between layers for added texture and flavor complexity. Toasted coconut flakes complement the chocolate flavors beautifully.
Individual Presentation
Create elegant individual servings in wine glasses, parfait glasses, or small mason jars for portion control and impressive presentation at dinner parties.
Lighter Version
Use low-fat milk and reduce butter quantities by half. You can also substitute some of the chocolate with cocoa powder for reduced fat content while maintaining chocolate flavor.
Alcohol Enhancement
Add a tablespoon of liqueur such as Grand Marnier, Kahlúa, or rum to any layer for adult-oriented sophisticated flavors.
Storage and Make-Ahead Tips
This layered chocolate delight actually improves with time, making it perfect for advance preparation. Store covered in the refrigerator for up to 4 days, though it’s best consumed within 2-3 days for optimal texture and flavor.
The dessert can be frozen for up to 1 month, though the texture may become slightly different upon thawing. Thaw overnight in the refrigerator before serving.
For entertaining, this dessert can be completely prepared 1-2 days in advance, making it an excellent choice for dinner parties or special occasions when you want to minimize last-minute preparation.
Frequently Asked Questions
Why did my layers mix together instead of staying separate? The most common cause is pouring a hot layer over a layer that hasn’t fully set, or not allowing sufficient cooling time between layers. Always ensure each layer is completely set before adding the next, and allow warm mixtures to cool to room temperature before pouring.
How can I prevent lumps in my pudding layers? Create a slurry with some of the cold milk and all dry ingredients before adding to the hot milk. Whisk continuously while cooking and strain the mixture if lumps do form. Using a fine-mesh strainer can salvage lumpy mixtures.
Can I make this dessert without cornstarch? Yes, you can substitute additional flour for the cornstarch, though cornstarch creates a smoother, more translucent texture. Use 1.5 times the amount of flour to replace cornstarch, but expect a slightly different texture.
What’s the best way to cut clean slices? Use a sharp knife dipped in warm water and wiped clean between each cut. This prevents the chocolate from sticking to the knife and creating messy edges. Let the dessert sit at room temperature for 10 minutes before cutting for easiest slicing.
Can I use milk chocolate instead of dark chocolate for the top layer? Yes, though the flavor will be sweeter and less intense. You may want to reduce the milk quantity slightly as milk chocolate has a different melting consistency than dark chocolate. The contrast between layers will be less pronounced but still delicious.
This layered chocolate delight represents the pinnacle of home dessert making, combining technique with premium ingredients to create a dessert that rivals professional patisserie creations. The patience required for proper setting is rewarded with a stunning presentation and complex flavor profile that makes every bite a luxurious experience.