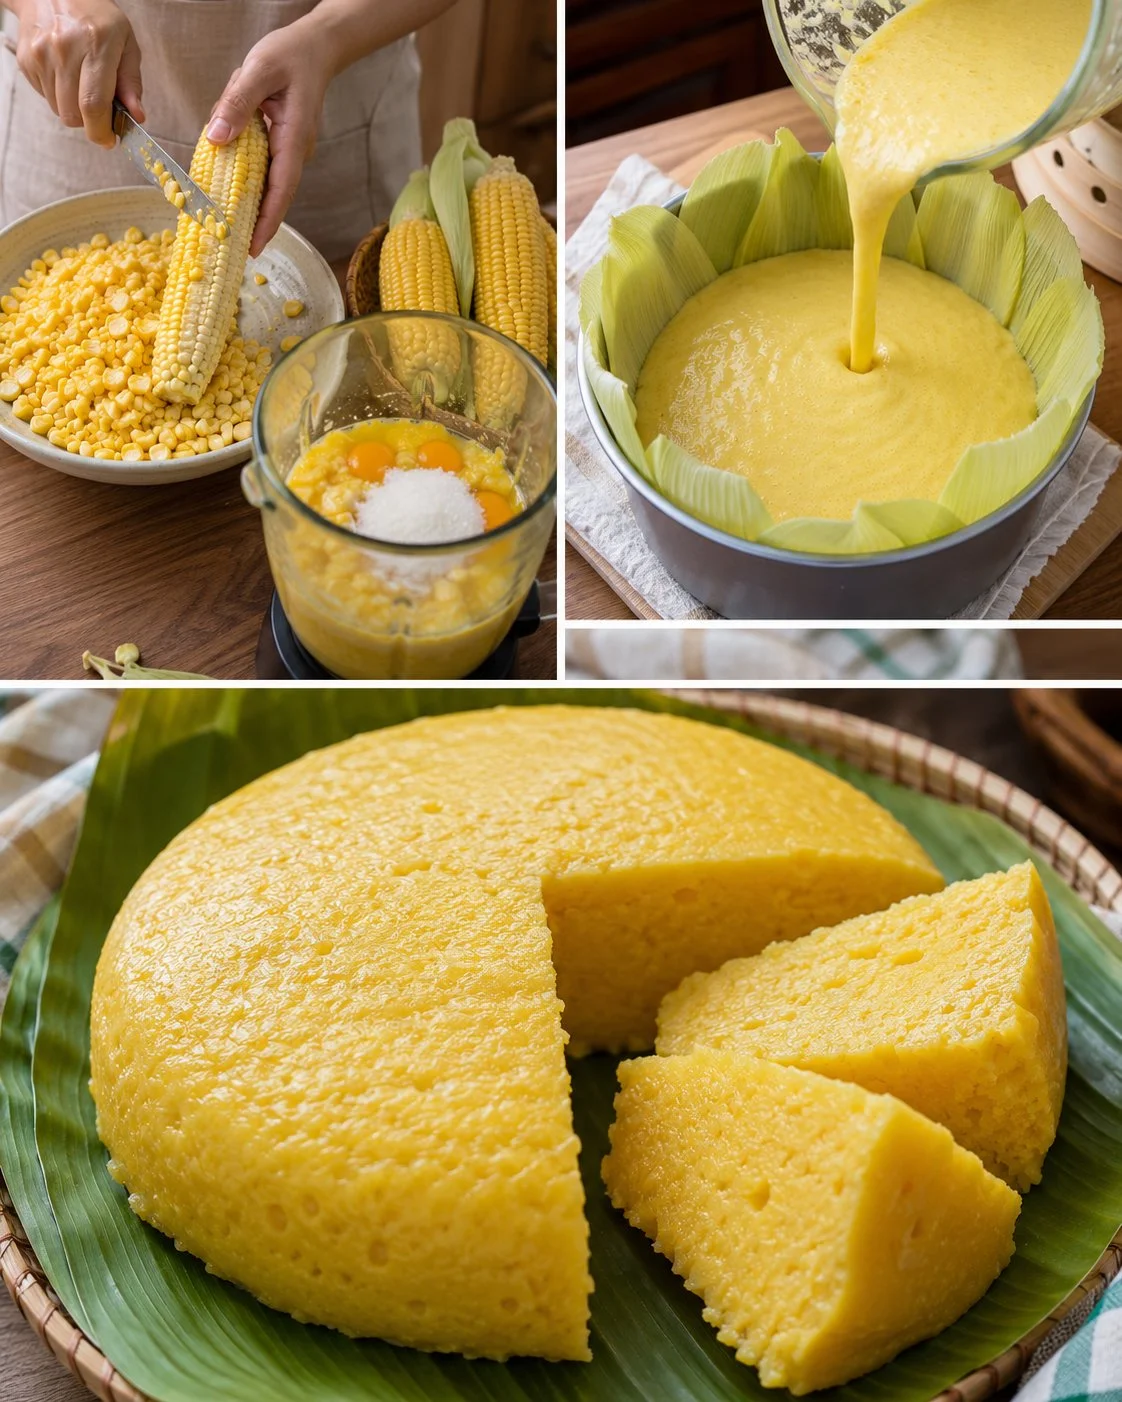
This soft steamed corn cake is the kind of sweet, comforting bake you can make without turning on the oven—perfect for hot days, small kitchens, or anytime you want a tender “tea cake” texture with a cozy corn aroma. It’s naturally gluten-heavy (flour + cornstarch) and typically sweetened, so it’s best enjoyed as a treat or snack rather than positioned as a “healthy” breakfast—especially for anyone trying to manage blood sugar.
If you like gently sweet desserts with a bouncy, steamed crumb (think somewhere between cornbread and a light steamed bun), this one’s for you. The corn husk lining sounds fancy, but it’s mostly practical: it keeps the cake from sticking and adds a subtle, nostalgic corn scent. If you enjoy other not-too-fussy homemade cakes, you might also like this brown sugar sheet cake with Earl Grey cream for a different (richer) dessert vibe.
Why This Recipe Is Helpful
- No oven needed—just a pot/steamer setup, which is great in warm weather.
- Uses real corn kernels for naturally sweet flavor and pleasant texture.
- The batter is simple: blend, rest, steam—no complicated folding or whipping.
- Corn husks help with easy release and make the cake feel special for guests.
- Easy to customize with raisins or nuts based on what you have.
- Makes a satisfying snack portion; you can slice thinly for mindful servings.
Who This Recipe Is Best For
This is great for home cooks who like lightly sweet, tender cakes and want something a little different from standard baked desserts. It’s also a nice option for families who want a homemade snack that feels comforting and filling (corn + eggs + flour make it more substantial than many quick sweets).
If you enjoy playful textures—soft, springy, and moist rather than fluffy and crumbly—you’ll probably love how steaming changes the crumb. It’s especially good served warm, when the corn aroma is strongest.
Who Should Be Careful
- People managing blood sugar: this recipe includes flour, cornstarch, and added sugar, so it can spike carbs quickly. If you enjoy it, consider smaller portions and pairing with protein (like yogurt or milk) rather than eating it alone.
- Anyone avoiding gluten: it uses all-purpose flour, so it’s not gluten-free as written.
- Nut allergies: skip the nuts entirely if serving to anyone with allergies (and watch cross-contamination).
- Those sensitive to very sweet snacks: keep the sugar on the lower end; the corn brings its own sweetness.
Ingredients
- Fresh corn kernels: 400 g (about 3 cups / 520 g on-the-cob yields vary)
- Eggs: 3 large
- Granulated sugar: 1/3 to 1/2 cup (65–100 g), to taste
- Instant yeast: 1 teaspoon (about 3 g)
- All-purpose flour: 1 2/3 cups (200 g)
- Cornstarch: 3/4 cup (100 g)
- Vegetable oil: 1 teaspoon (5 g)
- Optional: raisins: 1/4 cup (40 g)
- Optional: chopped nuts (walnuts or almonds): 1/4 cup (30–35 g)
- For lining the mold: fresh corn husks (enough to fully line and cover)
Ingredient Notes
- Fresh corn kernels: The fresher and sweeter the corn, the better. If your corn is very starchy (late-season), you may want a touch more sugar for balance.
- Sugar: I prefer starting at 1/3 cup (65 g) since corn is naturally sweet, then increasing next time if you want it more dessert-like.
- Yeast: This small amount helps give a gentle lift and a lighter bite. Don’t expect a big rise like bread—think subtle.
- Cornstarch + flour: Cornstarch makes the crumb more tender and springy. Too much flour can make it bready, so measure as accurately as you can.
- Corn husks: They’re both “nonstick lining” and flavor. If your husks tear, just overlap them—steaming is forgiving.
Kitchen Tools Needed
- Steamer pot or large pot with steaming rack
- Large bowl (or a deep heatproof bowl that fits your steamer)
- Blender or food processor
- Kitchen scissors or a sharp knife (for removing kernels)
- Measuring cups/spoons or kitchen scale
- Parchment (optional backup if husks are scarce)
Step-by-Step Instructions
- Soften the corn husks. Peel off the tough outer layers and keep the soft, flexible husks. Soak them in hot water for 3–5 minutes until pliable, then drain.
- Cut the kernels off the cobs. Use kitchen scissors or a knife to remove kernels. Rinse the kernels and drain well (excess water can thin the batter).
- Blend the base. Add most of the corn kernels to a blender with the eggs and sugar. Blend until mostly smooth, but stop while you still see some small corn bits (that texture is lovely in the final cake).
- Add yeast. Pour the blended mixture into a mixing bowl, stir in the yeast, and let it sit 2–3 minutes to hydrate.
- Mix in dry ingredients and oil. Stir in the flour and cornstarch gradually until you have a thick, pourable batter (like pancake batter but slightly thicker). Stir in the vegetable oil.
- Rest the batter. Cover and let it rest for 30 minutes at room temperature. It should look a bit puffier and feel slightly lighter when stirred.
- Line the bowl with husks. Arrange husks in a deep bowl so they overlap and come about one-third up and over the rim. Add an extra layer on the bottom where sticking happens most.
- Fill and top. Pour in the batter. Sprinkle raisins and/or nuts over the top if using. Cover the surface with an oiled husk layer (a light wipe of oil helps prevent sticking).
- Fold to cover. Fold the overhanging husks over the top to seal. If you have a small piece of corn cob, set it on top to help keep the husks in place.
- Steam. Place in the steamer over actively simmering water. Steam for 35 minutes, keeping the lid on (try not to peek).
- Rest before unmolding. Turn off heat and let the cake sit for 5 minutes. Carefully unwrap and slice. It should feel set and spring back lightly when pressed.
Pro Tips
- Keep the water at a steady simmer: aggressive boiling can splash water into the steamer and make the cake gummy.
- If your blender makes the corn very watery, hold back 2–3 tablespoons of flour and adjust after mixing.
- Overlap husks like shingles so batter can’t seep out through gaps.
- For the best texture, don’t over-blend the corn completely smooth—tiny bits give it character.
- Let it rest the full 5 minutes after steaming; it slices cleaner and feels less sticky.
Healthier or Lighter Swaps
- Reduce the sugar: Start with 1/3 cup (65 g), especially if your corn is sweet. It will still taste like dessert, just less sugary.
- Add nuts instead of raisins (or use fewer add-ins): Nuts add crunch and a bit more staying power, while raisins add extra sweetness.
- Serve smaller portions: This cake is satisfying—thin slices go a long way alongside fruit or yogurt.
Common Mistakes
- Not draining the corn well: extra water can make the crumb dense and wet.
- Packing the flour too tightly: it can turn the cake bready instead of tender; spoon and level or use a scale.
- Opening the steamer repeatedly: heat loss can cause uneven cooking and a gummy center.
- Skipping the batter rest: the texture is noticeably better with the 30-minute rest.
Variations
- Raisin-cinnamon version: add 1/2 teaspoon cinnamon (1 g) to the batter for a warm flavor.
- Coconut twist: replace part of the sugar with 2 tablespoons (15 g) shredded coconut for a gentle coconut aroma.
- Extra-corn texture: stir in a small handful of reserved whole kernels at the end for more “pop.”
- Less sweet snack cake: reduce sugar and skip raisins; add toasted nuts for a more snacky, less dessert-like feel.
Serving Suggestions
- Serve warm with sliced fruit (mango, berries, or oranges are great).
- For a more balanced snack, pair with plain yogurt or a glass of milk.
- If you’re serving it as dessert, a small drizzle of honey or a spoon of lightly sweetened whipped cream works nicely—but it’s optional.
Storage Instructions
- Cool completely, then wrap well or store in an airtight container.
- Refrigerate for up to 3 days (steamed cakes keep best chilled).
- For longer storage, slice and freeze for up to 2 months with parchment between pieces.
Reheating Tips
- Best method: steam slices for 3–5 minutes until warmed through and springy again.
- Microwave works in a pinch: cover with a damp paper towel and heat in short bursts (10–15 seconds) to avoid drying out.
Nutrition Estimate
Per serving (based on 8 servings; without optional raisins/nuts): ~210 calories, 6 g protein, **40