
Ricotta Cheesecake with Hazelnut Crust & Fresh Strawberries
Introduction
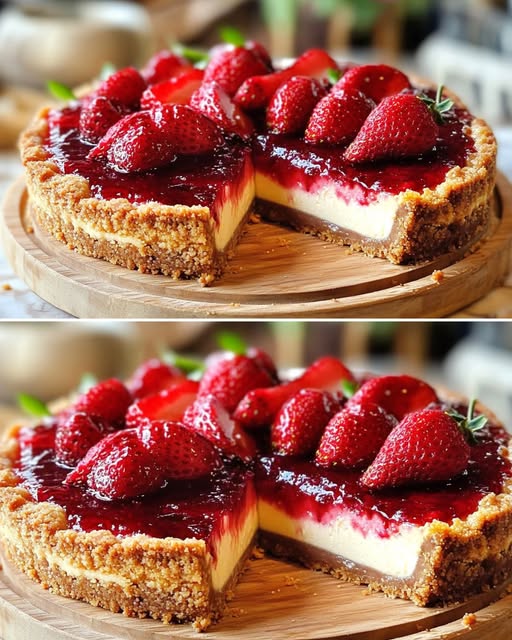
Indulge in the delightful creamy texture and subtle sweetness of this Italian-inspired ricotta cheesecake. This elegant dessert combines the light, airy quality of ricotta with a nutty hazelnut crust for a perfect balance of flavors and textures. Topped with bright strawberries and sweet jam, this cheesecake makes an impressive centerpiece for any occasion, from casual family gatherings to special celebrations. The beauty of this recipe lies in its simplicity – a true testament to the Italian culinary philosophy that quality ingredients need minimal interference to shine.
Ingredients
For the Hazelnut Crust:
- 160g (1¼ cups) type 00 flour
- 70g (⅔ cup) hazelnut flour
- 100g (½ cup) brown sugar
- 5g (1 teaspoon) baking powder
- 1 teaspoon vanilla extract
- 80g (⅓ cup) butter, cold and cubed
- 1 whole egg
- Zest of 1 lemon
For the Ricotta Filling:
- 400g (1¾ cups) ricotta cheese
- 1 jar (150g/5.3oz) natural yogurt
- 125g (⅔ cup) granulated sugar
- 1 teaspoon vanilla extract
- Zest of 1 lemon
- 3 large eggs
For the Topping:
- 4-5 tablespoons of your favorite jam (strawberry or berry works well)
- 200g (1½ cups) fresh strawberries, sliced
Instructions
- Prepare your equipment: Preheat your oven to 170°C (338°F). Grease and line a 20-22cm (8-9 inch) springform cake tin with parchment paper.
- Make the hazelnut crust: In a large mixing bowl, combine the 00 flour, hazelnut flour, brown sugar, and baking powder. Mix well to ensure even distribution of ingredients.
- Add the cold, cubed butter to the flour mixture and use your fingertips to rub it in until you achieve a sandy, crumbly texture.
- Add the whole egg, vanilla extract, and lemon zest to the mixture. Mix everything together until a smooth dough forms.
- Wrap the dough in plastic wrap and refrigerate for at least 30 minutes to allow it to rest and firm up.
- Prepare the ricotta filling: While the dough is resting, place the ricotta in a large bowl and whisk until smooth and creamy.
- Add the yogurt, granulated sugar, vanilla extract, and lemon zest to the ricotta. Mix thoroughly until well combined.
- Add the eggs one at a time, mixing well after each addition to ensure a smooth, homogeneous filling.
- Assemble the cheesecake: Remove the chilled dough from the refrigerator and place it on a lightly floured surface.
- Roll out the dough to a thickness of about 5mm (¼ inch), making sure it’s large enough to line your cake tin with some overhang.
- Carefully transfer the rolled dough to the prepared cake tin, gently pressing it against the bottom and up the sides to create a crust. Trim any excess dough from the edges.
- Pour the ricotta filling into the crust, smoothing the top with a spatula.
- Bake the cheesecake: Place the cake tin in the preheated oven and bake for 45-50 minutes, or until the filling is set but still has a slight wobble in the center.
- Once baked, turn off the oven and leave the cheesecake inside with the door slightly ajar for about 30 minutes to prevent it from cracking due to sudden temperature changes.
- Remove from the oven and allow to cool completely at room temperature.
- Decorate and serve: Once completely cooled, carefully transfer the cheesecake to a serving plate.
- Spread a layer of jam evenly over the top of the cheesecake.
- Arrange the sliced strawberries decoratively over the jam layer.
- Refrigerate for at least 2 hours before serving to allow the flavors to meld together and the cheesecake to set completely.
Nutritional Information and Timing
Preparation Time: 30 minutes Resting Time: 30 minutes Baking Time: 45-50 minutes Cooling Time: 2-3 hours Total Time: 4 hours Serves: 8-10 slices
Nutritional Information (per slice, based on 10 servings):
- Calories: 320 kcal
- Carbohydrates: 35g
- Protein: 9g
- Fat: 16g
- Saturated Fat: 8g
- Cholesterol: 95mg
- Fiber: 2g
- Sugar: 24g
- Sodium: 95mg
Cooking Tips and Tricks
- Room temperature ingredients: Allow the ricotta, yogurt, and eggs to come to room temperature before mixing. This ensures a smoother filling with fewer lumps.
- Perfectly smooth ricotta: For an ultra-smooth filling, pass the ricotta through a fine-mesh sieve before mixing with the other ingredients.
- Prevent crust shrinkage: When lining the cake tin with dough, make sure it’s not stretched too thin, as this can cause shrinkage during baking. Let the dough rest in the refrigerator for the full 30 minutes to prevent shrinkage.
- Baking perfection: To check if your cheesecake is done, gently shake the pan – the center should have a slight wobble but not be liquid. The edges should be set and lightly golden.
- Preventing cracks: Avoid opening the oven door during baking, as sudden temperature changes can cause your cheesecake to crack. The slow cooling method (leaving it in the turned-off oven with the door ajar) helps prevent cracks.
- Chilling for best results: For the best flavor and texture, refrigerate the cheesecake for at least 2 hours or overnight before serving. This allows the flavors to develop fully.
Variations and Substitutions
- Alternative nuts: If hazelnuts aren’t available, substitute with almond flour, walnut flour, or even ground pistachios for a different flavor profile.
- Gluten-free option: Replace the 00 flour with a gluten-free all-purpose flour blend at a 1:1 ratio to make this dessert suitable for those with gluten sensitivities.
- Dairy alternatives: For a lighter version, use low-fat ricotta and yogurt. For a dairy-free version, substitute with dairy-free alternatives like almond-based yogurt and tofu-based “ricotta.”
- Seasonal fruit toppings: Adapt the topping to whatever fruits are in season – blueberries, raspberries, peaches, or figs all work beautifully. In winter, try poached pears or citrus segments.
- Flavor variations: Add a tablespoon of limoncello to the filling for a more pronounced lemon flavor, or substitute the vanilla extract with almond extract for a different aromatic note.
- Chocolate lover’s version: Add 2 tablespoons of cocoa powder to the crust mixture and fold 100g of chocolate chips into the ricotta filling for a chocolatey twist.
Common FAQs
Why is my ricotta filling grainy?
Ricotta naturally has some texture. For a smoother cheesecake, pass the ricotta through a fine-mesh sieve before mixing, or blend it in a food processor until smooth. Also, ensure all ingredients are at room temperature before mixing.
Can I make this cheesecake ahead of time?
Absolutely! This cheesecake actually improves with time as the flavors meld together. You can make it up to 2 days ahead of serving. Add the fresh fruit topping just before serving for the best presentation.
My cheesecake cracked during baking. What went wrong?
Cracks usually occur due to sudden temperature changes or overbaking. Next time, try using a water bath (placing the springform pan in a larger pan filled with hot water) during baking, and follow the slow cooling method described in the recipe.
Can I freeze this ricotta cheesecake?
Yes, you can freeze the baked and cooled cheesecake (without the toppings) for up to 1 month. Wrap it well in plastic wrap and aluminum foil. Thaw overnight in the refrigerator and add the toppings before serving.
What’s the difference between ricotta cheesecake and regular cheesecake?
Ricotta cheesecake has a lighter, slightly grainy texture compared to the dense creaminess of traditional cream cheese cheesecakes. The Italian-style version has a more subtle sweetness and a unique flavor profile that pairs wonderfully with fruit.
Storage and Make-Ahead Tips
- Refrigeration: Store the cheesecake covered in the refrigerator for up to 5 days. The flavors will continue to develop during this time, often making it even more delicious on the second or third day.
- Freezing: To freeze, wrap the plain cheesecake (without jam or fruit topping) tightly in plastic wrap, then in aluminum foil. Freeze for up to 1 month. Thaw overnight in the refrigerator before decorating and serving.
- Make-ahead components: The hazelnut crust dough can be made up to 2 days ahead and stored in the refrigerator, or frozen for up to a month. The ricotta filling can be prepared a day ahead and stored covered in the refrigerator.
- Topping preparation: Prepare the jam layer up to a day in advance, but add the fresh strawberries just before serving to ensure they stay fresh and vibrant.
- Serving suggestions: For an elegant presentation, dust the edges of the cheesecake with powdered sugar and garnish with fresh mint leaves. Serve with a dollop of whipped cream or a scoop of vanilla ice cream for an extra indulgent treat.
This homemade ricotta cheesecake brings together the best of Italian baking traditions – quality ingredients, simple preparation, and a result that’s both rustic and refined. The combination of the nutty hazelnut crust with the creamy ricotta filling creates a perfect canvas for seasonal fruits, making this a versatile dessert that can be adapted throughout the year. Whether served at a family gathering or as the finale to an elegant dinner party, this cheesecake is sure to impress with its beautiful appearance and delightful flavor profile.