Introduction
Discover the ultimate guilt-free dessert that satisfies your sweet cravings without compromising your healthy lifestyle! This no-bake, sugar-free, low-carb cheesecake delivers all the creamy decadence of traditional cheesecake with a fraction of the carbs and calories. The nutty crust pairs perfectly with the velvety smooth filling, creating a dessert experience so indulgent you won’t believe it’s actually good for you. Best of all, this quick and easy recipe requires no oven, no heavy cream, and no condensed milk—just simple, wholesome ingredients that come together in a flash. Whether you’re following a keto diet, watching your sugar intake, or simply looking for healthier dessert options, this cheesecake is about to become your new favorite treat!
Ingredients
For the Crust:
- 100g peanut or almond flour (approximately 1 cup)
- 50g cream cheese, softened (approximately 1.8 oz or 3½ tablespoons)
- 3 tablespoons culinary sweetener (such as erythritol, monk fruit, or your preferred sugar substitute)
- ½ teaspoon ground cinnamon
For the Filling:
- 400g light cream cheese, softened (approximately 14 oz)
- 2 tablespoons culinary sweetener (or any sweetener you prefer)
- 450g unsweetened natural yogurt (approximately 1¾ cups)
- ½ cup skimmed milk powder (approximately 50g)
- 1 tablespoon unflavored, colorless gelatin
- 3 tablespoons cold water (for blooming the gelatin)
For Garnish (Optional):
- Ground cinnamon for dusting
- Lemon zest
- Fresh berries (a small amount won’t significantly increase the carb count)
Instructions
Preparing the Crust:
- Line the bottom of an 8-inch (20cm) springform pan with parchment paper and lightly grease the sides.
- In a medium bowl, combine the peanut or almond flour, softened cream cheese, sweetener, and ground cinnamon.
- Mix with a fork until the mixture resembles coarse crumbs and begins to clump together. If needed, use your hands to fully incorporate the ingredients.
- Press the mixture firmly and evenly into the bottom of the prepared springform pan.
- Place the crust in the refrigerator to firm up while you prepare the filling.
Preparing the Filling:
- In a small bowl, sprinkle the gelatin over 3 tablespoons of cold water and let it stand for 5 minutes to bloom.
- After blooming, microwave the gelatin mixture for 10-15 seconds or until just melted, then set aside to cool slightly but not set.
- In a large mixing bowl, beat the softened cream cheese and sweetener until smooth and fluffy.
- Add the unsweetened yogurt and skimmed milk powder to the cream cheese mixture and beat on medium speed until well combined and smooth.
- With the mixer on low speed, slowly pour in the melted gelatin, continuing to mix until fully incorporated.
Assembling and Setting:
- Remove the crust from the refrigerator and pour the cream cheese filling over it, smoothing the top with a spatula.
- Gently tap the pan on the counter a few times to release any air bubbles.
- Refrigerate the cheesecake for at least 4 hours, preferably overnight, until fully set.
- Before serving, carefully run a thin knife around the edge of the pan to loosen the cheesecake, then release the springform.
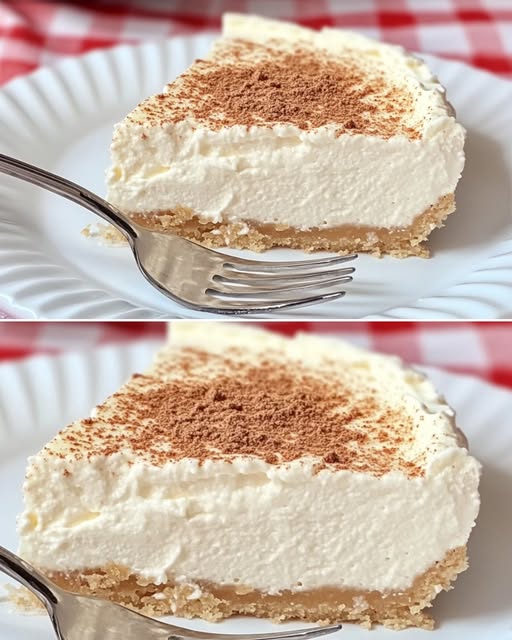
- If desired, dust the top lightly with ground cinnamon for garnish.
- Slice and serve chilled.
Nutritional Information and Timing
Prep Time: 20 minutes Setting Time: 4 hours (minimum) Total Time: 4 hours 20 minutes (including setting time) Servings: 10 slices
Nutritional Information (per serving):
- Calories: 133
- Carbohydrates: 7g
- Protein: 8g
- Fat: 8g
- Fiber: Approximately 1g (varies based on type of nut flour used)
- Net Carbs: Approximately 6g
Cooking Tips and Tricks
- Room temperature ingredients: Use cream cheese at room temperature for a smoother filling with no lumps. Cold cream cheese won’t blend as easily and may leave chunks in your filling.
- Perfect gelatin: To ensure your gelatin dissolves properly, always bloom it in cold water first, then heat just until melted. If it’s too hot when added to your mixture, it can create stringy bits in your filling.
- Crust consistency: The crust should be slightly sticky but still crumbly. If it’s too dry, add a little more cream cheese; if too wet, add a bit more nut flour.
- Sweetener adjustments: Different sweeteners vary in intensity, so taste your mixture before adding the gelatin and adjust the sweetness to your preference.
- Clean slicing: For picture-perfect slices, warm your knife in hot water and wipe it clean between each cut.
- Prevent moisture: If condensation forms on top of your cheesecake while refrigerating, gently blot it with a paper towel before serving.
Variations and Substitutions
- Nut-free option: Replace the nut flour with unsweetened shredded coconut or a mixture of sunflower seed flour and ground flaxseed for a nut-free crust.
- Flavor variations: Add 1 teaspoon of vanilla extract, lemon zest, or a dash of almond extract to the filling for different flavor profiles.
- Yogurt substitutions: Greek yogurt can be substituted for regular yogurt for a tangier, thicker filling with even more protein.
- Dairy-free adaptation: Use dairy-free cream cheese and coconut yogurt in place of traditional dairy products. Note that nutritional values will change.
- Chocolate version: Add 2 tablespoons of unsweetened cocoa powder to the filling and an additional tablespoon of sweetener for a chocolate cheesecake variation.
- Berry swirl: Purée a small handful of berries with a dash of sweetener and swirl into the top of the filling before refrigerating for a beautiful and flavorful accent.
Common FAQs
Why didn’t my cheesecake set properly?
The most common reason is that the gelatin wasn’t fully dissolved or was added when too hot or too cold. Make sure it’s completely dissolved but just warm, not hot, when adding to your mixture. Also, ensure you’re using the full tablespoon of gelatin.
Can I freeze this cheesecake?
Yes! This cheesecake freezes well for up to 1 month. Wrap individual slices or the whole cake tightly in plastic wrap, then in aluminum foil. Thaw in the refrigerator overnight before serving.
How long does this cheesecake last in the refrigerator?
When stored properly in an airtight container, this cheesecake will keep fresh for up to 5 days in the refrigerator.
Can I use regular sugar instead of a sugar substitute?
Yes, but this will no longer be a sugar-free dessert. Regular sugar can be substituted in equal amounts, though the carbohydrate content will increase significantly.
Why use skimmed milk powder in the recipe?
Skimmed milk powder adds creaminess and structure without the added fat of heavy cream or the extra carbs of condensed milk. It’s a clever way to achieve that perfect cheesecake texture while keeping the recipe lower in calories.
Storage and Make-Ahead Tips
- Make-ahead option: This cheesecake is perfect for preparing 1-2 days before you plan to serve it, as the flavors continue to develop during refrigeration.
- Proper storage: Always store the cheesecake covered in the refrigerator to prevent it from absorbing other food odors.
- Individual portions: For portion control and convenient serving, consider making individual mini cheesecakes in a muffin tin lined with paper liners.
- Freezing instructions: To freeze, place the unmolded cheesecake on a cardboard round, wrap in plastic wrap and then aluminum foil. Freeze for up to 1 month. Thaw overnight in the refrigerator.
- Serving from frozen: For a cheesecake ice cream-like texture, serve slices only partially thawed (about 20 minutes at room temperature).
- Topping storage: If you plan to add fruit toppings, add them just before serving rather than before storage to maintain the best texture and prevent moisture from softening the top of the cheesecake.