
Mom’s Famous Cream Puffs Recipe
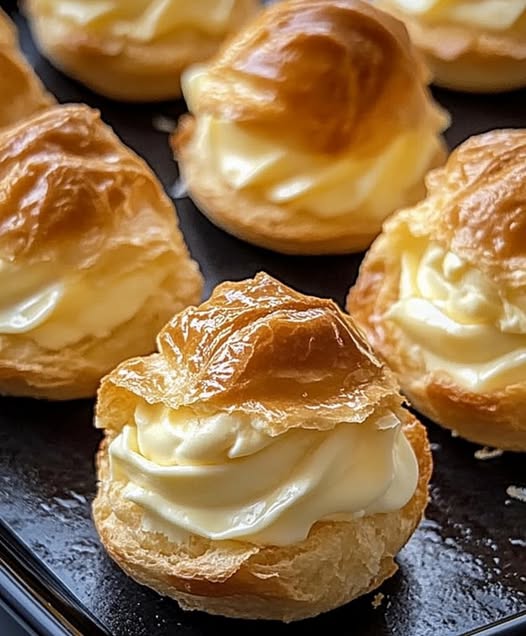
There’s something magical about biting into a perfectly made cream puff – that delicate crisp shell giving way to a cloud-like interior, filled with creamy, dreamy vanilla custard. Mom’s Famous Cream Puffs Recipe has been passed down through generations, bringing smiles to family gatherings and becoming the star of any dessert table. These impressive yet surprisingly simple pastries will make everyone think you’ve spent years perfecting your baking skills, when in reality, they’re quite approachable for home bakers of all levels.
Ingredients
For the Pastry:
- 8 tbsp (113g/1 stick) butter
- 240ml (1 cup) water
- 5g (1 tsp) sugar
- 5ml (1 tsp) vanilla extract
- 125g (1 cup) all-purpose flour
- 4 large eggs
For the Filling:
- 475ml (1 pint) heavy cream
- 1 package (3.4 oz/96g) instant vanilla pudding mix
- 80ml (⅓ cup) milk
- Confectioner’s sugar for dusting
Instructions
FIRST STEP:
- Preheat your oven to 400°F (200°C) and line a baking tray with parchment paper.
- In a medium saucepan, combine the butter, water, and sugar.
- Bring the mixture to a full boil over medium heat, stirring occasionally.
- Once boiling, add all the flour at once and stir vigorously with a wooden spoon.
- Continue stirring constantly until the mixture forms a smooth ball and pulls away from the sides of the pan, about 1-2 minutes.
SECOND STEP:
- Transfer the dough to a mixing bowl and let it cool for about 5 minutes. The dough should be warm but not hot to the touch.
- Add the vanilla extract to the cooled dough and mix well.
- Add the eggs one at a time, beating thoroughly after each addition until completely incorporated. The dough will initially look separated but will come together as you continue beating.
- The final dough should be smooth, glossy, and thick enough to hold its shape when piped or spooned.
THIRD STEP:
- Transfer the dough to a piping bag fitted with a large round tip (or use a zip-top bag with the corner snipped off).
- Pipe mounds of dough about 1.5-2 inches (4-5 cm) in diameter onto the prepared baking sheet, spacing them about 2 inches (5 cm) apart. If using spoons, drop heaping tablespoons of dough.
- Smooth any pointy tops with a moistened fingertip to prevent burning.
- Bake at 400°F (200°C) for 15 minutes.
- Without opening the oven door, reduce the temperature to 350°F (175°C) and continue baking for an additional 15 minutes, or until the puffs are golden brown and feel hollow when tapped.
FOURTH STEP:
- Remove the baking tray from the oven.
- Working quickly, use a small sharp knife to make a small slit in the side of each puff to allow the steam to escape.
- This crucial step prevents the puffs from becoming soggy inside.
FIFTH STEP:
- Allow the cream puffs to cool completely on a wire rack.
- While they are cooling, prepare the filling.
SIXTH STEP:
- In a large bowl, combine the heavy cream, milk, and instant vanilla pudding mix.
- Beat with an electric mixer on medium speed until the mixture is smooth and thickened to a pipeable consistency, about 2-3 minutes.
- Once the puffs are completely cool, carefully slice each puff horizontally in half.
- Spoon or pipe a generous amount of the filling onto the bottom half of each puff.
- Place the top half over the filling.
- Just before serving, dust the tops with confectioner’s sugar for a beautiful finishing touch.
Nutritional Information and Timing
Prep Time: 20 minutes
Cook Time: 30 minutes
Cooling Time: 30 minutes
Total Time: 1 hour 20 minutes
Yield: About 12-16 cream puffs, depending on size
Nutritional Information (per cream puff, approximate):
- Calories: 230
- Total Fat: 18g
- Saturated Fat: 11g
- Cholesterol: 110mg
- Sodium: 125mg
- Total Carbohydrates: 14g
- Dietary Fiber: 0g
- Sugars: 5g
- Protein: 4g
Cooking Tips and Tricks
- Temperature Matters: Make sure your ingredients are at the right temperature. Eggs should be at room temperature to incorporate more easily into the dough.
- Perfect Puffs: The secret to high-rising cream puffs is properly beating in the eggs. Each egg should be completely incorporated before adding the next one.
- Oven Door Rule: Never open the oven door during the first 20 minutes of baking, as the sudden temperature change can cause the puffs to collapse.
- Steam Release: Don’t skip the step of cutting a slit in the puffs right after baking. This releases steam and prevents them from becoming soggy.
- Dough Consistency: The dough should be thick enough to hold its shape when piped but not so stiff that it’s difficult to pipe. If it’s too runny, your puffs may not rise properly.
- Shiny Tops: For an extra golden, shiny top, you can lightly brush the puffs with an egg wash (1 beaten egg with 1 tablespoon of water) before baking.
Variations and Substitutions
- Chocolate Cream Puffs: Add 2 tablespoons of cocoa powder to the flour before incorporating it into the boiling mixture. Fill with chocolate pudding instead of vanilla.
- Dairy-Free Option: Substitute the butter with dairy-free margarine and use coconut cream instead of heavy cream. Use a dairy-free pudding mix as well.
- Savory Puffs: Omit the sugar and vanilla, add a pinch of salt and herbs to the dough, and fill with chicken salad, egg salad, or seafood mixture for appetizers.
- Homemade Pudding: Replace the instant pudding with homemade pastry cream for a more gourmet touch.
- Flavor Variations: Add different extracts to the dough (almond, lemon, etc.) or mix different flavors into the filling such as coffee, strawberry, or lemon.
- Gluten-Free Version: Substitute the all-purpose flour with a gluten-free flour blend. The texture may be slightly different, but they will still rise nicely.
Common FAQs
Why did my cream puffs collapse?
The most common reasons are opening the oven door too early during baking, not baking them long enough, or not allowing the steam to escape immediately after baking. Make sure to follow the proper baking time and make that slit right away!
Can I make the cream puffs ahead of time?
Yes! The unfilled shells can be made 1-2 days ahead and stored in an airtight container at room temperature. You can also freeze the baked shells for up to 1 month. The filling should be made no more than 24 hours in advance and stored in the refrigerator.
Why is my choux pastry dough too runny?
This could be because the dough wasn’t cooked long enough on the stove to remove sufficient moisture, or the eggs were added while the dough was still too hot, which can cook the eggs and prevent proper incorporation.
How do I know when cream puffs are done baking?
Properly baked cream puffs should be golden brown, feel light for their size, and sound hollow when tapped on the bottom. If in doubt, it’s better to bake them a few minutes longer than to underbake.
Can I use a different filling?
Absolutely! While vanilla pudding and cream is traditional, you can fill cream puffs with ice cream, whipped cream alone, or flavored pastry creams. They’re also delicious with savory fillings for appetizers.
Storage and Make-Ahead Tips
- Unfilled Shells: Store in an airtight container at room temperature for 1-2 days, or freeze for up to 1 month. To refresh and crisp them up, place in a 300°F (150°C) oven for about 5 minutes.
- Filled Cream Puffs: Once filled, cream puffs should be refrigerated and are best consumed within 24 hours to prevent the shells from becoming soggy.
- Freezing: You can freeze the unfilled baked shells in an airtight container for up to a month. Thaw at room temperature and crisp in a 300°F (150°C) oven for 5 minutes before filling.
- Make-Ahead Filling: The filling can be prepared up to 24 hours in advance and stored covered in the refrigerator. Give it a quick whisk before using if it has stiffened too much.
- Assembly Timing: For the best texture contrast, fill the cream puffs as close to serving time as possible. If you must fill them in advance, keep them refrigerated and bring to room temperature for about 15-20 minutes before serving.
Mom’s Famous Cream Puffs have delighted family and friends for generations with their perfect balance of light, airy shells and rich, creamy filling. Whether you’re making them for a special occasion or just because, these classic pastries are sure to become a beloved recipe in your household too. The joy of watching people bite into these delectable treats is worth every minute spent in the kitchen!