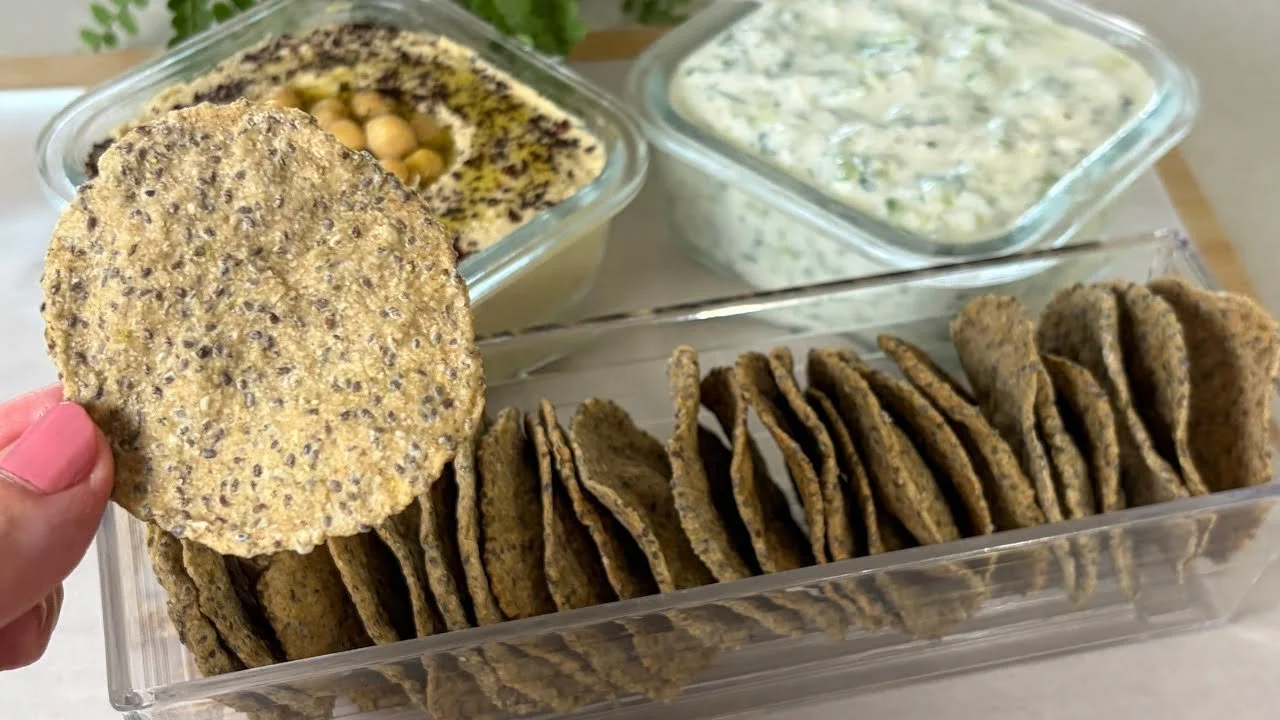
These oat-and-chia crackers are the kind of simple, pantry snack I make when I want something crunchy without fussing with yeast, kneading, or fancy ingredients. You’ll stir together a quick chia “gel,” mix it with oat flour and seasoning, then bake until crisp. They’re great for lunchboxes, soup nights, and grazing boards, and they happen to be naturally gluten-free if you use certified gluten-free oats. If you’re already a chia fan, you might also like this quick sweet option: sugar-free chocolate chia mousse.
Why This Recipe Is Helpful
- Uses a short ingredient list and no oil required (just a little on your hands if needed).
- Chia makes the dough easy to shape without eggs, and helps the crackers crisp as they bake.
- Easy to customize with different herbs and spices depending on what you’re serving them with.
Best For
Anyone who wants a simple homemade cracker for dips, soups, or snack plates, especially if you like hearty, seedy crunch.
Be Careful If
These are quite high in fiber from the chia and oats, so keep portions comfortable if you’re not used to lots of fiber at once. Also double-check oats if you need certified gluten-free.
Ingredients
- Rolled oats, blended into flour: 1 cup (90 g)
- Or oat flour: 90 g (about 1 cup)
- Chia seeds: 4 tablespoons (40 g)
- Water: 3/4 cup (180 ml)
- Fine salt: 1/4 teaspoon
- Baking powder: 1/2 teaspoon
- Dried oregano (or other dried herb/spice): 1 teaspoon
- Optional for handling: 1 teaspoon olive oil (to lightly oil your palms)
Ingredient Notes
- Oat flour: Blending rolled oats works perfectly; just blend until very fine so the crackers aren’t gritty.
- Chia seeds: They must soak to form a gel—this is what binds the dough.
- Seasoning: Oregano is great, but garlic powder, smoked paprika, za’atar, or chili flakes also work well.
- Water amount: If your dough feels dry after resting, add 1–2 teaspoons water; if it’s too sticky, dust in a little extra oat flour.
Kitchen Tools Needed
- Blender or food processor (if making oat flour)
- Mixing bowls
- Measuring cups/spoons
- Baking sheet
- Parchment paper
- Glass (for flattening)
- Spatula (helpful for flipping)
Step-by-Step Instructions
- Make oat flour (if needed). Add rolled oats to a blender/food processor and blend until a fine flour forms. Pour into a mixing bowl.
- Soak the chia. In a separate bowl, stir chia seeds and water until well mixed. Cover and let sit 15–30 minutes until thick and gel-like (it should look glossy and spoonable, not watery).
- Mix the dough. Add the oat flour, salt, baking powder, and oregano to the chia gel. Stir until a soft, slightly sticky dough forms.
- If it’s very wet, add 1 tablespoon (about 6–8 g) oat flour at a time.
- If it seems crumbly, add a teaspoon of water and mix again.
- Rest and preheat. Let the dough rest 10–15 minutes (this helps the oats hydrate). Meanwhile, preheat the oven to 340°F (175°C) and line a baking sheet with parchment.
- Portion. If the dough is sticky, lightly oil your palms. Divide into 30 small pieces and roll into balls. Place on the lined tray with a little space between each.
- Flatten. Lay a piece of parchment over the balls and press with the bottom of a glass to about 5 mm thick. (Aim for even thickness so they bake uniformly.)
- Bake, then flip. Bake 15 minutes. Remove the tray and carefully flip each cracker (a thin spatula helps).
- Finish baking. Bake another 15 minutes, or until they feel dry and firm with lightly browned edges.
- For extra crisp crackers, turn the oven off and let them sit inside for 5–10 minutes with the door cracked.
- Cool completely. Let crackers cool on the tray (or a rack) until fully crisp—cooling is where they really “set.”
Pro Tips
- The thinner and more even you press them, the crispier and more consistent they’ll be.
- If some crackers brown faster, pull the darker ones early and keep baking the paler ones a few minutes longer.
- For better crunch, don’t skip the full cool-down before storing.
- Want a stronger flavor? Add an extra pinch of salt or a little more dried herb.
Lighter Swaps
The original version is already quite light (no added oil or sugar). If you want, you can reduce the salt slightly, but keep a pinch for good flavor.
Common Mistakes
- Not soaking the chia long enough: the dough won’t bind and will crumble.
- Pressing unevenly: thick pieces stay chewy while thin ones get too dark.
- Storing before fully cool: trapped steam softens the crackers.
Serving Suggestions
Serve with hummus, yogurt dip, or alongside soup and salad. They’re also great as a crunchy base for tuna or smashed chickpeas.
Storage Instructions
Store completely cooled crackers in an airtight container at room temperature for 4–5 days. If they soften, they’re still tasty—just re-crisp them.
Reheating Tips
To re-crisp, bake at 300°F (150°C) for 5–8 minutes, then cool for a few minutes before eating.
Nutrition Estimate
Per serving (about 1/5 of the batch):
Calories: ~135
Protein: ~5 g
Carbs: ~20 g
Fat: ~4.5 g
Values are estimates and may vary by ingredients and portion size.
Recipe Summary
Prep Time: 10 minutes (plus soaking/resting)
Cook Time: 30 minutes
Total Time: ~1 hour
Servings: 5
Cuisine: Snack / Everyday baking
Course: Snack
Calories: ~135 per serving
Frequently Asked Questions
Can I make these without baking powder?
Yes. They’ll still bake up, but the texture may be a bit denser and less “crisp-light.” If yours tend to be hard, baking powder helps.
Why are my crackers not crunchy?
Most often they need either a few more minutes in the oven, or more time to cool completely. Also check thickness—too thick stays chewy.
Can I change the shape or make fewer, larger crackers?
Absolutely. Just keep the thickness around 5 mm and adjust bake time slightly (larger pieces may need a few extra minutes, and flipping still helps).
Conclusion
These oat and chia crackers are an easy, dependable way to turn a few pantry staples into a crunchy snack. Once you’ve made them once, it’s simple to swap seasonings and keep a batch in rotation for soups, dips, and quick bites.