Introduction
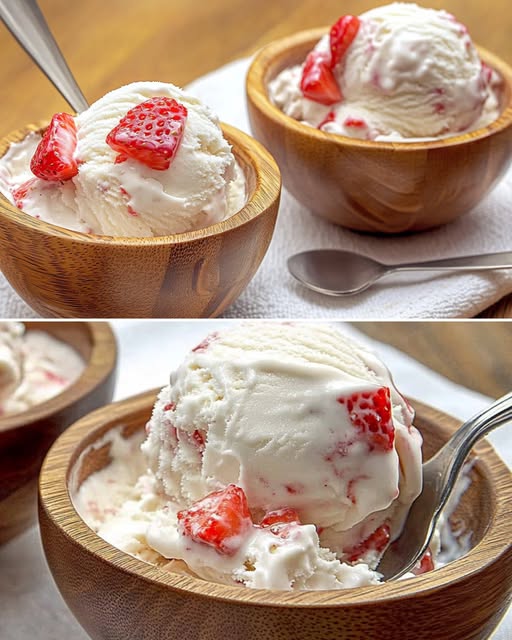
Forget store-bought ice cream with its long list of preservatives and artificial ingredients. This homemade strawberry banana ice cream delivers pure, creamy indulgence with real fruit and fresh ingredients you can pronounce. The secret to this recipe’s incredible texture lies in its unique combination of infused milk, custard base, and the inclusion of ricotta and whipped cream for unmatched creaminess. Rich yet refreshing, this ice cream balances sweet banana with tart strawberries and subtle hints of lemon and cinnamon. Perfect for summer entertaining or a special treat any time of year, this no-ice-cream-maker recipe proves that the most extraordinary desserts come from your own kitchen.
Ingredients
For the Infused Milk:
- 500ml (17.6 fl oz / 2 cups) whole milk
- Zest of 1 lemon
- 1 teaspoon vanilla sugar (or 1 teaspoon sugar plus ¼ teaspoon vanilla extract)
- 1 cinnamon stick
For the Custard Base:
- 1 ripe banana
- 2 egg yolks
- 50g (1.76 oz / ¼ cup) granulated sugar
- 30g (1 oz / ¼ cup) cornstarch
- 20ml (0.7 fl oz / 4 teaspoons) fresh lemon juice
- 80g (2.8 oz / ¼ cup) condensed milk
For the Creamy Mix-in:
- 80g (2.8 oz / ⅓ cup) ricotta cheese
- 100ml (3.5 fl oz / ⅓ cup + 1 tablespoon) heavy whipping cream
For the Fruit Addition:
- 100g (3.5 oz / ⅔ cup) fresh strawberries, finely chopped
Instructions
Step 1: Infuse the Milk
- Pour the milk into a medium saucepan.
- Add the lemon zest, vanilla sugar, and cinnamon stick.
- Heat the milk over medium heat, stirring constantly to prevent scorching.
- Bring the milk to a gentle boil, then immediately remove from heat.
- Allow the mixture to steep for 10 minutes to infuse the flavors.
- Strain the milk through a fine-mesh sieve into a clean bowl to remove the zest and cinnamon stick. Set aside.
Step 2: Prepare the Custard Base
- In a medium bowl, mash the banana until smooth and free of lumps.
- In a separate bowl, whisk together the egg yolks, sugar, and cornstarch until well combined and slightly pale.
- Gradually add the strained, infused milk to the egg mixture, whisking constantly.
- Return the mixture to the saucepan and cook over medium-low heat, stirring continuously with a wooden spoon or heat-resistant spatula.
- Continue cooking and stirring until the mixture thickens to a custard consistency that coats the back of a spoon (approximately 5-7 minutes).
- Remove from heat and let cool to room temperature, stirring occasionally to prevent a skin from forming.
- Once cooled, stir in the fresh lemon juice and condensed milk. Beat the mixture until it becomes thick and smooth.
Step 3: Incorporate the Creamy Elements
- In a separate bowl, briefly mix the ricotta cheese until smooth.
- Add the ricotta to the custard mixture and combine thoroughly.
- In another bowl, whip the heavy cream until stiff peaks form.
- Gently fold the whipped cream into the custard-ricotta mixture a little at a time, taking care not to deflate the air incorporated during whipping.
Step 4: Add Fruit and Freeze
- Wash, hull, and finely chop the strawberries.
- Gently fold the chopped strawberries into the ice cream base until evenly distributed.
- Transfer the mixture to a freezer-safe container with a lid.
- Place in the freezer for 2 hours.
- After 2 hours, remove and stir vigorously to break up any ice crystals and ensure a smooth texture.
- Return to the freezer for an additional 2-4 hours or until firm but scoopable.
- For best texture, remove from the freezer and let stand at room temperature for 5-10 minutes before serving.
Nutritional Information
Per serving (recipe makes approximately 6 servings):
- Calories: 230
- Total Fat: 12g
- Saturated Fat: 7g
- Cholesterol: 95mg
- Sodium: 65mg
- Total Carbohydrates: 25g
- Dietary Fiber: 1g
- Sugars: 22g
- Protein: 6g
Preparation Time: 30 minutes Cooking Time: 10 minutes Freezing Time: 4-6 hours Total Time: 5-7 hours (including freezing)
Cooking Tips and Tricks
- Temperature matters: Ensure your milk doesn’t boil too vigorously during infusion, as it can develop a scorched flavor or cause the proteins to coagulate.
- Custard caution: When making the custard, cook over medium-low heat and stir constantly. If the heat is too high, you’ll end up with scrambled eggs instead of smooth custard.
- Tempering technique: For a foolproof custard, you can “temper” the eggs by adding a small amount of the hot milk first, whisking vigorously, then adding the rest. This prevents egg curdling.
- Maximizing creaminess: The key to smooth, creamy homemade ice cream without an ice cream maker is breaking up ice crystals. For professional-level results, remove the ice cream from the freezer and beat it every hour for the first 3 hours of freezing.
- Fruit preparation: Make sure your strawberries are patted dry after washing to prevent excess water from creating ice crystals. Also, the smaller you chop them, the less they’ll interrupt the creamy texture.
Variations and Substitutions
- Dairy alternatives: Use coconut milk instead of regular milk for a tropical flavor. For a lighter version, substitute half-and-half for the heavy cream.
- Cheese options: If ricotta isn’t available, mascarpone or cream cheese can provide a similar richness and texture.
- Fruit variations: Replace strawberries with raspberries, blueberries, or diced peaches. For an extra decadent version, add 50g of dark chocolate chips along with the fruit.
- Sugar adjustments: For a less sweet version, reduce the condensed milk to 50g and adjust the sugar to taste based on the ripeness of your fruit.
- Adult version: Add 2 tablespoons of rum, bourbon, or limoncello to the cooled custard for a sophisticated twist (note: alcohol lowers the freezing point, so the ice cream will be softer).
Common FAQs
Why is my homemade ice cream too hard?
Commercial ice cream contains stabilizers that keep it scoopable. For softer homemade ice cream, add 1 tablespoon of vodka (which doesn’t freeze) or 1 tablespoon of corn syrup, which prevents crystallization.
Can I use frozen strawberries?
Yes, but thaw and drain them well first to remove excess moisture. Pat them dry with paper towels before adding to the mixture.
How can I make this recipe without eggs?
Replace the custard base with 250ml of full-fat Greek yogurt mixed with the condensed milk. The texture will be slightly different but still delicious.
What if I don’t have ricotta cheese?
Substitute with an equal amount of mascarpone, cream cheese, or Greek yogurt. Each will provide a different but equally delicious flavor profile.
Can I keep this ice cream for longer than a few days?
Yes, it will remain safe to eat for up to two weeks, but for the best texture and flavor, consume within one week. After that, ice crystals may form and affect the quality.
Storage and Make-Ahead Tips
- Container choice: Store in a shallow, wide container rather than a deep one for more even freezing. Metal containers conduct cold better than plastic, resulting in faster freezing.
- Preventing freezer burn: Press a piece of plastic wrap directly onto the surface of the ice cream before putting the lid on to prevent ice crystals from forming.
- Serving preparations: For easy scooping, place your ice cream scoop in hot water for 30 seconds before use. This helps it glide through the frozen dessert.
- Long-term storage: If you plan to store the ice cream for more than a week, transfer it to an airtight container and place in the back of the freezer where the temperature is most consistent.
- Make-ahead components: The infused milk and custard base can be prepared up to 2 days ahead and refrigerated separately. Complete the remaining steps when you’re ready to make the ice cream.
This homemade strawberry banana ice cream is a testament to the superior quality of homemade desserts. Free from preservatives and artificial flavors, it delivers a pure, authentic taste that store-bought varieties simply can’t match. The combination of aromatic infused milk, rich custard, and real fruit creates a luxurious treat that will impress family and friends alike. Once you’ve mastered this basic technique, the possibilities for flavor combinations are endless—proving that the best ice cream doesn’t come from a store but from your own kitchen creativity.