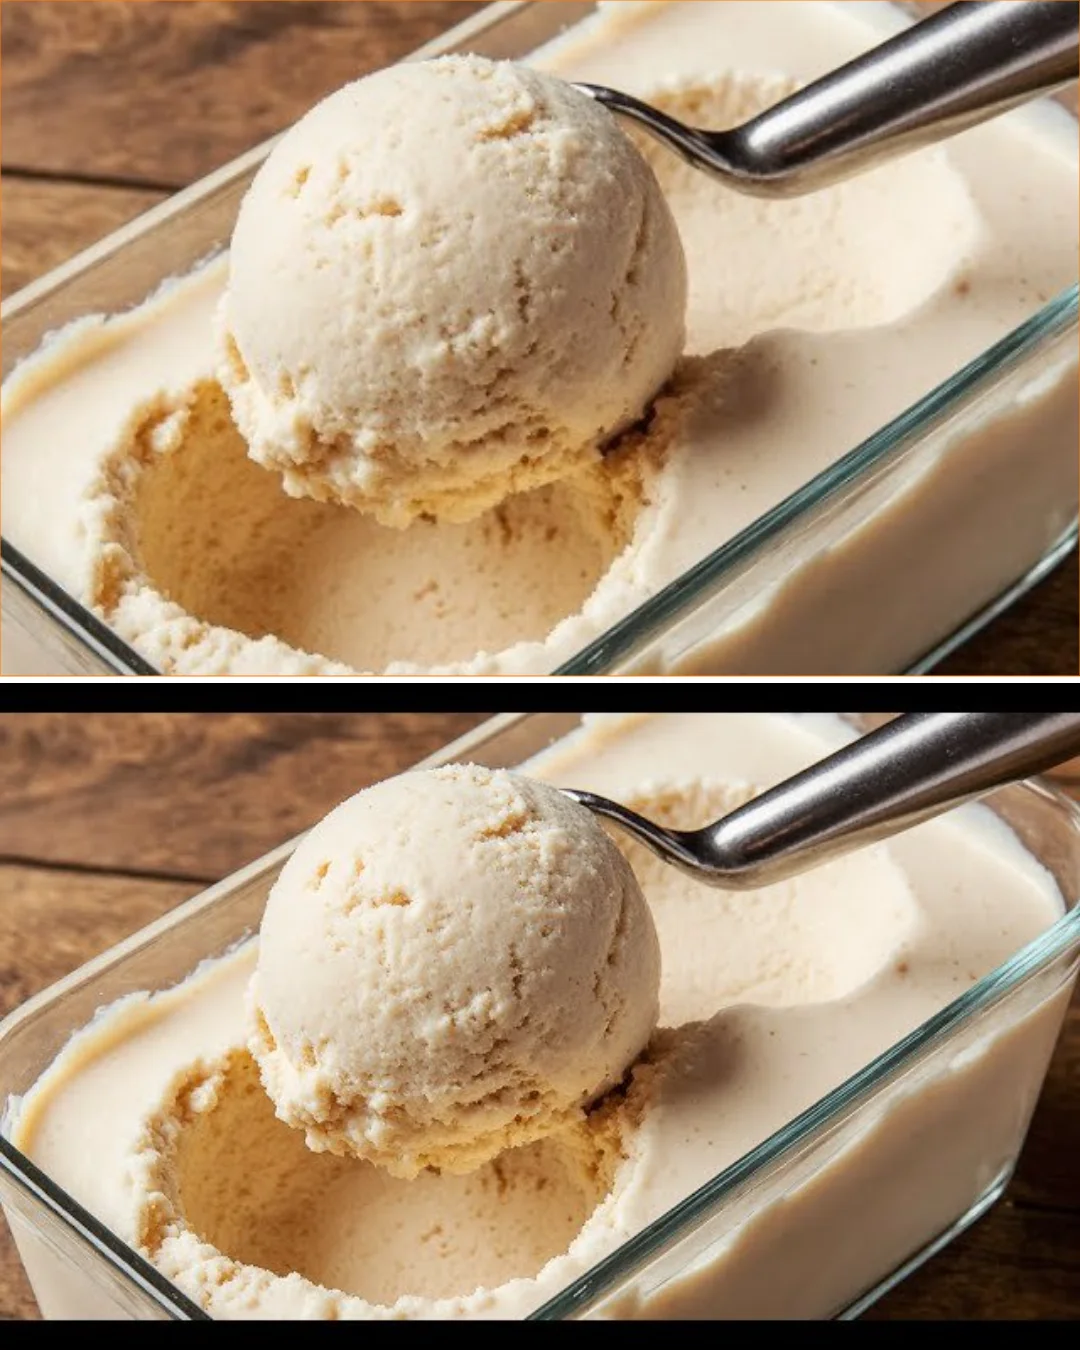
There’s nothing quite like enjoying a scoop of homemade ice cream on a warm day. The creamy texture and rich flavor make it a treat worth making yourself, and with this recipe, you can easily whip up your delicious version at home. I remember the first time I attempted to make ice cream from scratch; the anticipation of waiting for it to freeze was almost unbearable! However, when I finally took that first bite, all the effort was instantly rewarded. The best part? You can customize it to your taste with mix-ins like chocolate chips, nuts, or fresh fruit.
Let’s dive into creating a delightful and creamy ice cream that will impress your family and friends this season!
Why You’ll Love This Recipe
- Simple ingredients that you likely have on hand.
- A creamy texture that rivals store-bought options.
- Customizable with your favorite mix-ins or flavors.
- No ice cream maker required—perfect for home cooks!
- An excellent way to showcase seasonal fruits.
- The satisfaction of creating a classic dessert from scratch.
Ingredients
- 400 ml (1¾ cups) whole milk
- 125 g (¾ cup) granulated sugar
- 4 large eggs
- 1 g (¼ teaspoon) vanillin (or 1 teaspoon vanilla extract, optional)
- Decorations as desired (chocolate chips, nuts, fruits)
Ingredient Notes
Using whole milk contributes to the creaminess of the final product. You can substitute evaporated milk for a richer flavor or use a plant-based milk for dairy-free options. For sweetness, adjust the sugar according to your preference—the 125 g creates a balanced flavor without being too cloying.
Kitchen Tools Needed
- Medium saucepan
- Mixing bowls
- Whisk or electric mixer
- Spatula
- Ice cream mold or container
- Cling film
Step-by-Step Instructions
- Separate the Eggs: Begin by separating the egg yolks from the egg whites into two bowls.
- Heat the Milk: Pour the milk into a medium saucepan and warm it over low heat. Stir gently until you see small bubbles begin to form; this should take about 5-7 minutes.
- Mix Egg Yolks and Sugar: While the milk is heating, beat the egg yolks in a separate bowl until they are thickened and pale. Gradually mix in the sugar and continue beating until it’s fully incorporated.
- Combine Mixtures: Slowly pour the warmed milk into the egg yolk mixture while whisking constantly to prevent scrambling the eggs.
- Thicken the Mixture: Return the combined mixture to the saucepan and cook over low heat. Stir constantly until it thickens enough to coat the back of a spoon (about 5 minutes). Do not let it boil.
- Cool the Mixture: Remove from heat and let it cool to room temperature. This is key for achieving a creamy texture.
- Whip Egg Whites: In a clean bowl, whip the egg whites using a whisk or electric mixer until soft peaks form—this should take about 3-4 minutes.
- Fold in Egg Whites: Gently fold the whipped egg whites into the cooled egg yolk mixture. Take care not to deflate the whites for a lighter texture.
- Flavor it Up: Add the vanillin or vanilla extract if using, mixing it through gently.
- Add Mix-Ins: If you desire, fold in chocolate chips, nuts, or fruits at this stage.
- Freeze: Pour the mixture into an ice cream mold or a container, cover it with cling film, and freeze for at least 5 hours or until solid.
- Serve and Enjoy: Scoop into bowls and serve with your favorite toppings!
Pro Tips
- Allow the egg yolk and milk mixture to cool completely before adding the whipped egg whites to prevent them from collapsing.
- For richer ice cream, switch some of the milk with heavy cream.
- Keep a close eye when heating the milk to avoid boiling, which can lead to a grainy texture.
Common Mistakes to Avoid
One common mistake is not allowing the egg yolk and milk mixture to cool sufficiently before adding the whipped egg whites, which can result in a heavy texture.
Variations
- Fruit-Infused: Add pureed strawberries or mango into the base for a fruity flavor.
- Chocolate Swirl: Stir in melted chocolate or cocoa powder for a chocolate version.
- Nut Lover’s Delight: Include crushed nuts or a swirl of nut butter for added crunch and flavor.
- Coffee Ice Cream: Mix in brewed espresso or coffee extract for a coffee-flavored treat.
Serving Suggestions
Serve your ice cream in chilled bowls. Top with sliced fresh fruit, a drizzle of chocolate sauce, or additional nuts for a delightful finish.
Storage Instructions
Store any leftover ice cream in an airtight container in the freezer for up to two weeks. Ensure it’s well-sealed to avoid freezer burn.
Reheating Tips
There’s no need to reheat ice cream, but if it becomes too hard, simply let it sit at room temperature for about 5-10 minutes to soften before scooping.
Nutrition Estimate
Calories: 210 per serving
Protein: 4g
Carbohydrates: 25g
Fat: 10g
Recipe Summary Card
Prep Time: 20 minutes
Cook Time: 10 minutes
Total Time: 5 hours 30 minutes
Servings: 6
Cuisine: Dessert
Course: Ice Cream
Calories: 210 per serving
Frequently Asked Questions
Can I use different milk types?
Yes! You can substitute whole milk with low-fat milk or dairy-free options like almond or coconut milk.
How can I prevent ice crystals from forming?
Make sure to stir the mixture every hour for the first few hours in the freezer to break up any ice crystals.
Can I make this ice cream without eggs?
Absolutely! You can create a custard-free version using heavy cream and sweetened condensed milk.
How long does homemade ice cream last?
Homemade ice cream is best within two weeks but can last up to a month if stored properly.
What if I don’t have an ice cream mold?
Any airtight container works well, such as a glass dish or a plastic tub.
Conclusion
With this homemade creamy ice cream recipe, you’re not just making dessert; you’re creating a memory. The process is simple and rewarding, and the result is delightfully creamy ice cream that can be customized to your taste. So why not gather your loved ones and indulge in this delicious experience?
Tested Note
“I tested leaving the ice cream to freeze overnight and found that it solidifies nicely, making for perfect scoops the next day.”
Homemade Creamy Ice Cream
This homemade ice cream is creamy and customizable, allowing you to create a delightful dessert without needing an ice cream maker.
Ice Cream Base
- 400 ml whole milk (Using whole milk contributes to the creaminess; evaporated milk can be used for richer flavor.)
- 125 g granulated sugar (Adjust the sugar for desired sweetness.)
- 4 large eggs (Separate yolks from whites.)
- 1 g vanillin or vanilla extract (optional) (Adds flavor.)
Mix-Ins
- Decorations (chocolate chips, nuts, fruits) (Customize as desired.)
Preparation
- Separate the egg yolks from the egg whites into two bowls.
- Pour the milk into a medium saucepan and warm it over low heat for about 5-7 minutes until small bubbles form.
- Beat the egg yolks in a separate bowl until thickened and pale. Gradually mix in the sugar and continue beating until fully incorporated.
- Slowly pour the warmed milk into the egg yolk mixture while whisking constantly.
- Return the combined mixture to the saucepan and cook on low heat, stirring constantly for about 5 minutes until thick enough to coat the back of a spoon.
- Remove from heat and let it cool to room temperature.
Mixing
- In a clean bowl, whip the egg whites until soft peaks form, about 3-4 minutes.
- Gently fold the whipped egg whites into the cooled egg yolk mixture.
- Add the vanillin or vanilla extract if using, mixing gently.
- Fold in any desired mix-ins like chocolate chips, nuts, or fruits.
Freezing
- Pour the mixture into an ice cream mold or container, cover with cling film, and freeze for at least 5 hours or until solid.
- Scoop into bowls and serve with your favorite toppings.
Store any leftover ice cream in an airtight container for up to two weeks. Reheat lightly if it becomes too hard.