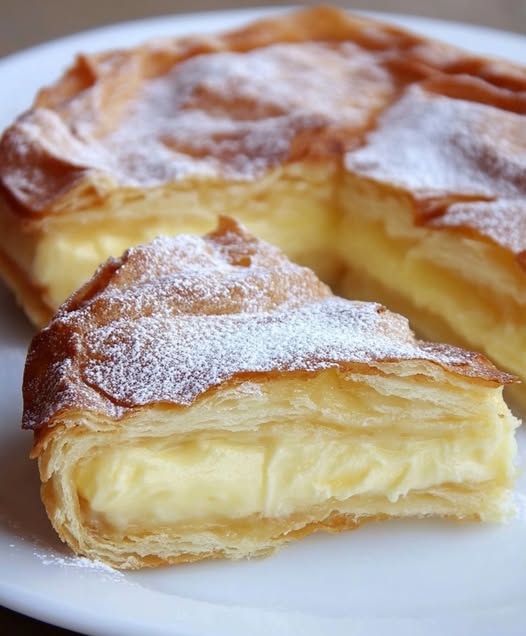
The Enchanting Story Behind the Melting Cake
Imagine a dessert that literally melts in your mouth, bridging the gap between a delicate pastry and a luxurious cream-filled dream. This Melting Cake is more than just a recipe—it’s a culinary experience that traces its roots to traditional European patisserie, where baking is considered an art form. Passed down through generations, this recipe combines the delicate layers of a classic pastry with a rich, creamy filling that transforms simple ingredients into a masterpiece of flavor and texture.
Ingredients
For the Cake Base
US Measurements
- 1 1/2 cups (150g) all-purpose flour
- 1/2 cup (100ml) water
- 1/2 cup (100ml) milk
- 1/3 cup (80g) butter, softened
- 4 large eggs
- 1 teaspoon baking powder
- 1/2 teaspoon salt
Metric Measurements
- 150g all-purpose flour
- 100ml water
- 100ml milk
- 80g butter, softened
- 4 large eggs
- 5g baking powder
- 3g salt
For the Creamy Filling
US Measurements
- 2 1/4 cups (500ml) milk
- 1 1/2 cups (150g) granulated sugar
- 1 cup (100g) all-purpose flour
- 2 large eggs
- 3/4 cup (180g) butter, softened
- Powdered sugar for dusting (optional)
Metric Measurements
- 500ml milk
- 150g granulated sugar
- 100g all-purpose flour
- 2 large eggs
- 180g butter, softened
- Powdered sugar for dusting (optional)
Step-by-Step Cooking Instructions
Preparing the Cake Base
- Preparation: Preheat your oven to 350°F (175°C). Grease a 9×13 inch (23×33 cm) baking pan or line it with parchment paper.
- Mixing Dry Ingredients: In a medium bowl, sift together the flour, baking powder, and salt. Set aside.
- Wet Ingredients: In a large mixing bowl, combine the softened butter and eggs. Beat until the mixture becomes light and fluffy, about 3-4 minutes.
- Combining Batter: Gradually add the water and milk to the butter-egg mixture, mixing continuously.
- Final Batter: Slowly fold in the dry ingredients, stirring until just combined. Be careful not to overmix.
- Baking: Pour the batter into the prepared pan, spreading it evenly. Bake for 20-25 minutes or until a toothpick inserted in the center comes out clean.
Preparing the Creamy Filling
- Milk Mixture: In a medium saucepan, heat the milk until it’s warm but not boiling.
- Egg Mixture: In a separate bowl, whisk together the eggs, sugar, and flour until smooth and free of lumps.
- Tempering: Slowly pour a small amount of the warm milk into the egg mixture, whisking constantly to prevent scrambling.
- Cooking Filling: Return the tempered mixture to the saucepan and cook over medium heat, stirring constantly until the mixture thickens and begins to bubble.
- Cooling: Remove from heat and let the filling cool slightly. Stir in the softened butter until smooth and creamy.
Assembling the Cake
- Cooling Base: Allow the cake base to cool completely.
- Filling: Spread the creamy filling evenly over the cooled cake base.
- Chilling: Refrigerate for at least 2 hours to allow the filling to set.
- Serving: Before serving, dust with powdered sugar if desired.
Nutritional Information
Per Serving (approximate):
- Calories: 350-400
- Protein: 7g
- Carbohydrates: 30g
- Fat: 24g
- Sugar: 18g
Preparation Time: 30 minutes Cooking Time: 25 minutes Chilling Time: 2 hours Total Time: 3 hours Servings: 12-16 slices
Expert Cooking Tips and Tricks
- Butter Temperature: Ensure butter is at room temperature for smoother mixing.
- Egg Tempering: Add hot milk to eggs gradually to prevent scrambling.
- Filling Consistency: Stir the filling constantly while cooking to achieve a smooth, lump-free texture.
- Cake Moisture: Don’t overbake the base to maintain a soft, tender texture.
- Serving Suggestion: Serve chilled for the best flavor and texture.
Recipe Variations and Substitutions
- Flavor Twist: Add vanilla extract or lemon zest to the filling for extra flavor.
- Gluten-Free Option: Use gluten-free flour and ensure all other ingredients are gluten-free.
- Dairy-Free Adaptation: Substitute milk with almond or oat milk, and use dairy-free butter alternatives.
- Chocolate Variation: Add cocoa powder to the filling for a chocolate version.
- Fruit Topping: Serve with fresh berries or a fruit compote.
Frequently Asked Questions
Q1: Can I make this cake in advance? A: Yes! The cake can be prepared a day ahead and stored in the refrigerator.
Q2: How long will the cake stay fresh? A: Stored in an airtight container in the refrigerator, it will stay fresh for 3-4 days.
Q3: Can I freeze this cake? A: While possible, the texture may change slightly. It’s best enjoyed fresh.
Q4: What if my filling is too runny? A: Continue cooking and stirring until it reaches a thick, pudding-like consistency.
Q5: Can I use a different type of sugar? A: Granulated sugar works best, but you can experiment with alternatives like coconut sugar.
Storage and Make-Ahead Tips
- Refrigeration: Store in an airtight container for up to 4 days.
- Freezing: Not recommended due to the delicate filling.
- Room Temperature: Keep refrigerated and bring to room temperature 15 minutes before serving.
- Covering: Always cover to prevent the cake from drying out.
- Make-Ahead: Prepare the base and filling separately up to a day in advance.
Indulge in this melt-in-your-mouth Melting Cake, a true testament to the magic of simple ingredients transformed into an extraordinary dessert!