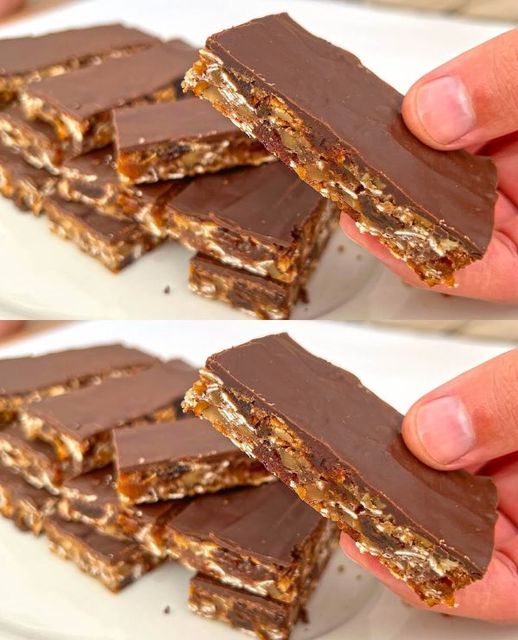
Are you looking for a tasty, nutritious, and guilt-free snack that’s quick to prepare and perfect for your busy lifestyle? Look no further! Our sugar-free energy bars are not only packed with wholesome ingredients like oats, raisins, walnuts, and dried apricots but are also topped with a luscious dark chocolate glaze. These energy bars are perfect for an on-the-go breakfast, a post-workout snack, or a healthy treat any time of the day. Let’s dive into the details of making these delicious bars in just 5 minutes of prep time!
Why Choose Homemade Energy Bars?
Store-bought energy bars often contain hidden sugars and preservatives that can derail your healthy eating goals. By making your own sugar-free energy bars, you control exactly what goes into them, ensuring they are packed with the nutrients your body needs without any unnecessary additives. Plus, they’re incredibly easy to make and can be customized to suit your taste.
Ingredients (Serves 10)
- 80 g (2.8 oz) oat flakes
- 100 g (3.5 oz) raisins
- 80 g (2.8 oz) walnuts, chopped
- 100 g (3.5 oz) dried apricots, chopped
- 1 banana, mashed
- 160 g (5.6 oz) dark chocolate (without sugar)
- 1 teaspoon vegetable oil
Nutritional Information (Per Serving)
- Calories: 180
- Protein: 3.5 g
- Carbohydrates: 25 g
- Dietary Fiber: 4 g
- Sugars: 10 g (natural sugars from fruit)
- Fat: 9 g
- Saturated Fat: 3.5 g
- Cholesterol: 0 mg
- Sodium: 5 mg
Step-by-Step Instructions to Make Healthy Energy Bars
1. Mix the Goodness
Begin by gathering all your ingredients. In a large bowl, combine 80 g of oat flakes, 100 g of raisins, 80 g of chopped walnuts, 100 g of chopped dried apricots, and 1 mashed banana. Stir these ingredients together thoroughly until you achieve a cohesive mixture. The oats provide a solid base and are rich in fiber, while the dried fruits add natural sweetness, and the walnuts bring a satisfying crunch along with healthy fats.
2. Shape and Prepare
Prepare a baking tray by lining it with baking paper to prevent sticking. Place a 25 x 15 cm (10 x 6 inch) mold on the tray. Evenly spread the oat and fruit mixture into the mold using a spatula, pressing it down firmly. This helps the bars hold together once baked.
3. Bake to Perfection
Preheat your oven to 180°C (356°F). Bake the mixture for approximately 20 minutes. Keep an eye on it as baking times can vary depending on your oven. You want a golden-brown surface that feels slightly firm to the touch. This step enhances the flavors and gives the bars a delightful crisp texture.
4. Prepare the Chocolate Coating
While your bars are baking, it’s time to prepare the indulgent yet healthy chocolate coating. In a microwave-safe bowl, add 160 g of dark chocolate without sugar. Melt the chocolate in the microwave in 30-second intervals, stirring between each interval to ensure even melting. Alternatively, you can use a double boiler for a gentler melting process. Once fully melted, stir in 1 teaspoon of vegetable oil. This will give your chocolate a smooth and shiny finish, perfect for coating your bars.
5. The Finishing Touch
Once the oatmeal mixture is done baking, carefully remove it from the oven and let it cool for a few minutes. Lift the bars out of the mold using the baking paper and place them on a cooling rack. Pour the melted chocolate over the top, spreading it evenly with a spatula to cover the entire surface. To set the chocolate, place the bars in the fridge for about 40 minutes. The chocolate will harden, giving your bars a perfect finish.
6. Serve with Love and Joy
After the chocolate has fully set, remove the bars from the fridge. Cut them into individual servings, approximately 10 pieces, depending on your preferred size. These energy bars are now ready to enjoy! Perfect for breakfast, a quick snack, or a healthy dessert, each bite offers a burst of flavor from the combination of fruits, nuts, and rich dark chocolate. Plus, with no added sugar, you can indulge without any guilt.
Tips for Perfect Energy Bars
- Storage: Store your energy bars in an airtight container in the fridge. They will stay fresh for up to a week.
- Customization: Feel free to swap out the raisins and apricots for your favorite dried fruits, such as cranberries or dates. You can also add seeds like chia or flax for an extra nutritional boost.
- Chocolate Variations: If you prefer, you can use white chocolate or milk chocolate, but keep in mind this will add sugar unless you use sugar-free options.
- Gluten-Free Option: Use certified gluten-free oats to make this recipe suitable for those with gluten sensitivities.
Enjoy the perfect blend of nutrition and taste with these homemade energy bars. Whether you’re fueling up for a busy day or just need a quick and healthy snack, these bars are sure to become a favorite in your household.
