Transform your kitchen into a bakery with this foolproof Dutch oven bread recipe that delivers crusty, artisan-quality bread with minimal effort. This no-knead bread requires just four simple ingredients and produces a golden, crackling crust with a tender, airy interior that rivals any bakery loaf.
Why Dutch Oven Bread is Perfect for Home Bakers
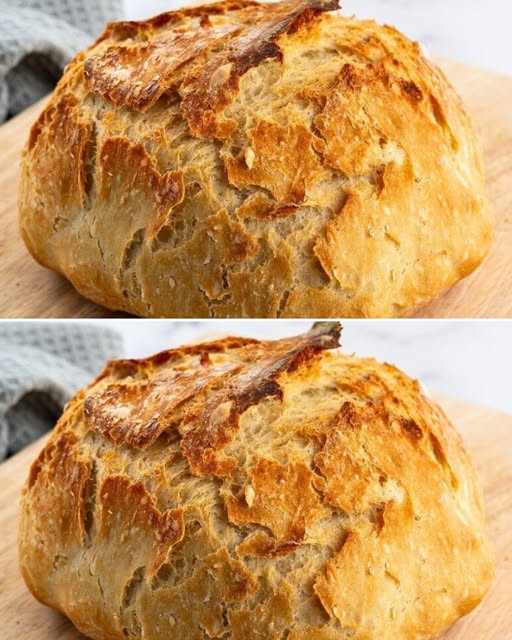
Dutch oven bread has revolutionized home baking by mimicking professional steam-injection ovens. The heavy pot traps moisture during baking, creating the perfect environment for developing that coveted crispy crust while keeping the interior soft and chewy. This method eliminates the need for specialized equipment or complex techniques, making artisan bread accessible to every home cook.
Ingredients
- 3 cups bread flour
- 1 packet (2 teaspoons) rapid rise yeast
- 1½ teaspoons salt
- 1½ cups warm water
Step-by-Step Instructions
Step 1: Create the Dough
In a large mixing bowl, combine the bread flour, rapid rise yeast, and salt. Whisk together to distribute evenly. Add the warm water and stir with a wooden spoon or spatula until a shaggy, sticky dough forms. The mixture will look rough and uneven, which is exactly what you want.
Step 2: First Rise
Cover the bowl tightly with plastic wrap or a damp kitchen towel. Allow the dough to rise at room temperature for 2-3 hours until it doubles in size and becomes bubbly on the surface. The longer rise develops complex flavors and creates the bread’s characteristic texture.
Step 3: Preheat Your Dutch Oven
Place your Dutch oven with its lid inside your oven and preheat to 450°F (230°C). Allow at least 30 minutes for the pot to heat thoroughly. This step is crucial for achieving maximum oven spring and crust development.
Step 4: Shape the Dough
Turn the risen dough onto a floured surface. With floured hands, gently shape it into a round loaf, folding the edges under to create surface tension. Place the shaped dough seam-side down on a piece of parchment paper.
Step 5: Bake Covered
Carefully remove the hot Dutch oven from the oven using oven mitts. Remove the lid and quickly lower the parchment paper with the dough into the pot. Cover immediately with the lid and bake for 30 minutes.
Step 6: Finish Uncovered
Remove the lid and continue baking for an additional 15-20 minutes until the crust is deep golden brown and sounds hollow when tapped. The internal temperature should reach 200°F (93°C).
Step 7: Cool Completely
Transfer the bread to a wire rack and resist the temptation to slice immediately. Allow the bread to cool for at least 1 hour before cutting to ensure the interior sets properly.
Nutritional Information
Per slice (assuming 8 slices per loaf):
- Calories: 185
- Carbohydrates: 38g
- Protein: 6g
- Fat: 1g
- Fiber: 2g
- Sodium: 435mg
Total Preparation Time: 4-5 hours (including rise time) Active Preparation Time: 15 minutes Baking Time: 45-50 minutes
Variations and Substitutions
Flour Alternatives
Replace up to one cup of bread flour with whole wheat flour for added nutrition and nutty flavor. All-purpose flour can substitute for bread flour, though the texture will be slightly less chewy. For gluten-free options, use a 1:1 gluten-free flour blend designed for bread baking.
Flavor Enhancements
Incorporate herbs like rosemary, thyme, or oregano during the initial mixing. Add seeds such as sesame, poppy, or sunflower for texture and visual appeal. For a tangy twist, substitute ¼ cup of water with apple cider vinegar.
Sweet Variations
Transform this recipe into a breakfast bread by adding 2 tablespoons honey and ½ cup dried cranberries or raisins. Cinnamon and nutmeg create a warming spice blend perfect for autumn baking.
Different Shapes
While round loaves are traditional, this dough can be shaped into baguettes, dinner rolls, or even pizza dough. Adjust baking times accordingly for smaller portions.
Troubleshooting Tips
If your bread doesn’t rise properly, check that your yeast is fresh and the water temperature isn’t too hot, which can kill the yeast. A dense crumb often results from insufficient rising time or using old flour. For a more open crumb structure, extend the first rise to 4-6 hours or refrigerate overnight for enhanced flavor development.
Storage and Serving Suggestions
Store cooled bread wrapped in a clean kitchen towel at room temperature for up to 3 days. For longer storage, slice and freeze for up to 3 months. This bread pairs beautifully with olive oil and balsamic vinegar, makes exceptional toast, and serves as the perfect vehicle for sandwiches or bruschetta.
Frequently Asked Questions
Can I make this bread without a Dutch oven? While a Dutch oven produces the best results, you can use a heavy oven-safe pot with a tight-fitting lid or bake on a pizza stone with a pan of boiling water placed on the oven floor for steam.
Why is my bread not crusty enough? Ensure your Dutch oven is properly preheated and avoid opening the oven door during the covered baking phase. The initial steam is crucial for crust development.
Can I prepare the dough in advance? Yes, after the initial mix, refrigerate the dough for up to 5 days. The cold fermentation actually improves flavor. Allow it to come to room temperature before shaping and baking.
What if my dough seems too wet? This recipe produces a high-hydration dough that should be sticky. Resist adding extra flour, as this creates the bread’s characteristic open crumb. Use wet hands when handling to prevent sticking.
How do I know when the bread is fully baked? The crust should be deep golden brown and sound hollow when tapped on the bottom. An instant-read thermometer inserted into the center should read 200°F (93°C).
This Dutch oven bread recipe proves that exceptional homemade bread doesn’t require professional equipment or years of experience. With just four ingredients and simple techniques, you can create bakery-quality bread that will impress family and friends while filling your home with irresistible aromas.