
Delightful Chocolate and Vanilla Layer Cake
Introduction
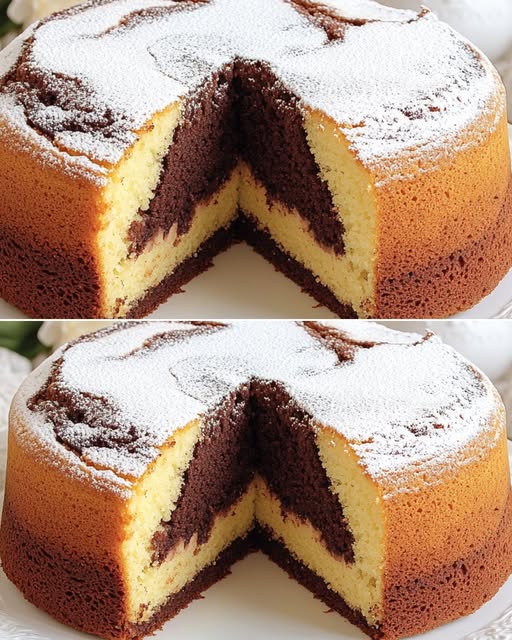
There’s something magical about the classic combination of chocolate and vanilla in a beautifully layered cake. This delightful Chocolate and Vanilla Layer Cake brings together the best of both worlds—rich, deep chocolate and aromatic vanilla—in a stunning dessert that’s sure to impress at any gathering. The contrasting layers create not just a visual spectacle but also a perfect harmony of flavors that dance on your palate. Whether you’re celebrating a birthday, hosting a dinner party, or simply craving something sweet, this cake delivers both elegance and comfort in every slice.
Ingredients
For the Cake:
- 3¼ cups (400g) Type 00 flour
- 1 cup (200g) granulated sugar
- 4 medium eggs (9.5 oz/270g), at room temperature
- 0.8 cup (190ml) corn oil
- 0.8 cup (190ml) whole milk, at room temperature
- 1 vanilla bean (seeds scraped)
- 1 pinch fine salt
- 1.1 tbsp (16g) powdered yeast for sweets (baking powder)
- ½ cup (50g) unsweetened cocoa powder
- Powdered sugar for dusting
Step-by-Step Instructions
Preparation:
- Preheat your oven to 340°F (170°C).
- Butter a 9-inch (23cm) round cake pan and line the bottom with parchment paper.
- Slice the vanilla bean lengthwise and scrape out the seeds with the back of a knife.
Making the Batter:
- In a large mixing bowl, beat the eggs with a pinch of salt until foamy using an electric mixer.
- Gradually add the sugar and the vanilla bean seeds, continuing to whip for approximately 5 minutes until the mixture becomes light, pale, and fluffy.
- Slowly pour in the corn oil and milk while mixing on low speed for 2 minutes until well incorporated.
- Sift half of the flour into the bowl and mix gently until fully absorbed.
- Add the remaining flour, again sifting it in, and mix until just combined.
- Sift the baking powder over the mixture and mix briefly to incorporate.
- Using a spatula, fold the batter gently to ensure everything is well combined without deflating the air you’ve incorporated.
Creating the Layers:
- Divide the batter equally between two bowls.
- Add the sifted cocoa powder to one bowl and gently fold until fully incorporated and no streaks remain.
- Pour half of the vanilla batter into the prepared cake pan, spreading it evenly.
- Carefully pour the chocolate batter over the vanilla layer, trying not to disturb the bottom layer too much.
- Top with the remaining vanilla batter, creating your final layer.
- Gently smooth the surface with a spatula if needed.
Baking and Finishing:
- Bake in the preheated oven for 50 minutes, or until a toothpick inserted into the center comes out clean.
- Allow the cake to cool in the pan for 10-15 minutes.
- Run a knife around the edges to loosen the cake, then invert onto a cooling rack.
- Once completely cooled, transfer to a serving plate and dust generously with powdered sugar.
Timing Information
- Preparation Time: 20 minutes
- Baking Time: 50 minutes
- Cooling Time: 1 hour
- Total Time: 2 hours 10 minutes
Nutritional Information
Per serving (based on 12 slices):
- Calories: 310
- Total Fat: 14g
- Saturated Fat: 2g
- Cholesterol: 62mg
- Sodium: 110mg
- Total Carbohydrates: 42g
- Dietary Fiber: 2g
- Sugars: 18g
- Protein: 6g
Cooking Tips and Tricks
- Room Temperature Ingredients: Ensure eggs and milk are at room temperature for better incorporation and a fluffier cake texture.
- Perfect Layering: To create clean, distinct layers, pour each layer slowly and gently over the previous one, using the back of a spoon to break the fall of the batter.
- Checking Doneness: Beyond the toothpick test, look for the cake pulling away from the sides of the pan slightly and springing back when lightly touched.
- Vanilla Bean Substitute: If vanilla beans are unavailable, substitute with 2 teaspoons of high-quality vanilla extract.
- Sifting Matters: Don’t skip sifting the dry ingredients—it prevents lumps and creates a lighter texture in the finished cake.
- Even Mixing: When adding the cocoa powder to half the batter, ensure thorough mixing without overmixing, which can make the cake tough.
Variations and Substitutions
Alternative Flavors:
- Orange Chocolate: Add the zest of one orange to the chocolate layer for a bright citrus note.
- Coffee Enhancement: Replace 2 tablespoons of milk with strong espresso in the chocolate batter to intensify the chocolate flavor.
- Berry Infusion: Add 1 cup of fresh berries between the vanilla and chocolate layers.
Dietary Adjustments:
- Gluten-Free Option: Substitute the Type 00 flour with a high-quality gluten-free all-purpose flour blend (add ½ teaspoon xanthan gum if not included in the blend).
- Dairy-Free Version: Replace whole milk with almond milk or oat milk, and ensure the cake pan is greased with oil instead of butter.
- Reduced Sugar: Decrease sugar to ¾ cup without significantly affecting texture.
Decorative Touches:
- Ganache Topping: Instead of powdered sugar, pour a silky chocolate ganache over the cooled cake.
- Whipped Cream Filling: Split the cooled cake horizontally and fill with sweetened whipped cream.
- Fresh Fruit Garnish: Decorate with fresh berries or sliced fruits for an elegant presentation.
Common FAQs
Q: Can I make this cake in advance for a special occasion?
A: Absolutely! This cake actually tastes better the day after baking as the flavors have time to meld. Bake it a day ahead, store at room temperature in an airtight container, and dust with powdered sugar just before serving.
Q: Why did my cake layers mix together instead of staying separate?
A: This could happen if the batters were poured too vigorously or if the consistency was too thin. Pour each layer gently using the back of a spoon to break the fall, and ensure your batter is properly whipped to the right consistency.
Q: Can I freeze this cake?
A: Yes, this cake freezes beautifully for up to 3 months. Wrap the completely cooled cake tightly in plastic wrap, then in aluminum foil. Thaw overnight in the refrigerator before serving, and dust with fresh powdered sugar.
Q: What can I use instead of Type 00 flour?
A: All-purpose flour makes an excellent substitute for Type 00 flour in this recipe. The texture will be slightly different but still delicious.
Q: My cake seems dry—what went wrong?
A: Overbaking is the most common cause of dry cake. Check the cake a few minutes before the suggested baking time ends. Also, make sure you’re measuring ingredients accurately, especially the fats (oil) which provide moisture.
Storage and Make-Ahead Tips
- Room Temperature Storage: Store the finished cake at room temperature under a cake dome or in an airtight container for up to 3 days.
- Refrigeration: If your kitchen is warm or humid, refrigerate the cake in an airtight container for up to 5 days. Allow to come to room temperature before serving for best flavor and texture.
- Freezing Instructions: This cake can be frozen whole or in slices. Wrap tightly in plastic wrap followed by aluminum foil or place in freezer-safe containers. Freeze for up to 3 months.
- Make-Ahead Components: The cake can be baked up to 2 days in advance and kept at room temperature, well-wrapped, until ready to serve.
- Refreshing Day-Old Cake: If the cake seems to dry out after a day, serve with a drizzle of warm chocolate sauce or a dollop of softly whipped cream to add moisture.
This beautiful Chocolate and Vanilla Layer Cake brings sophisticated flavors in an approachable recipe that anyone can master. The marbled effect of the contrasting batters creates a stunning visual presentation that’s sure to impress your guests. Whether served as the centerpiece of a celebration or as a special treat with afternoon tea, this cake delivers both elegance and homemade comfort in every delicious bite.