I’m thrilled to share with you a recipe that’s about to revolutionize your baking routine – a crispy, flaky pastry that mimics the complexity of puff pastry but can be whipped up in just 15 minutes! This ingenious method combines the convenience of quick bread with the irresistible texture of layered pastry, resulting in a versatile dough that’s perfect for both sweet and savory applications.
Introduction
The art of making puff pastry has long been considered a test of a baker’s skill, often requiring hours of folding and chilling to achieve those signature flaky layers. However, this quick method I’m about to share with you challenges that notion, offering a shortcut to crispy, buttery perfection that’s accessible to bakers of all skill levels.
This recipe’s origins can be traced back to busy home cooks who craved the luxury of puff pastry without the time commitment. By cleverly combining a few basic ingredients and employing some smart techniques, they created a dough that puffs and crisps beautifully in the oven, rivaling its more time-consuming counterpart.
What makes this recipe truly special is its adaptability. Whether you’re in the mood for a savory snack or a sweet treat, this dough serves as the perfect canvas. Today, we’ll be focusing on a delicious potato and cheese filling, but feel free to let your culinary imagination run wild with other fillings once you’ve mastered the technique.
Ingredients
For the Dough:
- 3 grams (1 teaspoon) active dry yeast
- 400 milliliters (1 2/3 cups) warm water
- 630 grams (5 1/2 cups) all-purpose flour
- 7 grams (1 1/2 teaspoons) salt
For the Filling:
- 2 medium potatoes (about 400 grams or 14 ounces)
- 3 grams (1 teaspoon) salt
- 3 grams (1 teaspoon) black pepper
- 100 grams (1 cup) grated cheddar cheese
For Greasing:
- 150 grams (5.3 ounces) unsalted butter, softened
For the Topping:
- 1 egg yolk
Step-by-Step Instructions
1. Preparing the Dough
I start by activating the yeast, which is crucial for achieving the right texture in our quick puff pastry. In a large mixing bowl, I combine the warm water with the yeast, stirring gently until the yeast is fully dissolved. The water should be comfortably warm to the touch, around 38°C (100°F), to ensure the yeast activates properly without being killed by excessive heat.
Next, I gradually add the flour and salt to the yeast mixture. Using my hands or a wooden spoon, I mix the ingredients until they come together to form a shaggy dough. Then, I turn the dough out onto a lightly floured surface and knead it for about 5-7 minutes. The kneading process is crucial as it develops the gluten in the flour, which will give our pastry its structure and help it puff up during baking.
As I knead, I can feel the dough becoming smoother and more elastic. When it reaches a soft, pliable consistency and no longer sticks to my hands, I know it’s ready. I then divide the dough into 8 equal portions, shaping each into a smooth ball. I cover these dough balls with a clean kitchen towel and let them rest for 25 minutes. This resting period allows the gluten to relax, making the dough easier to roll out later.
2. Making the Potato Filling
While the dough is resting, I prepare the flavorful potato filling. I start by peeling the potatoes and cutting them into uniform, medium-sized chunks. This ensures they’ll cook evenly. I place the potato pieces in a pot of cold, salted water and bring it to a boil over high heat. Once boiling, I reduce the heat to medium and let the potatoes simmer for about 15 minutes, or until they’re tender enough to be easily pierced with a fork.
Once cooked, I drain the potatoes thoroughly and return them to the hot pot. The residual heat helps to dry out any excess moisture, which is key to achieving a smooth, non-watery filling. I use a potato masher to break down the potatoes, working quickly while they’re still hot to prevent them from becoming gluey.
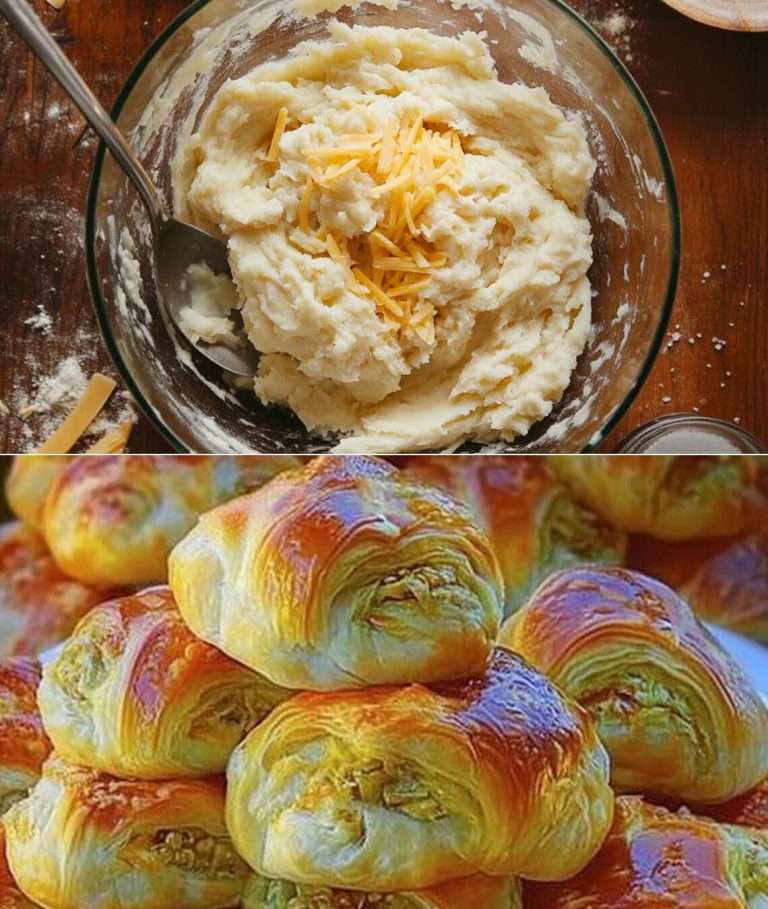
When the potatoes are smoothly mashed, I add the grated cheddar cheese, salt, and black pepper. The heat from the potatoes helps to melt the cheese slightly, creating a creamy, cohesive filling. I mix everything together until well combined, then set the filling aside to cool while I work on the pastry.
3. Assembling the Pastry
Now comes the fun part – creating those flaky layers! I take one portion of the rested dough and roll it out on a lightly floured surface into a thin rectangle, about 3mm (1/8 inch) thick. Using a pastry brush or the back of a spoon, I spread a thin layer of softened butter over the surface of the dough, making sure to leave a small border around the edges.
I repeat this process with another portion of dough, placing it on top of the buttered layer and again spreading it with butter. I continue layering and buttering until I’ve used all 8 portions of dough. This layering technique, combined with the butter, is what will create those delightful, flaky layers in our finished pastry.
Once all the layers are stacked, I carefully transfer the layered dough to a baking sheet and place it in the freezer for 30 minutes. This chilling step is crucial as it firms up the butter between the layers, which will create steam pockets during baking, resulting in that coveted puff and crispiness.
4. Shaping and Filling
After chilling, I remove the dough from the freezer and place it on a lightly floured surface. Working quickly to keep the dough cold, I roll it out into a large square, about 5mm (1/4 inch) thick. Using a sharp knife or pizza cutter, I cut the dough into 16 equal squares.
I place a spoonful of the cooled potato and cheese filling in the center of each square, being careful not to overfill, which could cause the pastries to burst during baking. Then, I fold one corner of each square over to the opposite corner, creating a triangle shape. I press the edges firmly to seal, using a fork to crimp them for extra security and a decorative touch.
5. Baking the Pastry
With my oven preheated to 190°C (375°F), I’m ready for the final step. I arrange the filled pastries on a baking sheet lined with parchment paper, leaving some space between each one to allow for expansion.
To achieve that appetizing golden-brown color, I lightly beat the egg yolk and brush it over the top of each pastry. This egg wash not only adds a beautiful sheen but also helps to seal the edges further and promote even browning.
I slide the baking sheet into the preheated oven and bake for 20-25 minutes. During this time, the magic happens – the butter between the layers creates steam, causing the pastry to puff up, while the outside turns delightfully crisp and golden.
I know the pastries are done when they’ve risen significantly and turned a beautiful golden brown color. The smell wafting from the oven is absolutely irresistible!
Nutrition Information
This recipe yields approximately 16 pastries. Here’s the estimated nutritional information per pastry:
- Calories: 250
- Total Fat: 12g
- Saturated Fat: 7g
- Cholesterol: 40mg
- Sodium: 300mg
- Total Carbohydrates: 30g
- Dietary Fiber: 1g
- Sugars: 1g
- Protein: 6g
Please note that these values are approximate and may vary based on the exact size of your pastries and any modifications to the recipe.
- Prep Time: 15 minutes
- Resting Time: 25 minutes
- Chilling Time: 30 minutes
- Baking Time: 20-25 minutes
- Total Time: Approximately 1 hour 35 minutes
Conclusion
Creating these crispy, flaky pastries in just 15 minutes of active preparation time is nothing short of culinary magic. This recipe proves that with a bit of clever technique, you can achieve results that rival traditional puff pastry without the hours of labor.
The versatility of this dough is truly its crowning glory. While we’ve filled these pastries with a savory potato and cheese mixture, the possibilities are endless. Sweet fillings like fruit compotes or chocolate work just as beautifully, making this recipe a true all-rounder in your culinary arsenal.
Remember, the key to success with this recipe lies in keeping your ingredients cold and working quickly. The colder the butter stays between the layers, the more dramatic the puff will be when baking.
As you bite into these pastries, savoring the crisp exterior giving way to the flaky layers and creamy filling, you’ll understand why this recipe is destined to become a habit. It’s perfect for impromptu gatherings, quick family dinners, or when you simply crave something deliciously homemade without the fuss.
So go ahead, give this 15-minute crispy pastry a try. I’m confident it will become a staple in your kitchen, opening up a world of quick yet impressive baking possibilities. Enjoy the process, savor the results, and don’t be afraid to get creative with your fillings. Happy baking!