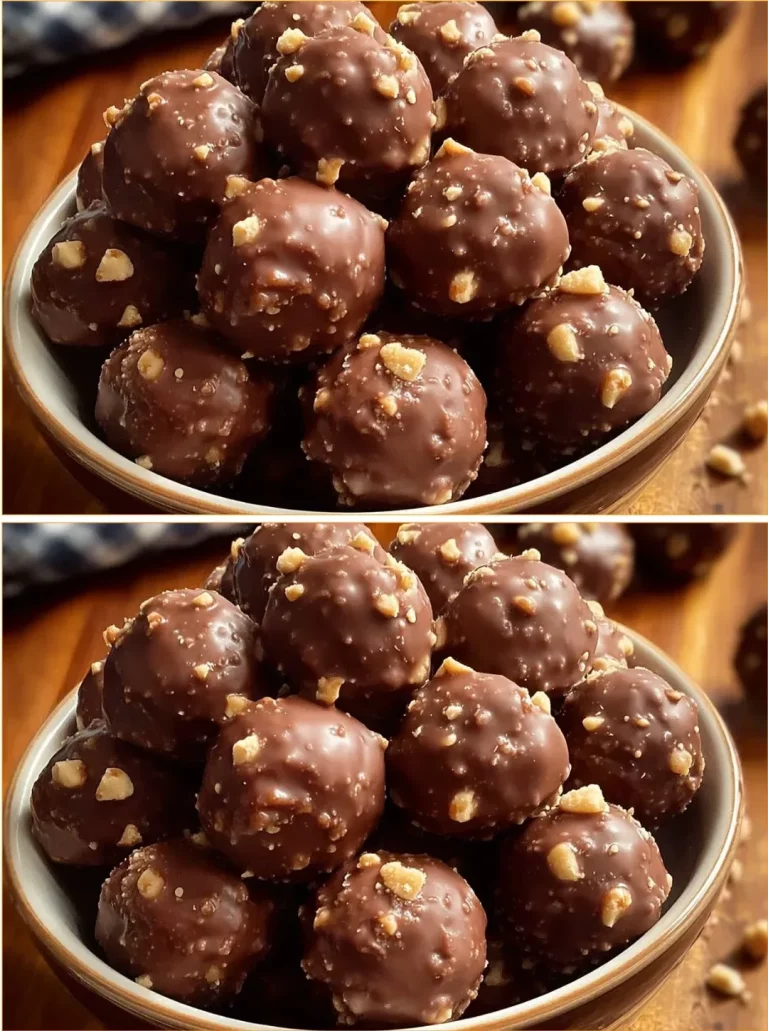
Butterfinger Balls Recipe: A Quick and Easy Delight
If you’re looking for a simple yet divine treat, Butterfinger Balls are your answer! These sweet, bite-sized treats combine the rich flavors of peanut butter with the delightful crunch of Butterfinger bars. They’re perfect for parties, movie nights, or just because you have a sweet tooth. Plus, who can resist chocolate-coated snacks? Let’s dive into this quick and easy recipe that’s sure to impress everyone around you.
What You’ll Need for Butterfinger Balls
Here’s everything you’ll need to get started on these delicious treats:
- 4 tablespoons butter, softened (about 60g)
- 1 teaspoon vanilla extract
- 1 cup peanut butter (about 240g; avoid all-natural varieties that separate)
- 1 cup powdered sugar (about 120g)
- ¾ cup graham cracker crumbs (about 70g)
- ½ cup crushed Butterfinger bars (about 50g)
- 8 ounces chocolate bark or chocolate chips for coating (about 225g)
- Optional: extra crushed Butterfinger bars, festive sprinkles, coarse sea salt for topping
How to Make Butterfinger Balls
Ready to whip up these delightful treats? Follow these simple steps to create Butterfinger Balls that everyone will love:
-
Mix the Base: In a large bowl, use a hand or stand mixer to cream together the peanut butter and softened butter until smooth. Add the vanilla extract and mix until combined.
-
Add Sweetness and Crunch: Gradually mix in the powdered sugar at low speed, scraping the sides of the bowl as needed. Fold in the graham cracker crumbs and crushed Butterfingers until the mixture is evenly combined.
-
Form the Balls: Line a baking sheet with parchment paper. Scoop about 1 to 1½ tablespoons of the dough and roll it into balls. Place them spaced apart on the sheet.
-
Chill to Set: Freeze the formed balls for 30 minutes or until they are completely firm.
-
Melt the Chocolate: In a microwave-safe bowl, melt the chocolate bark or chips in 30-second intervals at 50% power, stirring between bursts until smooth. Be careful not to overheat.
-
Dip and Decorate: Dip each chilled ball in the melted chocolate—either fully or halfway. Immediately top with additional crushed Butterfingers, sea salt, or sprinkles before the chocolate sets.
-
Let Them Set: Allow the chocolate coating to harden completely before serving or storing.
How to Serve Butterfinger Balls
Once your Butterfinger Balls are ready, the fun really begins! These treats are perfect for serving at gatherings or simply enjoying at home. Place them on a festive platter or in cupcake liners for a beautiful presentation. For a fun touch, you can sprinkle some extra crushed Butterfinger bars or colorful sprinkles on top before serving. They pair wonderfully with a glass of cold milk or a warm cup of coffee for a delightful contrast.
Expert Tips for Butterfinger Balls
- Keep it Cool: If your dough becomes too soft while rolling, pop it back in the fridge for a bit. This makes it easier to form nice, round balls.
- Chocolate Options: Feel free to experiment with different types of chocolate—dark, milk, or white chocolate all work beautifully for dipping.
- Mix It Up: Try adding some chopped nuts or even drizzling caramel on top for an extra layer of flavor!
Butterfinger Balls FAQs
Can I use a different type of nut butter?
Absolutely! While peanut butter shines in this recipe, almond or cashew butter can also be used if you want to switch things up.
How long will these treats last?
Stored in an airtight container in the fridge, Butterfinger Balls typically last about a week. You can also freeze them for longer storage!
Can I make them ahead of time?
Yes! You can prepare the dough and form the balls a day or two in advance. Just make sure to keep them chilled until you’re ready to dip and serve.
There you have it! A quick and easy recipe for Butterfinger Balls that’s bound to be a hit. Whether for yourself or to share with others, these treats will bring smiles and satisfy your sweet cravings. Grab your ingredients and give them a try today!
Butterfinger Balls
Ingredients
Method
- In a large bowl, use a hand or stand mixer to cream together the peanut butter and softened butter until smooth.
- Add the vanilla extract and mix until combined.
- Gradually mix in the powdered sugar at low speed, scraping the sides of the bowl as needed.
- Fold in the graham cracker crumbs and crushed Butterfingers until the mixture is evenly combined.
- Line a baking sheet with parchment paper.
- Scoop about 1 to 1½ tablespoons of the dough and roll it into balls. Place them spaced apart on the sheet.
- Freeze the formed balls for 30 minutes or until they are completely firm.
- In a microwave-safe bowl, melt the chocolate bark or chips in 30-second intervals at 50% power, stirring between bursts until smooth. Be careful not to overheat.
- Dip each chilled ball in the melted chocolate—either fully or halfway.
- Immediately top with additional crushed Butterfingers, sea salt, or sprinkles before the chocolate sets.
- Allow the chocolate coating to harden completely before serving or storing.