
No-Knead Garlic Bread
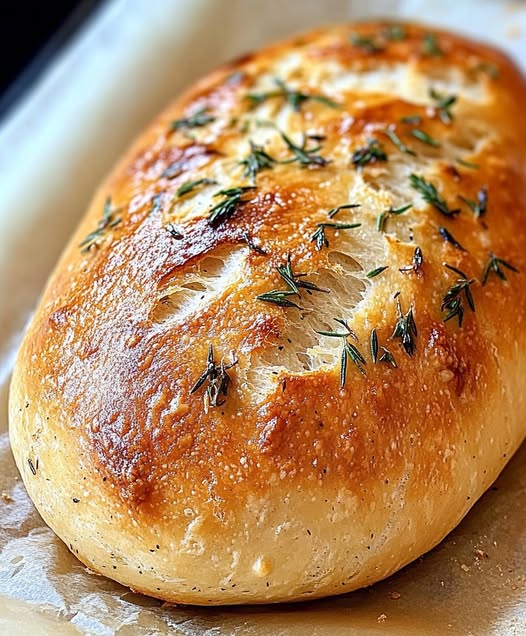
There’s something magical about the aroma of freshly baked bread wafting through your home. Our No-Knead Garlic Bread recipe combines the simplicity of traditional no-knead bread with aromatic garlic and herbs for a rustic loaf that’s crispy on the outside and wonderfully fluffy inside. The best part? It requires minimal effort while delivering bakery-quality results every time!
Ingredients
- 3 cups (500 g) all-purpose flour
- 1 teaspoon (3 g) instant dry yeast
- 1 teaspoon (6 g) salt
- 1½ cups (400 ml) warm water (about 110°F/45°C)
- 3 garlic cloves, minced
- ¼ cup (60 ml) olive oil
- 2 tablespoons fresh parsley, chopped
- 1 teaspoon sea salt (for sprinkling)
Instructions
- Mix the dry ingredients: In a large mixing bowl, combine the all-purpose flour, instant dry yeast, and salt. Stir well to distribute the ingredients evenly.
- Add water: Pour the warm water into the flour mixture and stir until completely incorporated. The dough will look shaggy and sticky – this is exactly what you want! Don’t worry about kneading it.
- First rise: Cover the bowl tightly with plastic wrap and let the dough rest at room temperature (around 70°F/21°C) for 12-18 hours. The long fermentation is what develops flavor and creates the perfect texture.
- Preheat your baking vessel: About 30 minutes before baking, place a cast-iron Dutch oven with its lid (or a loaf pan) in the oven and preheat to 450°F (230°C).
- Shape the dough: Generously flour your work surface. Using a dough scraper or spatula, gently transfer the risen dough onto the floured surface. The dough will be very sticky. With floured hands, gently shape the dough into a round loaf without kneading it.
- Add flavorings: Drizzle half the olive oil over the shaped dough. Sprinkle with minced garlic, chopped parsley, and a pinch of sea salt. Gently fold the dough over itself once or twice to incorporate some of the flavorings.
- Final shaping: Reshape the dough into a round loaf and let it rest while the oven finishes preheating.
- Bake covered: Carefully remove the hot baking vessel from the oven. Working quickly, transfer the dough into the hot pot or pan, drizzle with remaining olive oil, and sprinkle with any remaining garlic, parsley and sea salt. Cover with the lid and return to the oven.
- Bake uncovered: After 30 minutes, remove the lid and continue baking for another 15-20 minutes until the bread is deeply golden brown.
- Cool: Remove the bread from the oven and transfer to a wire cooling rack. Allow to cool for at least 30 minutes before slicing to let the interior structure set.
Nutritional Information and Timing
Prep Time: 15 minutes
Rise Time: 12-18 hours
Bake Time: 45-50 minutes
Total Time: 13-19 hours
Servings: 8 slices
Nutritional Information (per slice):
- Calories: 210
- Protein: 5g
- Carbohydrates: 33g
- Fat: 6g
- Fiber: 1g
- Sodium: 300mg
Cooking Tips and Tricks
- Water temperature matters: The water should be warm (about 110°F/45°C) – not hot! Too hot will kill the yeast, too cold will slow down fermentation.
- Longer fermentation = better flavor: Don’t rush the rising time. The long fermentation develops complex flavors and improves texture.
- Don’t skimp on preheating: The extremely hot baking vessel creates that professional-quality crust. Make sure it’s thoroughly heated before adding the dough.
- Create steam: For an even crispier crust, throw a few ice cubes into the bottom of the oven when you place the bread in. The steam helps form that perfect artisan crust.
- Check for doneness: When fully baked, the bread should sound hollow when tapped on the bottom. If unsure, use an instant-read thermometer – the internal temperature should reach 205-210°F (96-99°C).
Variations and Substitutions
- Herb variations: Replace or complement parsley with rosemary, thyme, oregano, or basil for different flavor profiles.
- Cheese lover’s version: Mix 1 cup of shredded parmesan, asiago, or gruyere into the dough before the long rise, or sprinkle on top before baking.
- Whole wheat option: Substitute up to 1 cup (170g) of the all-purpose flour with whole wheat flour for added nutrition and nutty flavor.
- Roasted garlic: Use 1 whole head of roasted garlic instead of fresh minced garlic for a sweeter, mellower garlic flavor.
- Spicy kick: Add 1 teaspoon of red pepper flakes to the dough for a spicy variation.
- No Dutch oven? Use a heavy baking sheet or pizza stone, and place a metal baking pan with water on the bottom rack to create steam.
Common FAQs
Q: Why is my dough so sticky? Did I do something wrong?
A: The high hydration (water content) is intentional and creates those beautiful air pockets in the finished bread. Use flour on your hands and surface when handling, but resist the urge to add more flour to the dough itself.
Q: Can I make this dough ahead of time and refrigerate it?
A: Absolutely! After the initial rise, you can refrigerate the dough for up to 3 days. The flavor will continue to develop. Let it come to room temperature for about 30 minutes before shaping and baking.
Q: My bread didn’t rise much during baking. What went wrong?
A: Check that your yeast is fresh and active. Also, be gentle when shaping to preserve the air bubbles that formed during fermentation.
Q: Can I use active dry yeast instead of instant?
A: Yes, but dissolve it in the warm water for 5-10 minutes until foamy before adding to the dry ingredients.
Q: How do I store leftovers to keep the crust crispy?
A: Store at room temperature in a paper bag or wrapped in a clean kitchen towel for 1-2 days. Avoid plastic bags as they soften the crust.
Storage and Make-Ahead Tips
- Room temperature storage: The bread stays fresh at room temperature for 2-3 days. Store in a paper bag or bread box to maintain crust quality.
- Freezing: Slice the completely cooled bread, wrap tightly in plastic wrap and then aluminum foil, and freeze for up to 3 months.
- Refreshing: To revive day-old bread, sprinkle with water and heat in a 350°F (175°C) oven for 5-10 minutes.
- Make-ahead dough: Prepare the dough through the first rise, then refrigerate for up to 3 days. The slow, cold fermentation adds flavor complexity.
- Par-baked option: Bake the bread for just 25 minutes, cool completely, then freeze. When ready to serve, bake the frozen par-baked loaf at 350°F (175°C) for 20-25 minutes until heated through and crisp.
This no-knead garlic bread is perfect for beginners and experienced bakers alike. With just minutes of hands-on time and basic ingredients, you’ll have an impressive, artisan-style loaf that pairs perfectly with soups, stews, or simply enjoyed with a bit of butter. Happy baking!